


In this tutorial, we'll be creating a decentralized chat app with React, CSS, and GunJs. It should be noted that you have the option of adding more features and styles.
We'll be building something similar to this 👇

Why a Decentralized Chat App?
First, let us define decentralization.
In a decentralized system, data isn't stored in a single central point or location. Instead, copies of said data are distributed to multiple participants, implying that no single authority controls such information.
So basically, decentralization eliminates the concept of one entity having control over an asset or specific assets stored in a central location.
Some messaging platforms today can read our messages if they’re not encrypted end-to-end. Who are we to argue with messaging apps that claim to be secure? On the plus side, some are highly safe, and our conversations remain private and secure.
A decentralized chat app is more secure and safeguards user privacy. This gives such apps a significant advantage over some standard messaging platforms.
Our Aim
In this article, we’ll use ReactJs as our front-end framework, CSS for styling, and GunJs for decentralization.
GunJs allows us to store data without any external servers or databases. GunJS is a decentralized database that holds data and distributes it across a network of peers/computers. Each computer may have a complete or a portion of the actual data. The GunJs database can be defined as the entire data stored on the network's nodes.
Instead of writing a program to manage a decentralized information storage system ourselves, GunJs simplifies it with its simple syntax.
Prerequisites
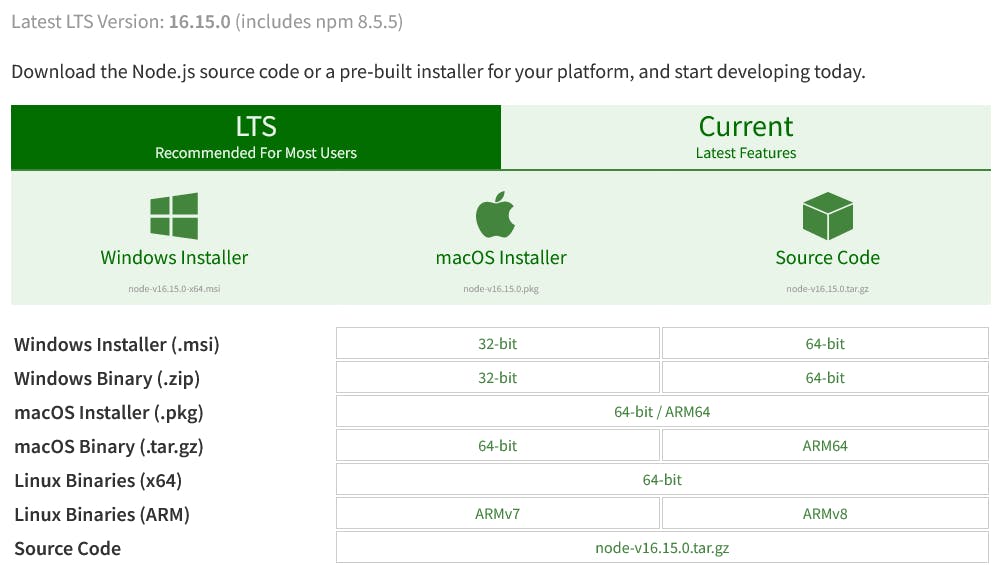
- You need to have Node.js installed. You can download the latest version here.
- create-react-app. That's what we'll use to create our React app. You can install it by running
npm i -g create-react-apporyarn add -g create-react-appin your terminal. - Basic JavaScript and React knowledge.
- Basic CSS knowledge.
The Server
Create a folder gun-server and initialize the package.json file:
mkdir gun-server
cd gun-server
npm init --y
We'll need express and gun for the server. Run this command to install the packages in our project directory:
yarn add gun express
If you're using npm, you should run the following:
npm install gun express
Creating the server
In the gun-server folder, create a file called index.js. This file will contain the server code. It will only take about 20 lines of code:
// in the index.js file

const express = require('express')
const app = express()
const port = 5050
const Gun = require('gun')

app.use(Gun.serve)

const server = app.listen(port, () => {
  console.log(`Gun server running on port ${port}🔥`)
})

Gun({ web: server })
That's it for our server. To start the server, run npm start or yarn start in your terminal in the same directory as the server's files.
The Frontend
Create a React app titled gun-client. To create the app, run the following code in the terminal:
npx create-react-app gun-client
cd gun-client
npm install gun @faker-js/faker
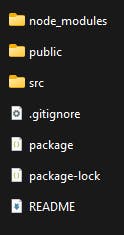
This should generate a React app with the standard React boilerplate code and folder structure. Your project folder should look like this:
Now run npm start to start the app in your browser.
Frontend Packages
- GunJs
- Faker.js: It's a JavaScript library that generates random user information like first name, last name, profile image, etc. As the sender's username, we’ll use Faker.js to generate a random username that’ll be attached to each message. When you launch the app, you can save this name in local or session storage to ensure that each message has the same username. You can also ask the user for their name.
GunJs configuration
Import and initialize the Gun library in src/App.js and the required React hooks for our project:
import './App.css'
import { useEffect, useState, useReducer } from 'react'
import Gun from 'gun'
import faker from '@faker-js/faker'

// Port 5050 is the port of the gun server we previously created
const gun = Gun({
  peers: [
    'http://localhost:5050/gun'
  ]
})

// The messages array will hold the chat messages
const currentState = {
  messages: []
}

// This reducer function will edit the messages array
const reducer = (state, message) => {
  return {
    messages: [message, ...state.messages]
  }
}

function App() {
  const [messageText, setMessageText] = useState('')
  const [state, dispatch] = useReducer(reducer, currentState)

  // fires immediately the page loads
  useEffect(() => {

  }, [])

  // save message to gun / send message
  const sendMessage = () => { }

  return <div className="App">
    <main>
      <div className='messages'>
        <ul>
          <li className='message'>
            <img alt='avatar' src='https://res.cloudinary.com/follio/image/upload/v1650729202/vhophm5tpnlyaj2h6snf.png' />
            <div>
              Hey there y'all 👋
              <span>Langford</span>
            </div>
          </li>
        </ul>
      </div>
      <div className='input-box'>
        <input placeholder='Type a message...' />
        <button>Send</button>
      </div>
    </main>
  </div>
}

export default App
Styling
You can be as creative as you want and introduce as many styles as possible, but for the sake of simplicity, we’re using basic CSS styles in this tutorial. Open the src/index.css file to style the app and copy the code below:
* {
  padding: 0;
  margin: 0;
  list-style-type: none;
  font-family: -apple-system, BlinkMacSystemFont, 'Segoe UI', Roboto, Oxygen, Ubuntu, Cantarell, 'Open Sans', 'Helvetica Neue', sans-serif
}

main {
  max-width: 700px;
  margin: auto;
  height: 100vh;
}

.input-box {
  display: flex;
  align-items: center;
  position: fixed;
  bottom: 0;
  padding: 10px 0;
  width: 100%;
  max-width: 700px;
}

input {
  width: 100%;
  border: 2px solid #f1f1f1;
  padding: 10px;
  background: #f1f1f1;
  outline: none;
  border-radius: 10px;
}

button {
  padding: 10px;
  width: 30%;
  border: none;
  background: #016fff;
  border-radius: 10px;
  margin-left: 5px;
  color: #fff;
  cursor: pointer;
}

button:hover {
  opacity: .5;
}

.message {
  background: #f1f1f1;
  margin: 10px 3px;
  margin-left: 0;
  border-radius: 10px;
  padding: 10px;
  text-align: left;
  width: max-content;
  display: flex;
}

.messages>ul {
  padding-bottom: 100px;
}

.message>img {
  background: #fff;
  width: 30px;
  height: 30px;
  object-fit: contain;
  border-radius: 9999px;
  margin-right: 10px;
}

.message>div span {
  opacity: .3;
  display: block;
  font-size: small;
}

.message>div {
  display: flex;
  flex-direction: column;
}
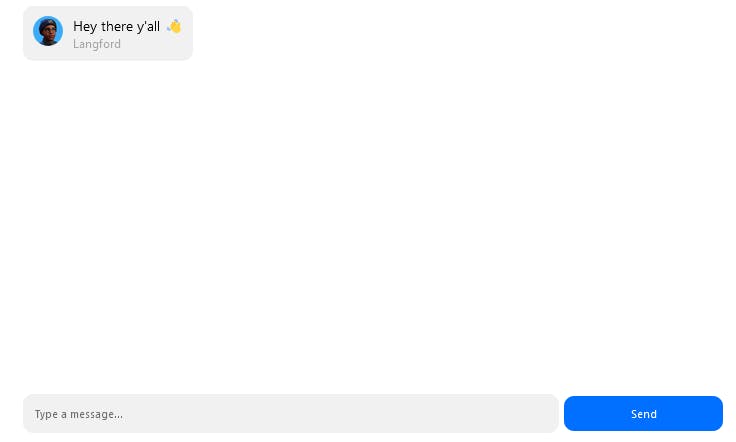
When you view the app in your browser, you should see something like this:
Handling User Interaction
In the useEffect hook, add this code:
useEffect(() => {
    const messagesRef = gun.get('MESSAGES')
    messagesRef.map().on(m => {
      dispatch({
        name: m.name,
        avatar: m.avatar,
        content: m.content,
        timestamp: m.timestamp
      })
    })
  }, [])
Any code in the useEffect hook is executed as soon as the page is loaded. In our case, we want to retrieve the messages as soon as the page loads. Then, we’ll save it to our messages array and display it in the frontend.
Replace the frontend JSX code with the code below:
return <div className="App">
    <main>
      <div className='messages'>
        <ul>
          {state.messages.map((msg, index) => [
            <li key={index} className='message'>
              <img alt='avatar' src={msg.avatar} />
              <div>
                {msg.content}
                <span>{msg.sender}</span>
              </div>
            </li>
          ])}
        </ul>
      </div>
      <div className='input-box'>
        <input placeholder='Type a message...' onChange={e => setMessageText(e.target.value)} value={messageText} />
        <button onClick={sendMessage}>Send</button>
      </div>
    </main>
  </div>
In the input-box, we added an event to keep track of user input, and executed the function sendMessage when the “send” button is clicked.
Also, in the ul, we looped through and rendered the messages in the state.messages array variable.
Sending Messages
Before we can send a message, we must first refer to the chat key, which in this case is MESSAGES. This key represents the current chatroom and acts as a unique identifier for this room. You can generate a unique key/id to implement a one-to-one chat feature.
Consider this chat key to be the name of a bucket containing all of our messages. You can also consider the chat rooms to be separate buckets containing different sets of messages.
In the sendMessage function, copy the code below:
 const sendMessage = () => {
       // a reference to the current room
        const messagesRef = gun.get('MESSAGES')

       // the message object to be sent/saved
        const messageObject = {
            sender: faker.name.firstName(),
            avatar: faker.image.avatar(),
            content: messageText,
            timestamp: Date().substring(16, 21)
        }

        // this function sends/saves the message onto the network
        messagesRef.set(messageObject)

       // clear the text field after message has been sent
        setMessageText('')
    }
A Critical Bug Fix 🐛
Our chat app is now operational, but each message sent may appear multiple times by default. We’ll create a function, newMessagesArray, that loops through the messages array, removes duplicate messages, and returns a new array to address this issue:
  // remove duplicate messages
  const newMessagesArray = () => {
    const formattedMessages = state.messages.filter((value, index) => {
      const _value = JSON.stringify(value)
      return (
        index ===
        state.messages.findIndex(obj => {
          return JSON.stringify(obj) === _value
        })
      )
    })

    return formattedMessages
  }
The Final Code
We’ve finished building our own decentralized chat app using React and GunJs.
This is the final code for the src/App.js:
import './App.css'
import { useEffect, useState, useReducer } from 'react'
import Gun from 'gun'
import faker from '@faker-js/faker'

// Port 5050 is the port of the gun server we previously created
const gun = Gun({
  peers: [
    'http://localhost:5050/gun'
  ]
})

// The messages array will hold the chat messages
const currentState = {
  messages: []
}

// This reducer function will edit the messages array
const reducer = (state, message) => {
  return {
    messages: [message, ...state.messages]
  }
}

function App() {
  const [messageText, setMessageText] = useState('')
  const [state, dispatch] = useReducer(reducer, currentState)

  // fires immediately the page loads
  useEffect(() => {
    const messagesRef = gun.get('MESSAGES')
    messagesRef.map().on(m => {
      dispatch({
        sender: m.sender,
        avatar: m.avatar,
        content: m.content,
        timestamp: m.timestamp
      })
    })
  }, [])

  // remove duplicate messages
  const newMessagesArray = () => {
    const formattedMessages = state.messages.filter((value, index) => {
      const _value = JSON.stringify(value)
      return (
        index ===
        state.messages.findIndex(obj => {
          return JSON.stringify(obj) === _value
        })
      )
    })

    return formattedMessages
  }

  // save message to gun / send message
  const sendMessage = () => {
    // a reference to the current room
    const messagesRef = gun.get('MESSAGES')

    // the message object to be sent/saved
    const messageObject = {
      sender: faker.name.firstName(),
      avatar: faker.image.avatar(),
      content: messageText,
      timestamp: Date().substring(16, 21)
    }

    // this function sends/saves the message onto the network
    messagesRef.set(messageObject)

    // clear the text field after message has been sent
    setMessageText('')
  }


  return <div className="App">
    <main>
      <div className='messages'>
        <ul>
          {newMessagesArray().map((msg, index) => [
            <li key={index} className='message'>
              <img alt='avatar' src={msg.avatar} />
              <div>
                {msg.content}
                <span>{msg.sender}</span>
              </div>
            </li>
          ])}
        </ul>
      </div>
      <div className='input-box'>
        <input placeholder='Type a message...' onChange={e => setMessageText(e.target.value)} value={messageText} />
        <button onClick={sendMessage}>Send</button>
      </div>
    </main>
  </div>
}

export default App
When you go back to http://localhost:3000/ in your preferred browser, you should see something like this:

You can host the server on Heroku, or any other server hosting platform.
You can also host your React frontend on Vercel, or some other React hosting platform.
This article is a part of the Hashnode Web3 blog, where a team of curated writers are bringing out new resources to help you discover the universe of web3. Check us out for more on NFTs, DAOs, blockchains, and the decentralized future.