


Decentralization is now an important part of our daily lives, whether we realize it or not. We see it in finance, the arts, data ownership, and a variety of other areas.
Token swapping is a crucial aspect of finance, particularly decentralized finance. You've come to the right place if you want to learn more about tokens, token swapping and how it works.
This article will go over the fundamentals of tokens and token swaps. Finally, we will use React and the Moralis to create our token swapping dApp.
What is a token?
Crypto tokens are a sort of cryptocurrency that symbolizes an item or a specific use and has its own blockchain. Tokens can be used to make investments, store value, or make purchases.
Some popular tokens are:
- Tether USD (USDT)
- Litecoin
- Auroracoin
- Dogecoin
- Peercoin
- Namecoin
What is token swapping?
Token swapping is the exchange of one token for another on a different blockchain protocol in real time.
Token swapping, as the name implies, involves swapping two tokens. Assume you have token A but prefer token B. So, on a swapping platform, you will pay an agreed amount of token A to another person and receive an agreed amount of token B in return.
Swapping has a significant advantage in that there is no need to use a fiat currency during the swapping process, and it is a simple and quick.
What is Moralis?
Moralis is a platform that provides tools and services that make it extremely simple to create, improve, and maintain dApps. Moralis-based Dapps are cross-platform by default, and can run on Ethereum, Polygon, Solana, Elrond, and BSC, with many more supported chains on the way.

Moralis handles the heavy lifting and simplifies the dApp development process by performing all background work that can be called by the developer with a few lines of code. They have SDKs for:
- React
- Vanilla JavaScript
- Unity
- Node.js
One advantage of Moralis is that it includes boilerplate code for React Native and Unity projects, as well as boilerplate code for NFT marketplaces. It essentially reduces the developer's stress
Let's start building.
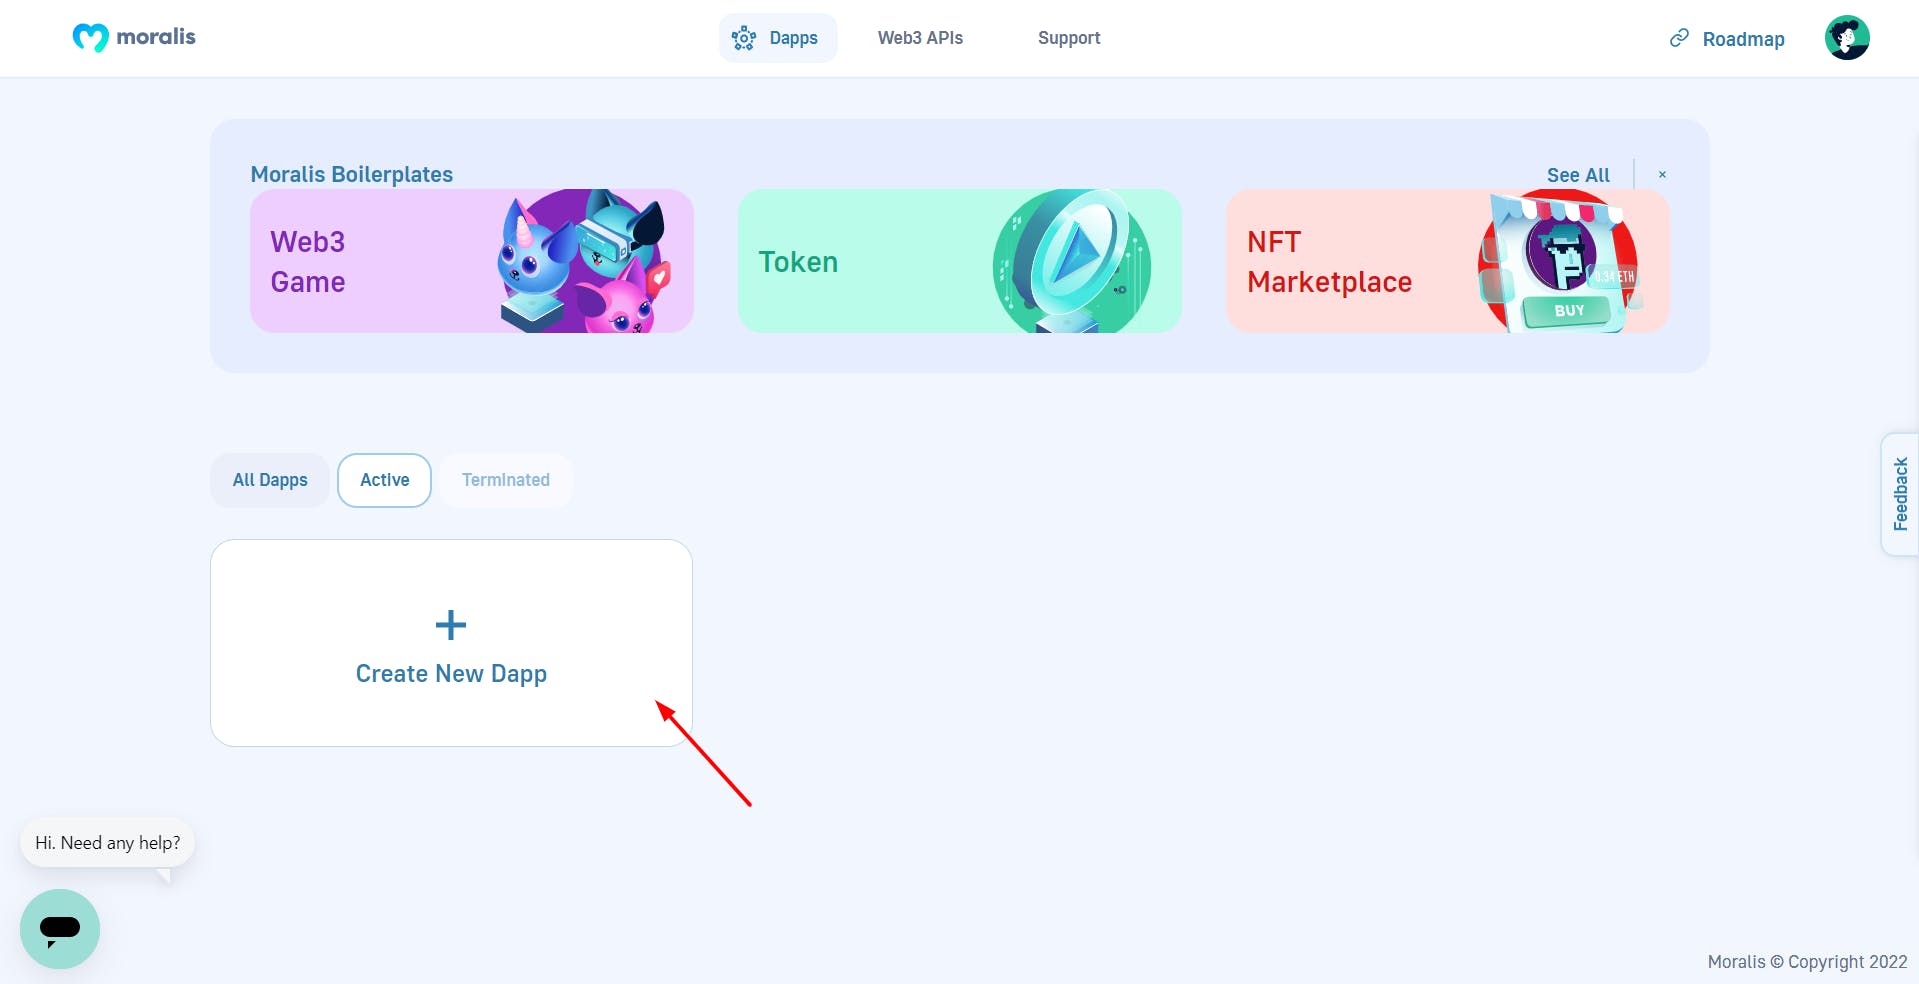
Before we get into the code, we need to sign up for Moralis. To do that, open your browser and navigate to the Moralis signup page to create a new account or log in if you've already signed up.

After logging in, you should be presented with an admin dashboard. You can create new dApps on this page, view active and terminated dApps and links to boilerplates for developing games, tokens, and NFT marketplaces.
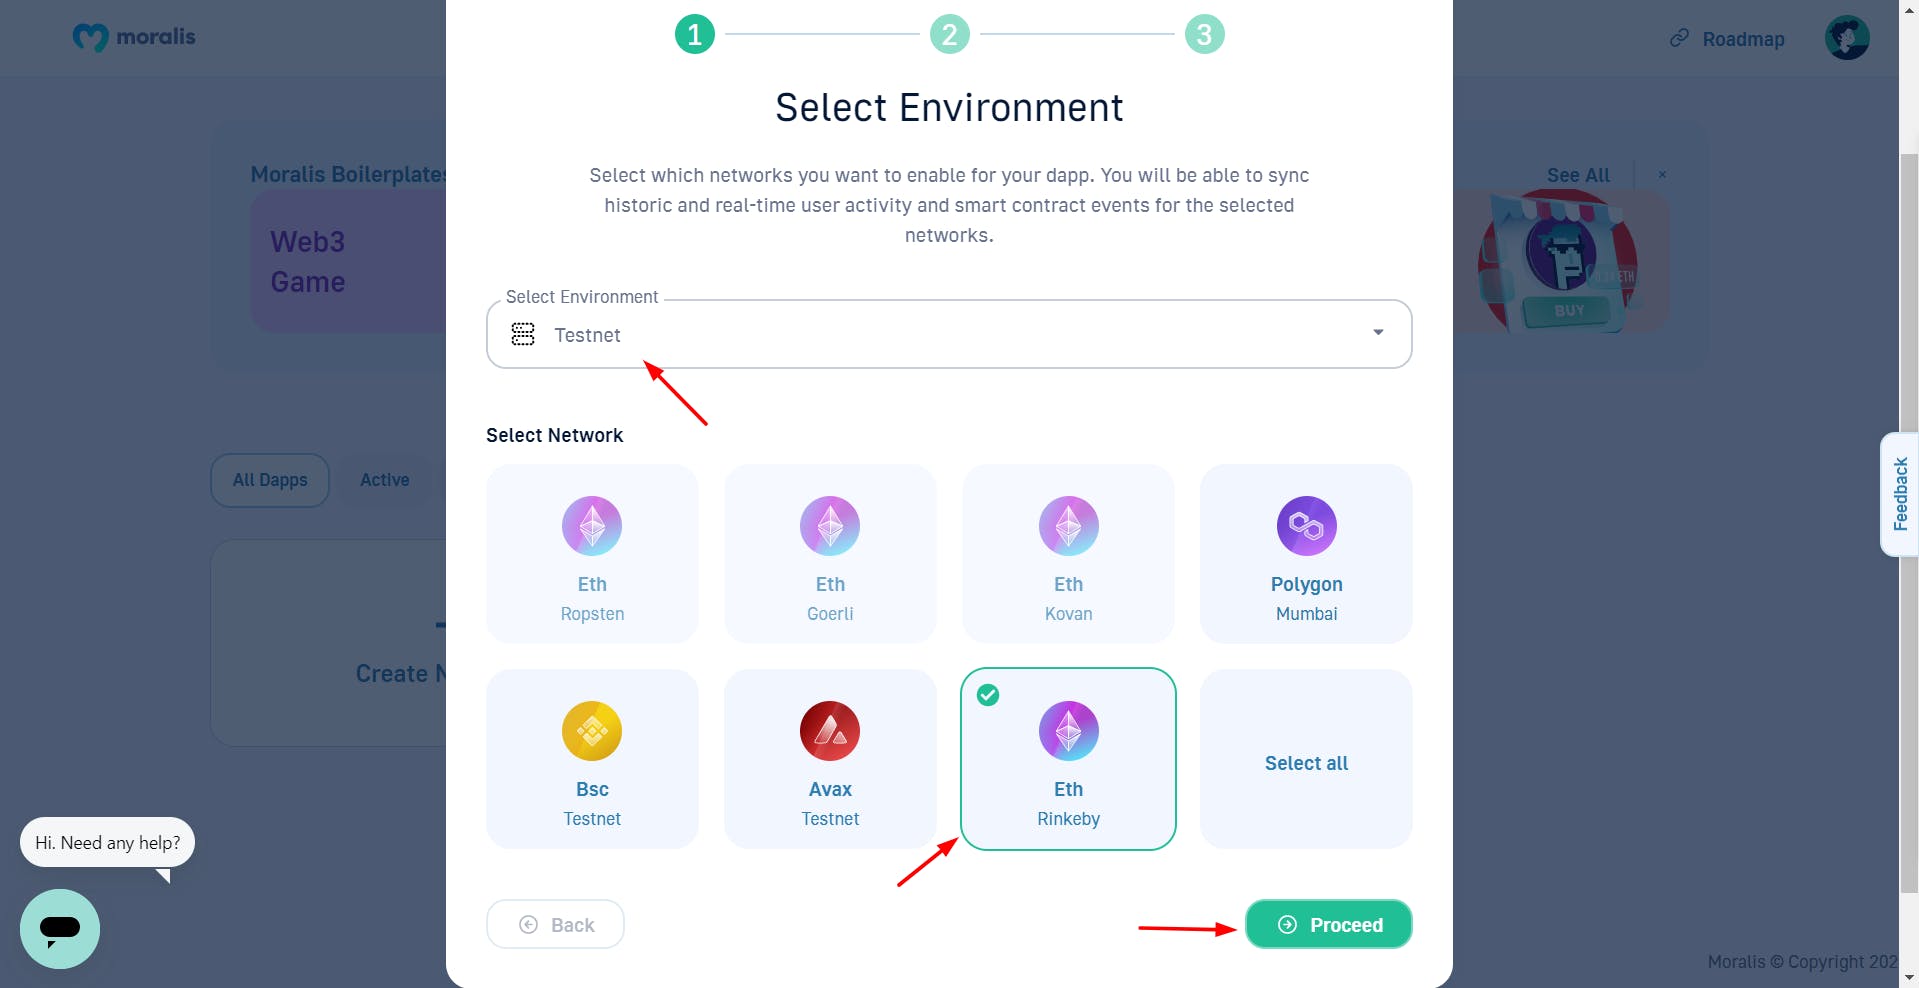
Next, we choose an environment and network on which our dApp will run. Because this is a test, we will select testnet as our environment. And for our network, we will go with Ether Rinkeby.
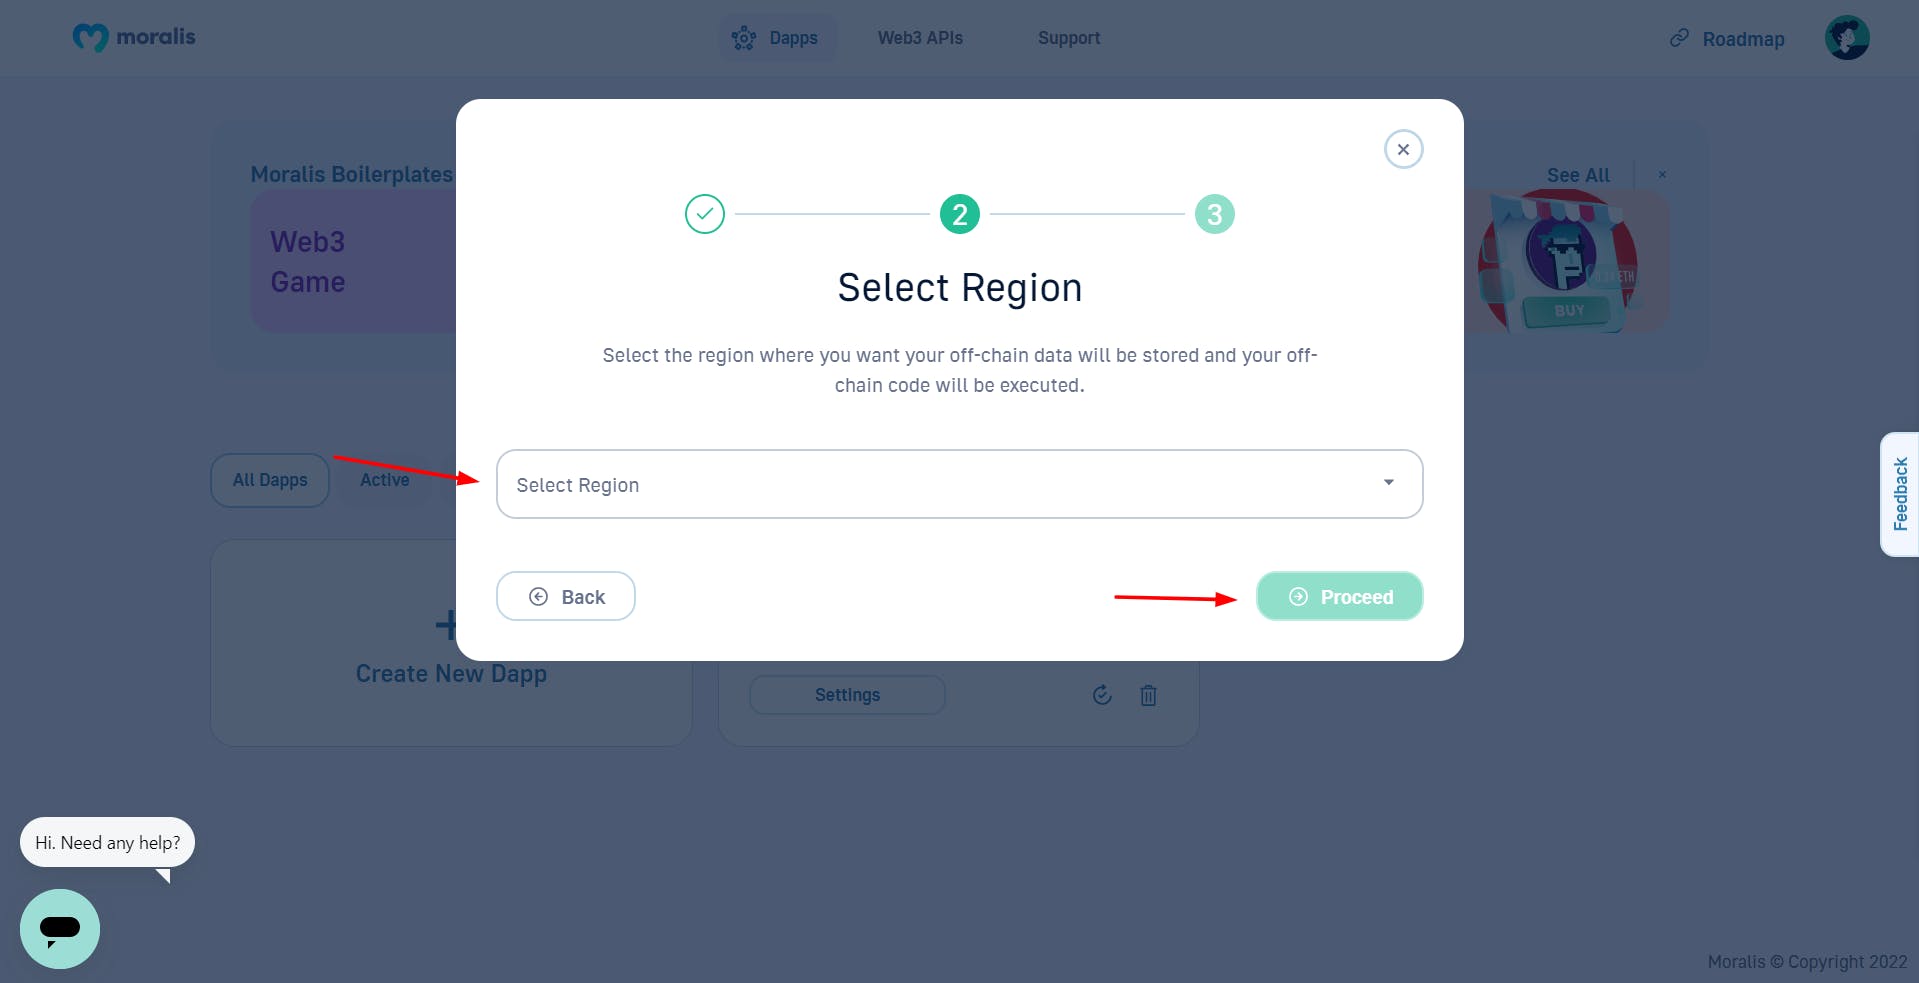
In this step, we will choose our region. It is best if you select a region close to where you are.
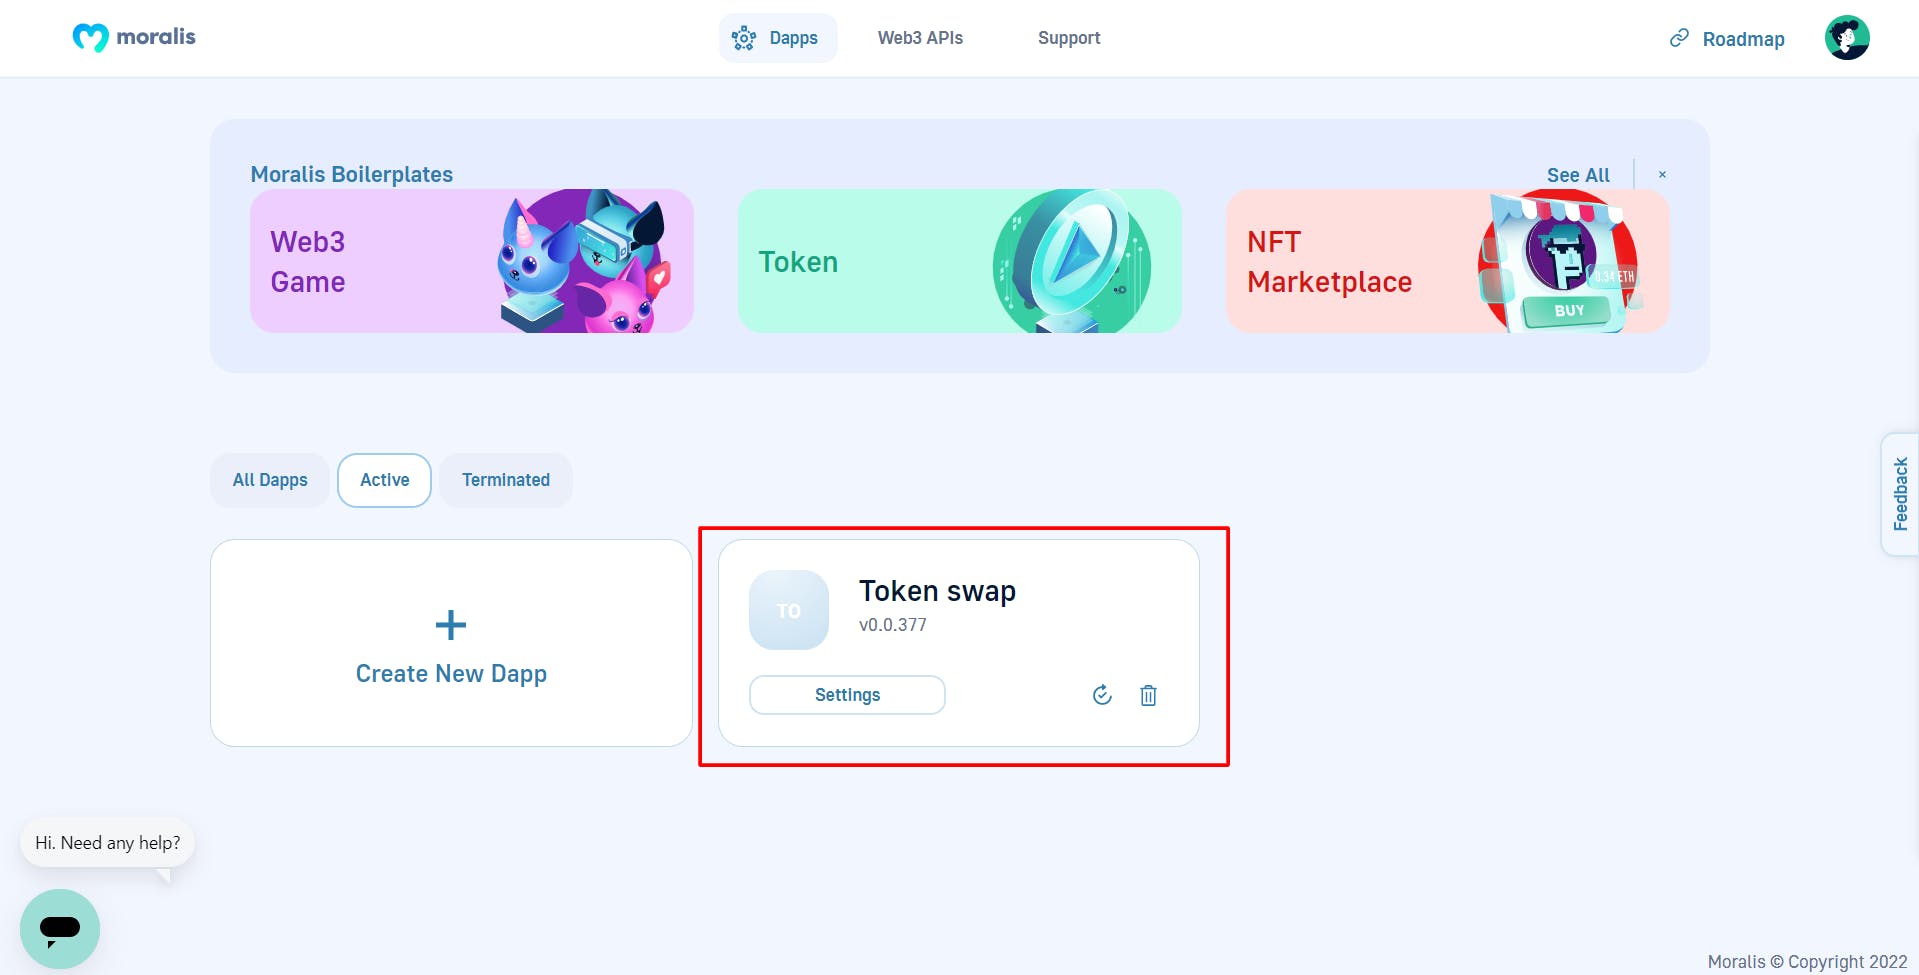
Finally, we give our dApp a name, which in this case is Token Swap. After you've entered your dApp name, click on Create Your Dapp.

Our newly created dApp should show up on our dashboard.
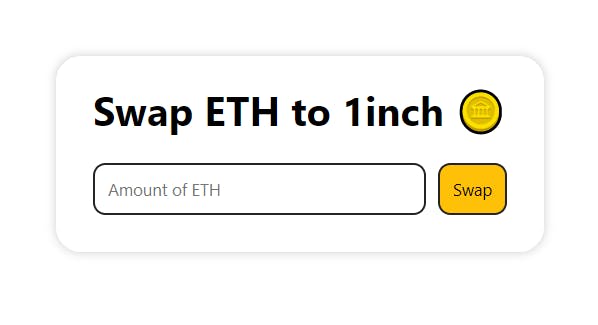
We have completed the creation of our Moralis dApp from the dashboard. All that remains is to install the 1 inch Moralis plugin. This plugin will allow us to integrate a DEX/DeFi feature into our dApp and give is the token swapping functionality we want to achieve.
The 1 inch Plugin
The 1inch plugin introduces on-chain trading functionality into a dApp using the 1inch contract.
How does 1 inch work? 1 inch is essentially a DEX aggregator that searches other decentralized exchanges for the lowest cryptocurrency prices and executes a swap in the most efficient and optimal method possible, so you don't have to pay extremely high transaction fees. What is more, because it is decentralized, there is no risk of losing funds.
Moralis 1Inch Plugin This plugin integrates the DeFi/DEX aggregator 1Inch into any project that uses Moralis. 17 September 2021
The 1 inch plugin supports multiple chains, including:
- Ethereum (ETH)
- Polygon (polygon)
- Binance Smart Chain (BSC)
You can read more about the 1 inch Moralis plugin here.
Note that when using this plugin, a 1% transaction fee is charged on each swap.
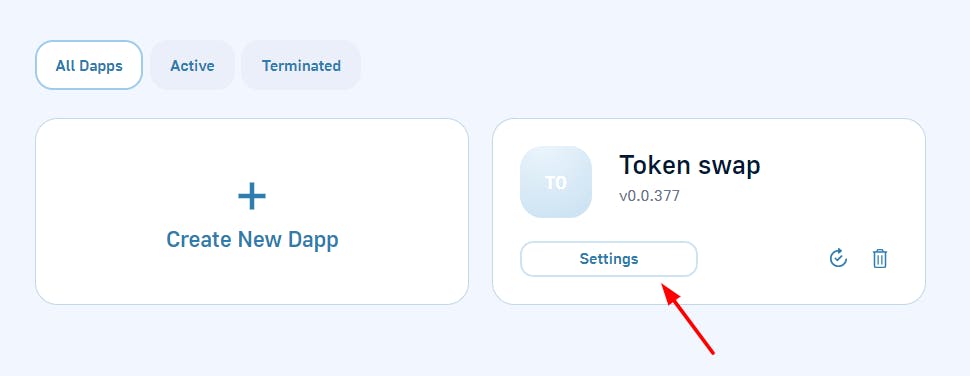
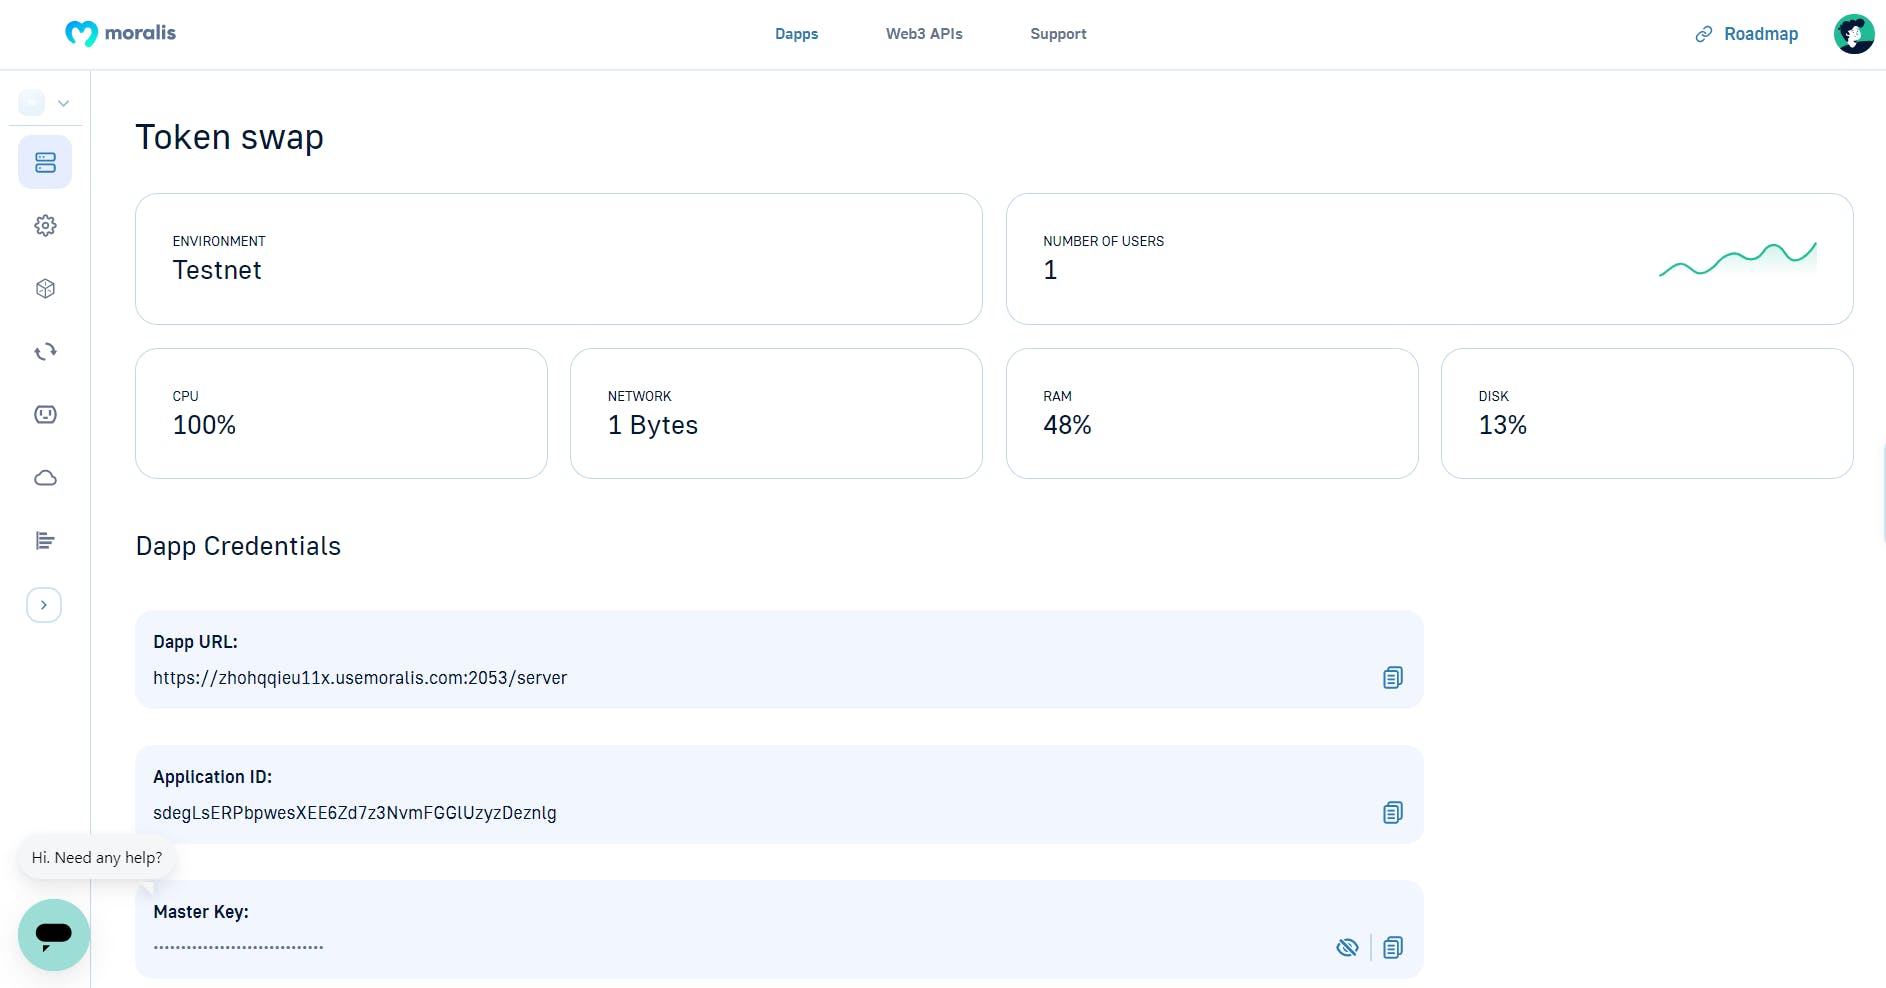
By clicking on settings, you can access the Token Swap dApp's main dashboard.
Here we can see:
- Dapp URL
- Application ID
- Master Key
- CPU
- Network
- RAM
- Disk and some other vital information about our dApp
For a major project, it's advisable that you keep these keys private.
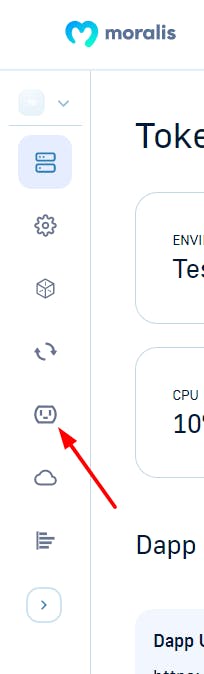
On the sidebar of your dashboard, click on"plugins as shown in the screenshot below.
By clicking on Add a new plugin, you should be redirected to a plugins page. Here we can see a list of other plugins, but we only need to find the 1inch plugin which is what we will be installing and using
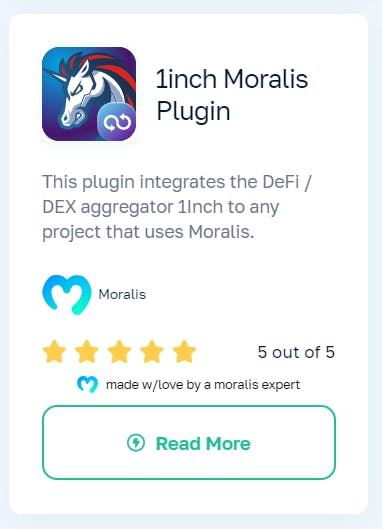
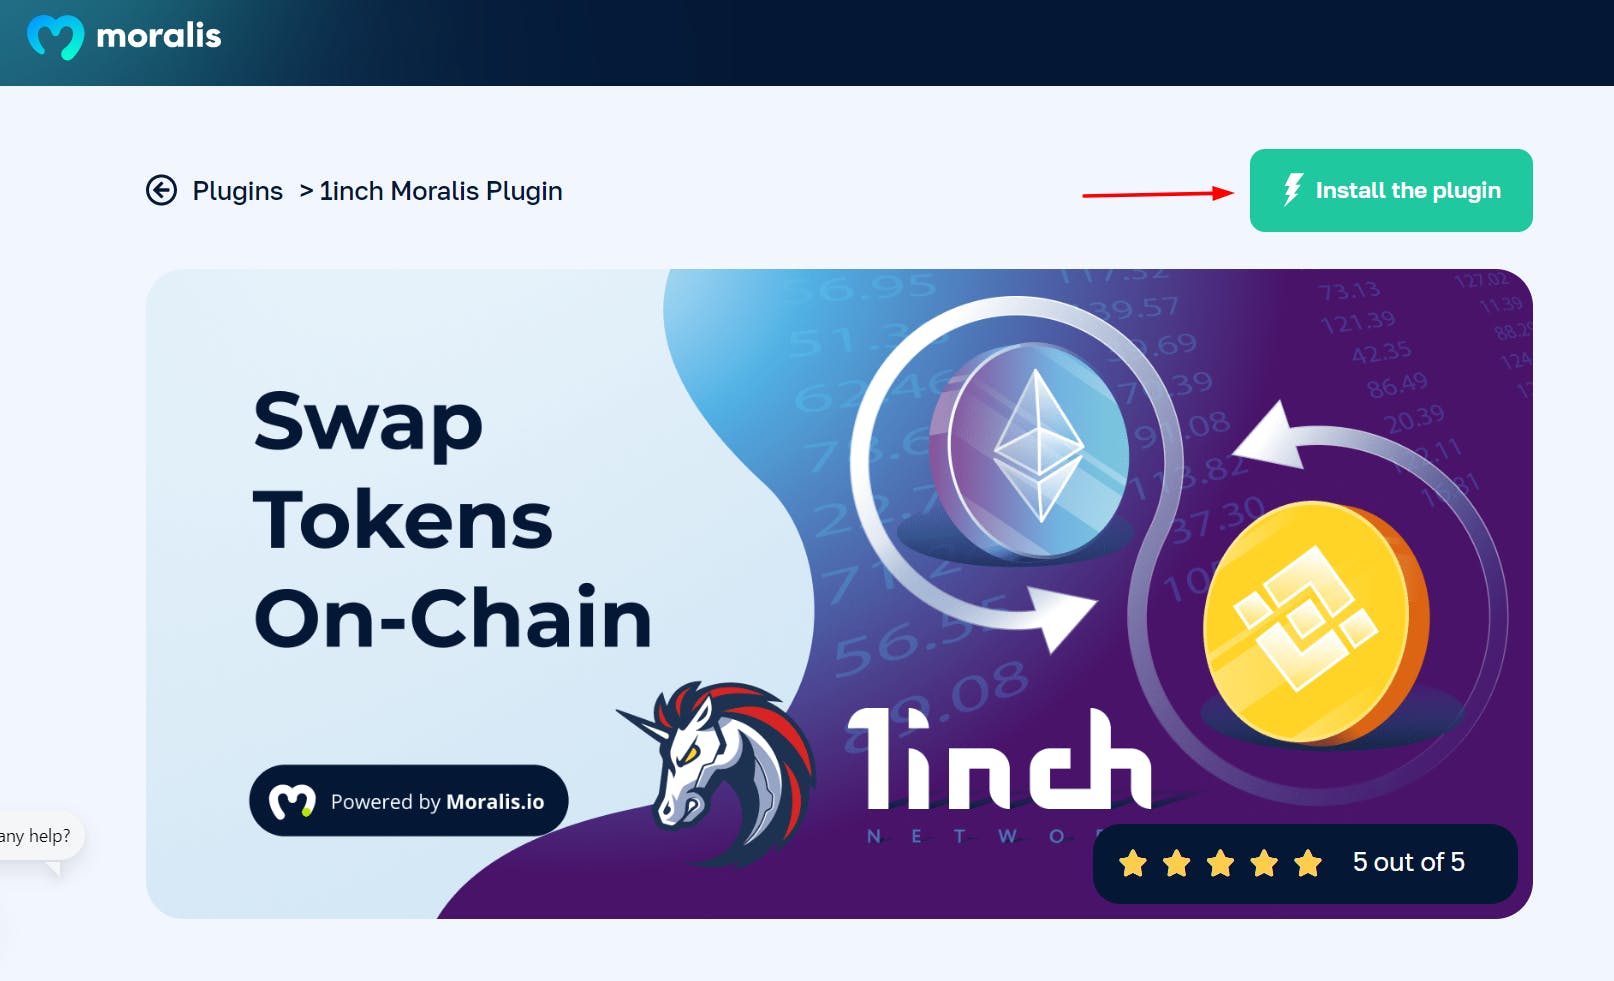
Next, click on the plugin, and once again, you will be redirected to an installation page. On this page, we're given some more information about the plugin and supported chains, as well as come useful code snippets that come handy in this tutorial.
Click on Install the plugin
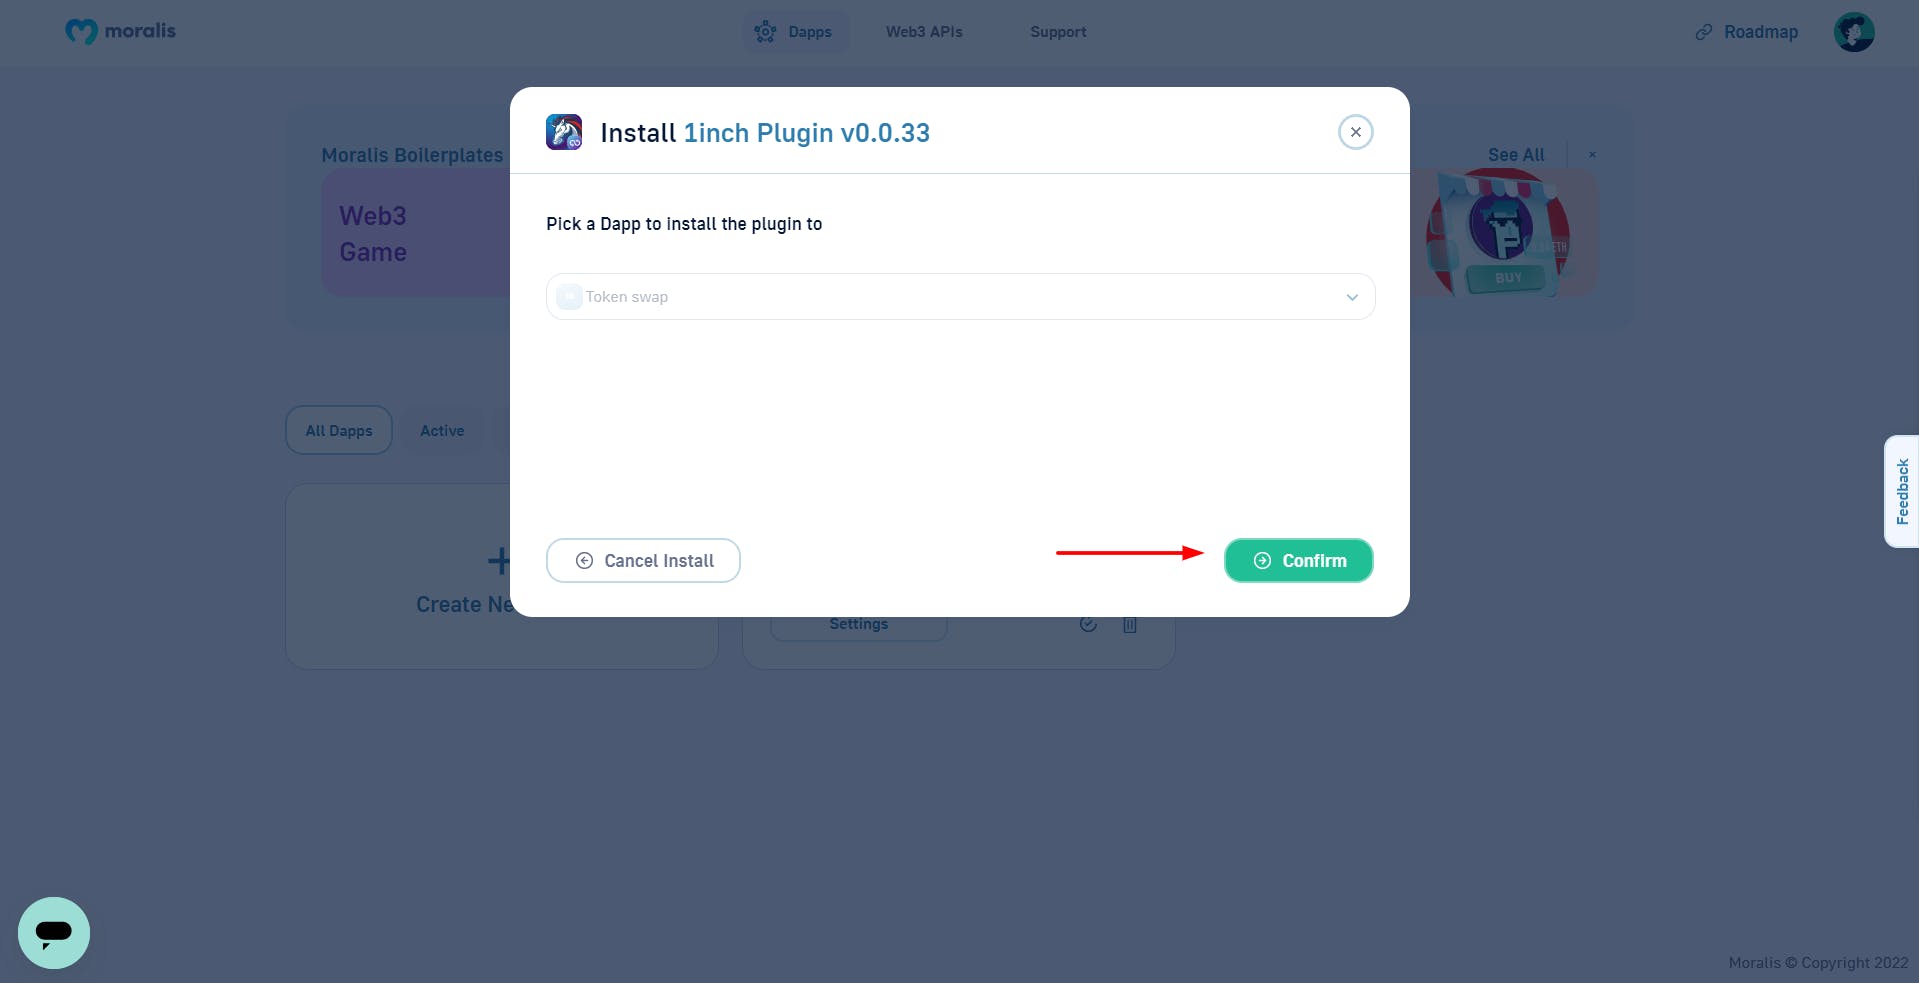
A new tab will open, and we choose the dApp we want to install the plugin into. Click Confirm, then click Install. That's it! We're done installing The 1inch Plugin.
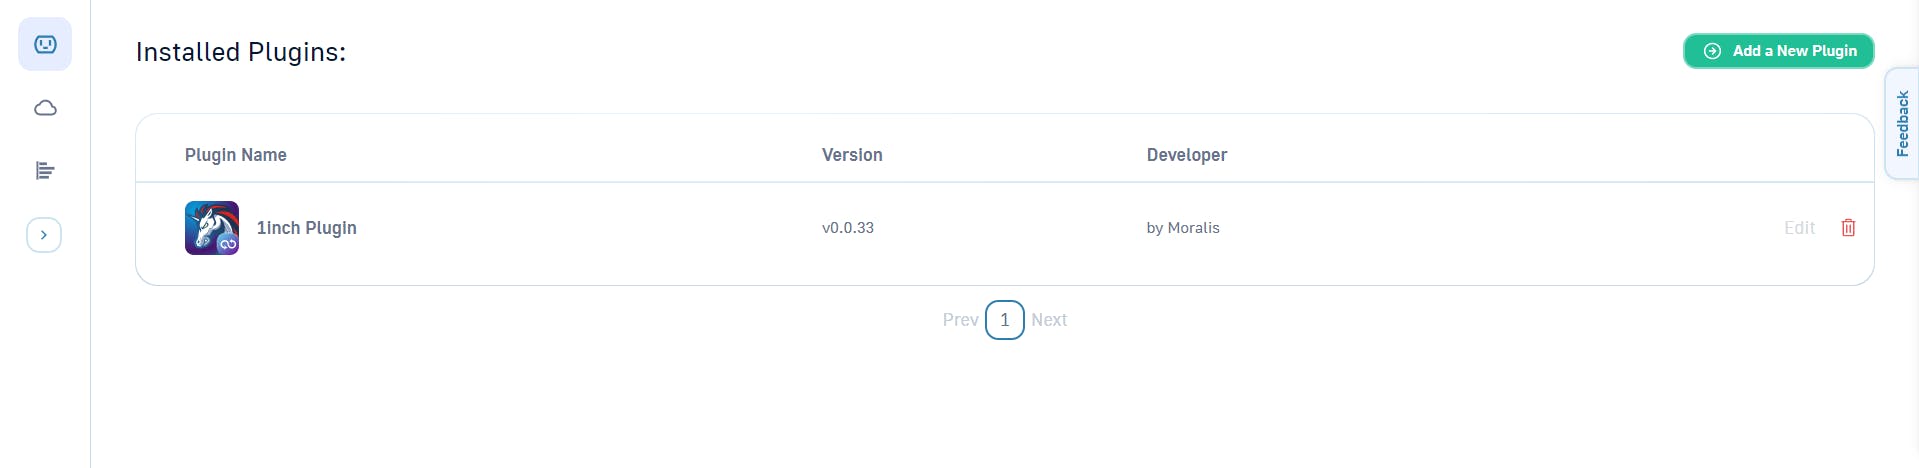
Upon navigating back into our dApp's plugins tab, we should see the newly installed 1inch plugin.
Creating our React app
Let's begin by starting our terminal. We must first create our react project and change the directory to that folder by running:
npx create-react-app token-swap
cd token-swap
If you don't already have create-react-app installed, you can do so by running the code below in your terminal.
npm i create-react-app
Now open the folder in your preferred code editor. For this tutorial, we will be using Visual Studio Code (VS Code). A shortcut to open the folder in VS Code is navigating into the project folder and executing:
code .
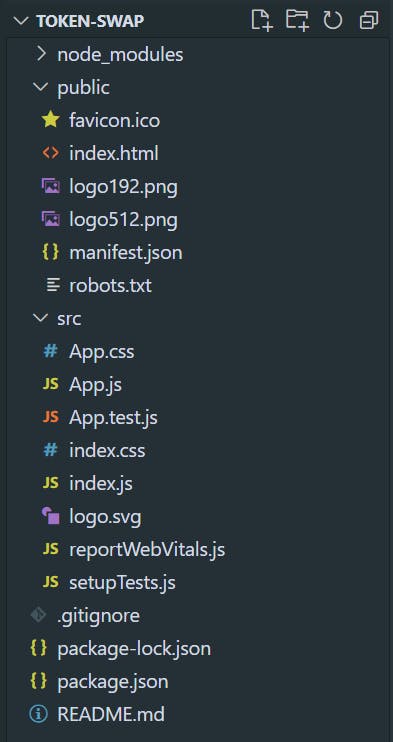
As always, after creating a react app, your folder structure should look like this:
For the sake of this tutorial, we'll be creating a new dApp. We won't be using any boilerplates code.
Running the React app
To start the React app, run:
npm start
After running the command, navigate to localhost:3000; there, you should see a page like this.
Let's start building
We will keep the design simple because this tutorial aims to help you understand token swapping and how to implement it on your own. However, you are free to implement any styles and designs that you want.
This is the UI we will be building for this tutorial:
Installing and setting up moralis in react
We need to connect and set up our dApp with the Moralis React SDK so we can have access to Moralis' vast range of tools and services.
Learn more about connecting a react app to moralis from the official documentation
Run this in your terminal to install Moralis:
npm install moralis react-moralis
After the installation is complete, we will proceed to set up moralis. Open index.js, which should contain the following code by default:
import React from 'react';
import ReactDOM from 'react-dom/client';
import './index.css';
import App from './App';
import reportWebVitals from './reportWebVitals';

const root = ReactDOM.createRoot(document.getElementById('root'));
root.render(
  <React.StrictMode>
    <App />
  </React.StrictMode>
);

// If you want to start measuring performance in your app, pass a function
// to log results (for example: reportWebVitals(console.log))
// or send to an analytics endpoint. Learn more: https://bit.ly/CRA-vitals
reportWebVitals();
Import the Moralis Provider. Then add component as shown in the code below.
import React from 'react';
import ReactDOM from 'react-dom/client';
import './index.css';
import App from './App';
import reportWebVitals from './reportWebVitals';
import { MoralisProvider } from "react-moralis";

const root = ReactDOM.createRoot(document.getElementById('root'));
root.render(
  <React.StrictMode>
    <MoralisProvider
      serverUrl="https://zhohqqieu11x.usemoralis.com:2053/server"
      appId="sdegLsERPbpwesXEE6Zd7z3NvmFGGlUzyzDeznlg"
    >
      <App />
    </MoralisProvider>
  </React.StrictMode>
);

// If you want to start measuring performance in your app, pass a function
// to log results (for example: reportWebVitals(console.log))
// or send to an analytics endpoint. Learn more: https://bit.ly/CRA-vitals
reportWebVitals();
I used the
serverUrlandappIdgenerated by my dashboard here. You will obviously have different values, so replace the values with what you see on your dashboard.
The Frontend
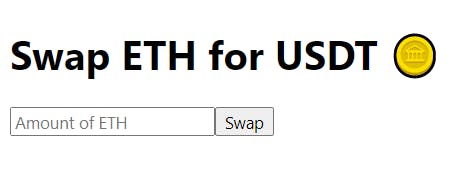
Open App.js and replace the boilerplate code with this code:
import "./App.css";

function App() {
  return (
    <div className="App">
      <main>
        <h1>Swap ETH for USDT 🪙</h1>
        <div className="input-container">
          <input placeholder="Amount of ETH" type="number" />
          <button>Swap</button>
        </div>
      </main>
    </div>
  );
}

export default App;
When you go to your browser, you should see a page similar to this
Now comes the fun part: styling our app with CSS. Navigate to our project folder and open the index.css file. Some boilerplate CSS code should be included. Let's replace that with the following code.
* {
  font-family: system-ui, -apple-system, BlinkMacSystemFont, "Segoe UI", Roboto,
    Oxygen, Ubuntu, Cantarell, "Open Sans", "Helvetica Neue", sans-serif;
}

body {
  overflow: hidden;
}

.App {
  height: 100vh;
  width: 100vw;
  display: flex;
  align-items: center;
  justify-content: center;
}

main {
  padding: 30px;
  padding-top: 0;
  box-shadow: 0 0 8px #9e9e9e8a;
  border-radius: 20px;
  width: max-content;
}

.input-container {
  display: flex;
  justify-content: center;
  align-items: center;
}

input {
  width: 100%;
}

button {
  margin-left: 10px;
  cursor: pointer;
  background: #ffc107;
  transition: 0.2s linear;
}

button:active {
  transform: scale(0.9);
  box-shadow: 0 0 8px #9e9e9e8a;
}

input,
button {
  outline: none;
  padding: 10px;
  border-radius: 10px;
  border: 2px solid #242424;
}
The CSS code above should transform our dApp from the previous screenshot into something more visually appealing, like this:
When the swap button is pressed, we want to call a function that converts our ETH token into the USDT token. Also, we'd like to capture the user input and use it as the amount of ETH we want to swap.
Let's start by getting the values from the input box. To accomplish this, we create a variable to store the input value.
const [amount, setAmount] = useState('')
Next, we get the value of the input box whenever the values in the box change, and then we use the setAmount function to set the value of the amount variable to the current values in the input box. We also set the variable amount as the value of the input box.
<input
  placeholder="Amount of ETH"
  value={amount}
   onChange={(e) => setAmount(e.target.value)}
   type="number"
/>
Let's write a function that contains the main swapping code.
const swap = async () => {
      try {

      } catch (e) {
        console.log(e.message);
      }
   };
When clicked, our button should also be able to invoke the swap function. Let's start by updating the button's code.
<button onClick={swap}>Swap</button>
The final code in the App.js file should look like this:
import { useState } from "react";
import "./App.css";

function App() {
  const [amount, setAmount] = useState("");

  const swap = async () => {
      try {

      } catch (e) {
        console.log(e.message);
      }
   };

  return (
    <div className="App">
      <main>
        <h1>Swap ETH for USDT 🪙</h1>
        <div className="input-container">
          <input
            placeholder="Amount of ETH"
            value={amount}
            onChange={(e) => setAmount(e.target.value)}
            type="number"
          />
          <button onClick={swap}>Swap</button>
        </div>
      </main>
    </div>
  );
}

export default App;
We wrapped the code for the swap function in a try-catch block to prevent the frontend from breaking down when an error is detected.
Our frontend is now complete! Let's get to work on the swap function.
We first import the Moralis SDK
import Moralis from "moralis";
At this point, before we begin calling the main swap function, we need to do a few minor setups for the swapping to work.
Here's an outline of what we will be doing in the swap function:
- We load the Moralis plugins.
- Initialize the 1inch plugin and assign it to a variable
- Enable web3
- Check to see if a user has his wallet connected.
- Finally, we call the swap function
Loading Moralis plugins
To use Moralis plugins, we must invoke a built-in method that initializes the plugins. Add this code into the swap function.
await Moralis.initPlugins();
Initializing the 1inch plugin
We can access the 1inch plugin in Moralis.Plugins.oneInch. In this section of our dApp, we'll assign 1inch to a variable that we'll use later in the code.
let oneInchDex = Moralis.Plugins.oneInch;
Enabling Web3
The code we'll use in this step is nearly self-explanatory. It works in the same way as window.ethereum.enable() and returns a web3Provider instance. We do this so that our dApp can access a web3Provider. This enables us to implement features such as calling contract functions, interacting with other smart contracts, user wallet authentication, and many other web3 services.
await Moralis.enableWeb3();
Checking if a wallet is connected
The wallet must be connected to the dApp in order for the dApp to read the walet's information, get the wallet address, and calculate the amount of crypto in the wallet. Wallet connection and authentication are extremely simple with Moralis. Here's how to do it:
if (!Moralis.User.current()) {
    await Moralis.authenticate();
}
The swap function should now include the following code:
const swap = async () => {
    try {
       await Moralis.initPlugins();
       let oneInchDex = Moralis.Plugins.oneInch;
       await Moralis.enableWeb3();

       // authenticate with metamask if wallet not connected
       if (!Moralis.User.current()) {
         await Moralis.authenticate();
       }
    } catch (e) {
      console.log(e.message);
    }
  };
Following that, we'll declare the six variables that we'll require in the swap function. These variables are as follows:
- FROM_TOKEN_ADDRESS
- TO_TOKEN_ADDRESS
- WALLET_ADDRESS
- AMOUNT
- CHAIN
- OPTIONS
In the code, we will assign values to these variables
const FROM_TOKEN_ADDRESS = "0xeeeeeeeeeeeeeeeeeeeeeeeeeeeeeeeeeeeeeeee"; // ETH token address
const TO_TOKEN_ADDRESS = "0xdac17f958d2ee523a2206206994597c13d831ec7"; // USDT token address
const WALLET_ADDRESS = "0x...123";
const CHAIN = "eth";
const OPTIONS = {
        chain: CHAIN,
        fromTokenAddress: FROM_TOKEN_ADDRESS,
        toTokenAddress: TO_TOKEN_ADDRESS,
        amount: amount,
        fromAddress: WALLET_ADDRESS,
        slippage: 1,
};
Because we are making our swap on the Ethereum chain and loading assets from the Ethereum chain, the native token, ETH, is assigned an odd address, which is 0xee...eeee. On a network like Polygon, that address will be assigned to MATIC, Polygon's native token, while on the Binance Smart Chain (BSC), the address will be assigned to BNB, BSC's native token.
To get all of the tokens supported by the 1inch plugin, the function below will return an array containing all of the supported tokens as well as their token names, symbols, and addresses. There, you may select which tokens to switch from and which tokens to swap to. You can do this by simply changing the FROM_TOKEN_ADDRESS and TO_TOKEN_ADDRESS to your chosen token addresses.
To kick things up a notch, you can add a dropdown for selecting the tokens and then populating the token address variables with the tokens selected from the dropdown
async function getSupportedTokens() {
        const tokens = await Moralis.Plugins.oneInch.getSupportedTokens({
          chain: "eth", // The blockchain you want to use (eth/bsc/polygon)
        });

        console.log(tokens);
}
Calling the swap method
Moralis makes this easy for us to swap tokens by converting the swap function into a single line of code:
const receipt = await oneInchDex.swap(OPTIONS);
The final code
App.js:
import { useState } from "react";
import Moralis from "moralis";
import "./App.css";

function App() {
  const [amount, setAmount] = useState("");

  const swap = async () => {
    try {
      // initialize Moralis plugins and enable web3
      await Moralis.initPlugins();
      let oneInchDex = Moralis.Plugins.oneInch;
      await Moralis.enableWeb3();

      // authenticate with metamask if wallet not connected
      if (!Moralis.User.current()) {
        await Moralis.authenticate();
      }

      const FROM_TOKEN_ADDRESS = "0xeeeeeeeeeeeeeeeeeeeeeeeeeeeeeeeeeeeeeeee"; // ETH token address
      const TO_TOKEN_ADDRESS = "0xdac17f958d2ee523a2206206994597c13d831ec7"; // USDT token address
      const WALLET_ADDRESS = "0xB778AC3E4bEf931DbD3C39b71C15F00A773d596f";
      const CHAIN = "eth";
      const OPTIONS = {
        chain: CHAIN,
        fromTokenAddress: FROM_TOKEN_ADDRESS,
        toTokenAddress: TO_TOKEN_ADDRESS,
        amount: amount,
        fromAddress: WALLET_ADDRESS,
        slippage: 1,
      };

      await oneInchDex.swap(OPTIONS);
    } catch (e) {
      console.log(e.message.text);
    }
  };

  return (
    <div className="App">
      <main>
        <h1>Swap ETH for USDT 🪙</h1>
        <div className="input-container">
          <input
            placeholder="Amount of ETH"
            value={amount}
            onChange={(e) => setAmount(e.target.value)}
            type="number"
          />
          <button onClick={swap}>Swap</button>
        </div>
      </main>
    </div>
  );
}

export default App;
index.css:
  * {
    font-family: system-ui, -apple-system, BlinkMacSystemFont, "Segoe UI", Roboto,
      Oxygen, Ubuntu, Cantarell, "Open Sans", "Helvetica Neue", sans-serif;
  }

  body {
    overflow: hidden;
  }

  .App {
    height: 100vh;
    width: 100vw;
    display: flex;
    align-items: center;
    justify-content: center;
  }

  main {
    padding: 30px;
    padding-top: 0;
    box-shadow: 0 0 8px #9e9e9e8a;
    border-radius: 20px;
    width: max-content;
  }

  .input-container {
    display: flex;
    justify-content: center;
    align-items: center;
  }

  input {
    width: 100%;
  }

  button {
    margin-left: 10px;
    cursor: pointer;
    background: #ffc107;
    transition: 0.2s linear;
  }

  button:active {
    transform: scale(0.9);
    box-shadow: 0 0 8px #9e9e9e8a;
  }

  input,
  button {
    outline: none;
    padding: 10px;
    border-radius: 10px;
    border: 2px solid #242424;
  }
That's it! We've completed our own token swapping dApp. Again, you can style this to make it look even better, add more functionalities, add a loader while the swap is running, and so on.
This article is a part of the Hashnode Web3 blog, where a team of curated writers are bringing out new resources to help you discover the universe of web3. Check us out for more on NFTs, DAOs, blockchains, and the decentralized future.