


Table of contents
- Introduction
- What we'll Build - NFT Explorer
- Demo
- Prerequisites
- Step 1 - Create a React App
- Step 2 - Installing Moralis React SDK
- Step 3 - Installing Tailwind CSS
- Step 4 - Setting up Moralis Server
- Step 5 - Moralis Server Details
- Step 6 - Initializing Moralis SDK in React
- What is an NFT API?
- NFT API - Moralis NFT API
- Step 7 - Creating the Components
- Bringing It Together
- Where do you go next?
Think "Firebase of Crypto" - Moralis
Introduction
Moralis is a web3 development platform that provides a backend as a service for blockchain projects.
It's the fastest way to build and deploy decentralized applications (dApps) on Ethereum, BSC, Polygon, Solana, and Elrond blockchains.
Instead of building your dApps architecture from scratch, the Moralis server and its Software Development Kit (SDK) will help you with the backend, making it easy to interact and query non-fungible tokens (NFTs) data from the blockchain in real-time!
What we'll Build - NFT Explorer
In this tutorial, we're going to use the Moralis React SDK and its cross-chain web3 NFT APIs to build a React NFT explorer application, where anyone can search for NFTs across multiple chains by name.
An NFT explorer is a dApp that allows users to get information about any collection of NFTs, such as name, price, birthday, owner's address, ownership verification, NFT transfer history, etc.
Demo
Below is the demo video of the React NFT explorer application we're going to build at the end of this article:
Prerequisites
This tutorial uses the following stack:
- React
- Tailwind CSS
- Moralis React SDK
- Web3 NFT APIs
For this tutorial, you'll need to have:
- A basic understanding of React, which you can find here: A (re)introduction to React.
- A working knowledge of Tailwind CSS.
Step 1 - Create a React App
In this first step, we'll create a new React application using the npx package manager.
Run the command below to create a new react app for our NFT explorer:
npx create-react-app nft-explorer
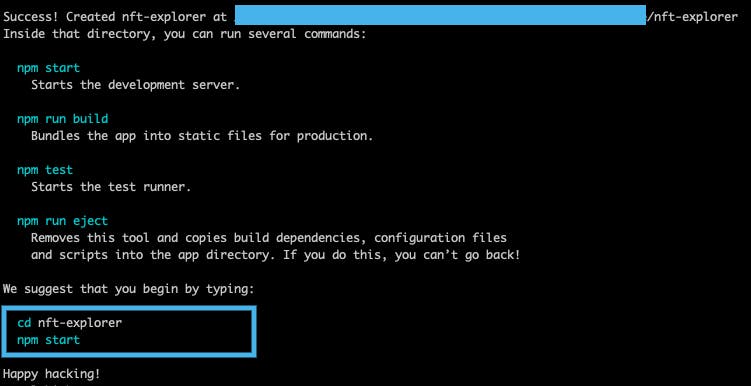
When it's done, run the command below to navigate into your nft-explorer directory:
cd nft-explorer
Open your project in any code editor. Our project folder structure should look like this:
nft-explorer
├── node_modules
├── public
├── src
├── .gitignore
├── package-lock.json
├── package.json
└── README.md
Step 2 - Installing Moralis React SDK
Now that our React application is ready, we're going to install the Moralis React SDK.
Run the following command from your nft-explorer directory terminal:
npm install moralis react-moralis
Step 3 - Installing Tailwind CSS
In this step, we're going to install and set up Tailwind CSS in our React application.
Run the code below to install Tailwind CSS and its peer dependencies:
npm install -D tailwindcss postcss autoprefixer
Next, run the command below to generate a Tailwind CSS configuration file at the root of your project directory:
npx tailwindcss init
Inside your tailwind.config.js file, replace the content with the following code:
module.exports = {
  darkMode: "class",
  content: ["./src/**/*.{js,jsx,ts,tsx}"],
  theme: {
    extend: {},
  },
  plugins: [],
};
Finally, import Tailwind CSS by updating the index.css file with the following:
@tailwind base;
@tailwind components;
@tailwind utilities;
To test if Tailwind CSS is working, update your App.js file with the code below:
import logo from "./logo.svg";
import "./App.css";

function App() {
  return (
    <div className="App">
      <header className="App-header">
        <img src={logo} className="App-logo" alt="logo" />
        <p className="bg-red-900">
          Edit <code>src/App.js</code> and save to reload.
        </p>
        <a
          className="App-link"
          href="https://reactjs.org"
          target="_blank"
          rel="noopener noreferrer"
        >
          Learn React
        </a>
      </header>
    </div>
  );
}

export default App;
Next, start your React project server by running the code below:
npm run start
Our development server will start up on localhost:3000. Our React page should look like this:

The red background text indicates that Tailwind CSS is working in our React app.
Step 4 - Setting up Moralis Server
A Moralis server allows you to use the Moralis SDK to speed up the development of your dApp. - Moralis
In this step, we're going to set up our Moralis Cloud Server and generate our Moralis Server API keys.
Go to Moralis.io and click on the "Sign Up for FREE" button:
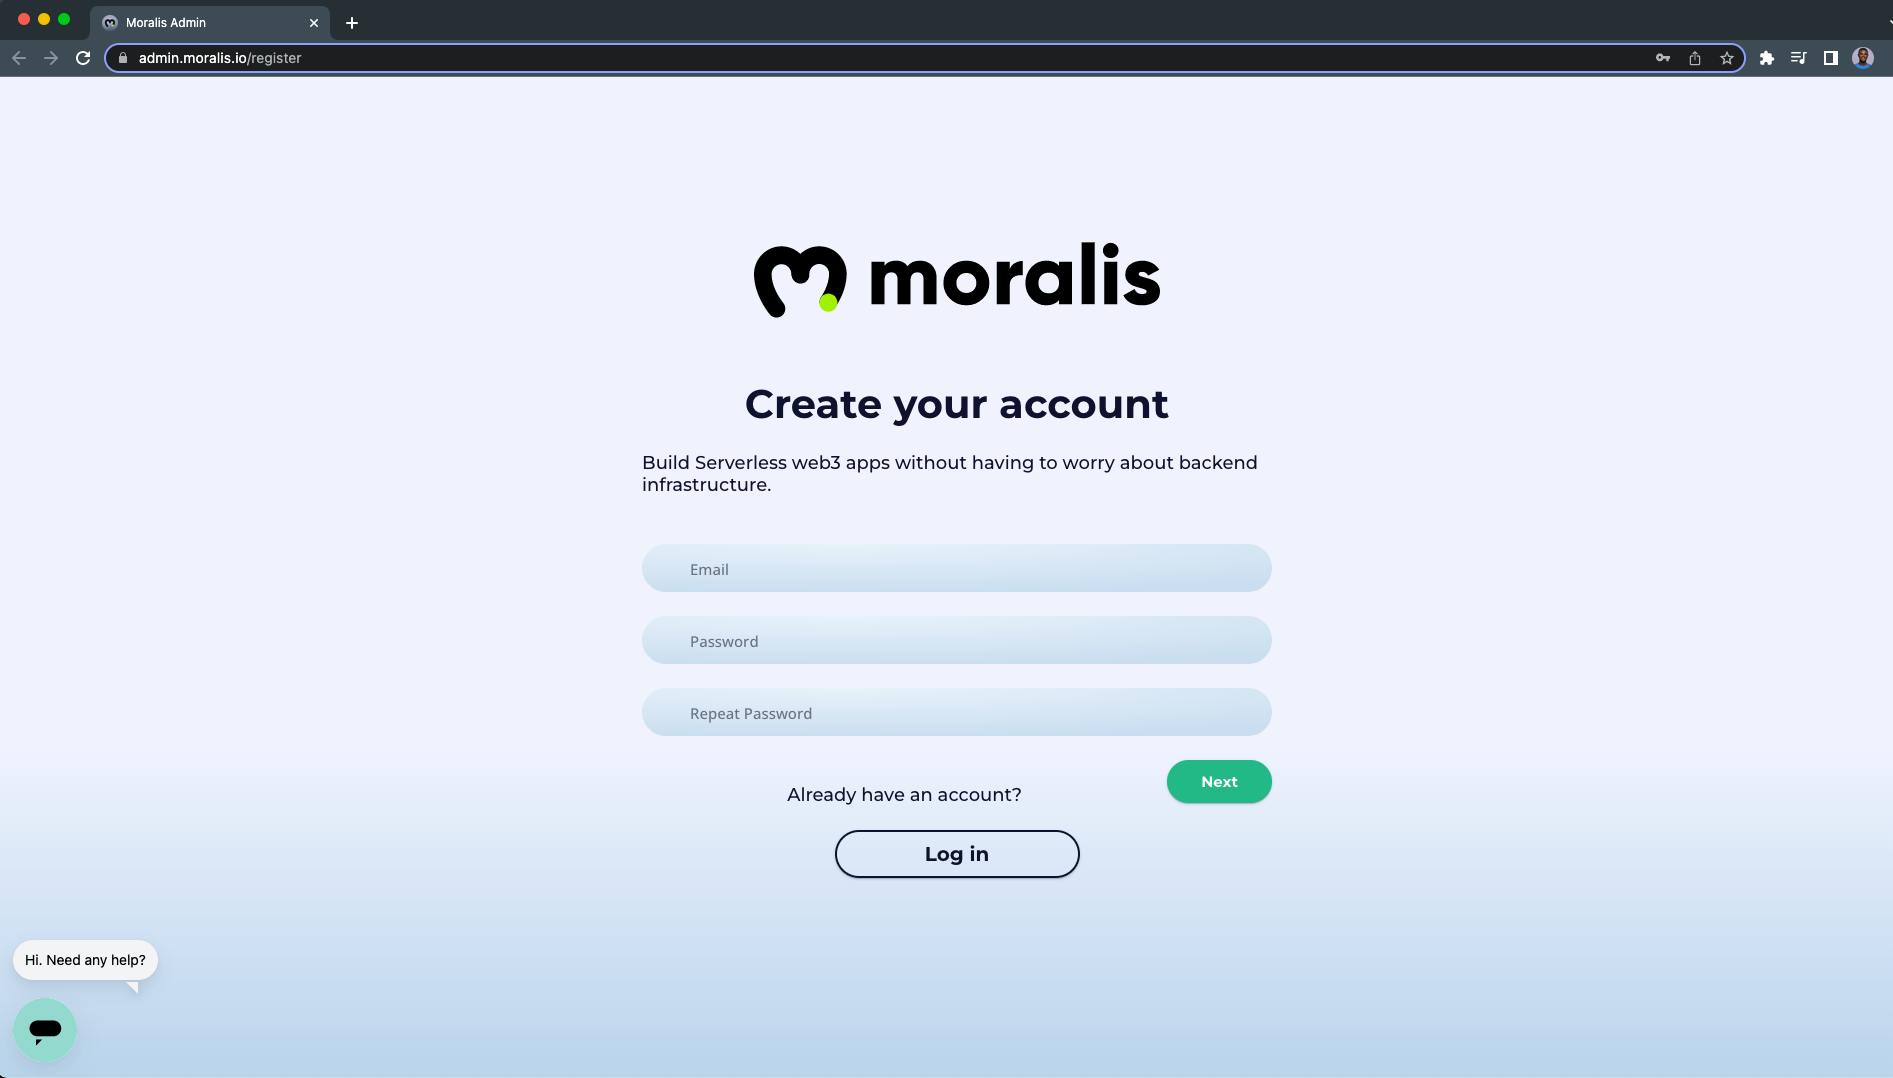
Provide a valid email address with a password to create your Moralis account:
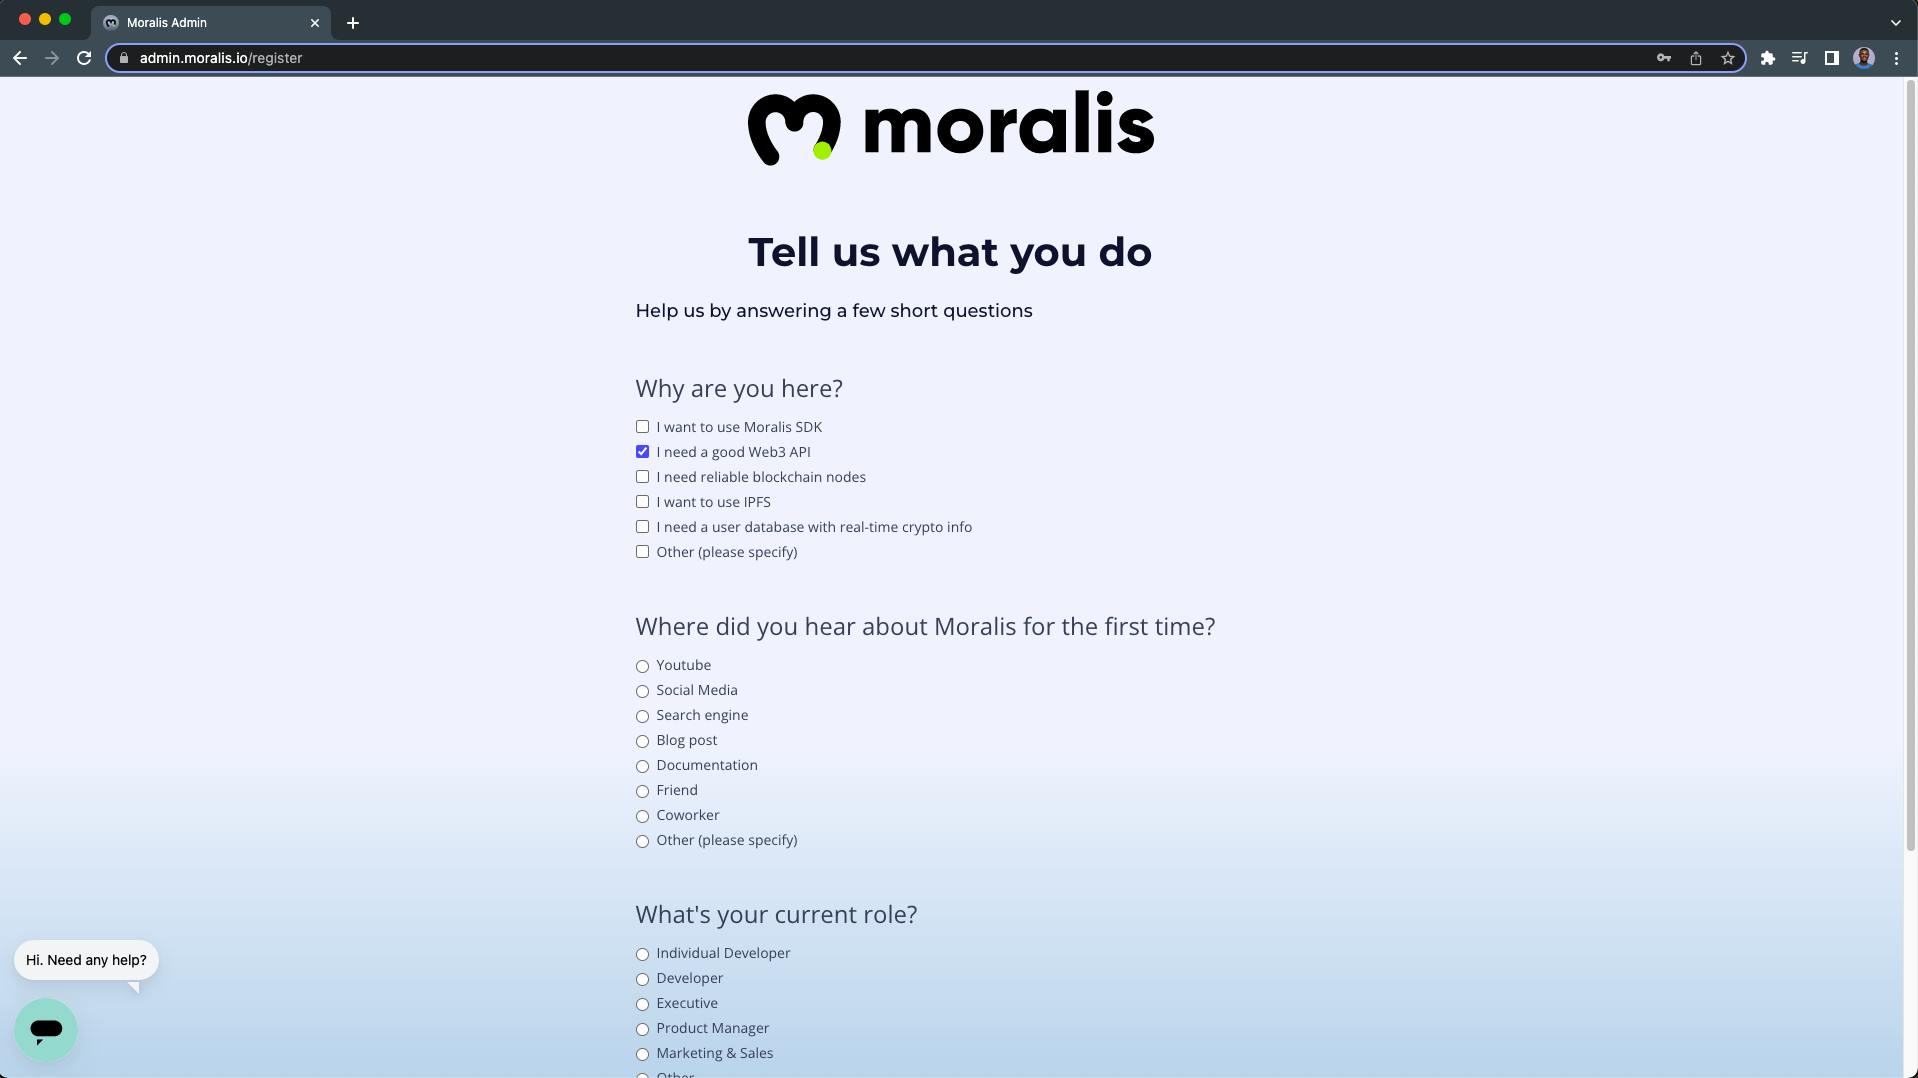
The next page is where you'll answer a few short questions.
Click next when you're done to create your Moralis account:
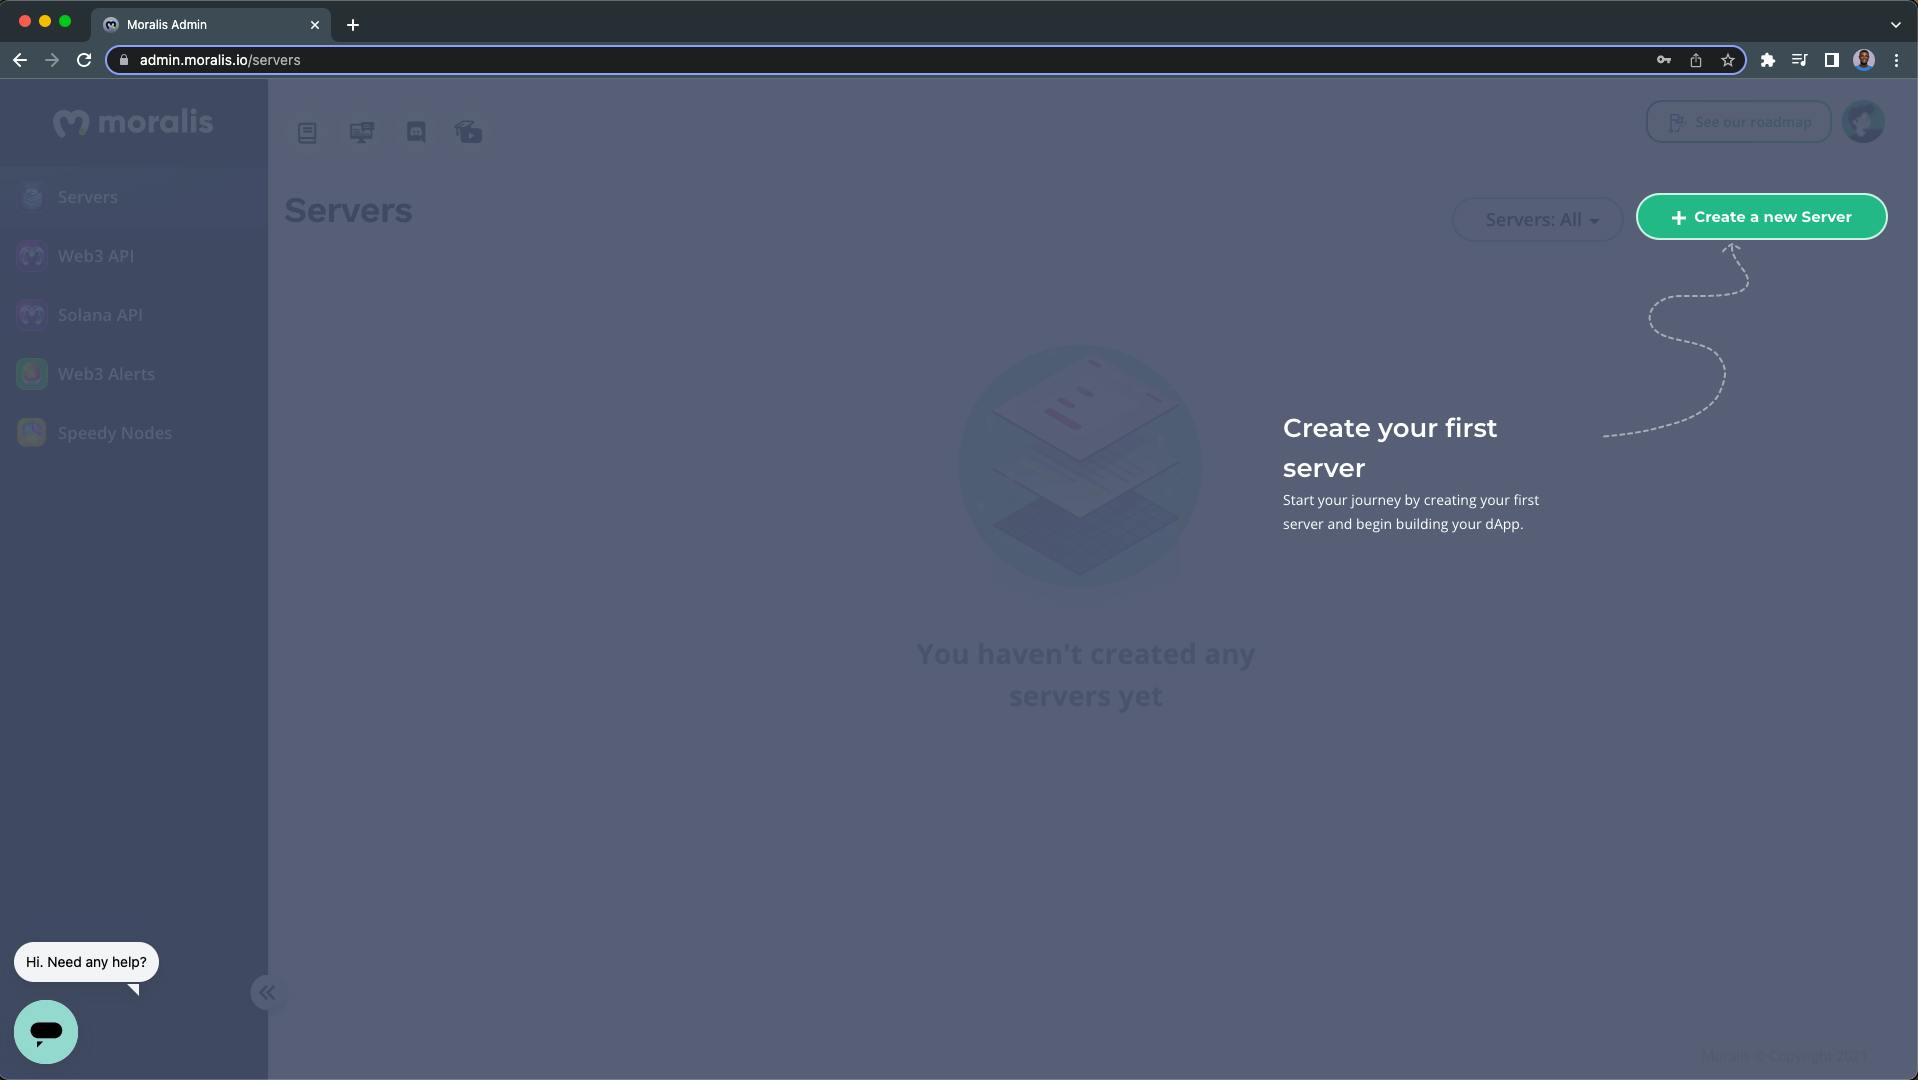
After successful registration, you'll be redirected to your Moralis dashboard.
On your dashboard:
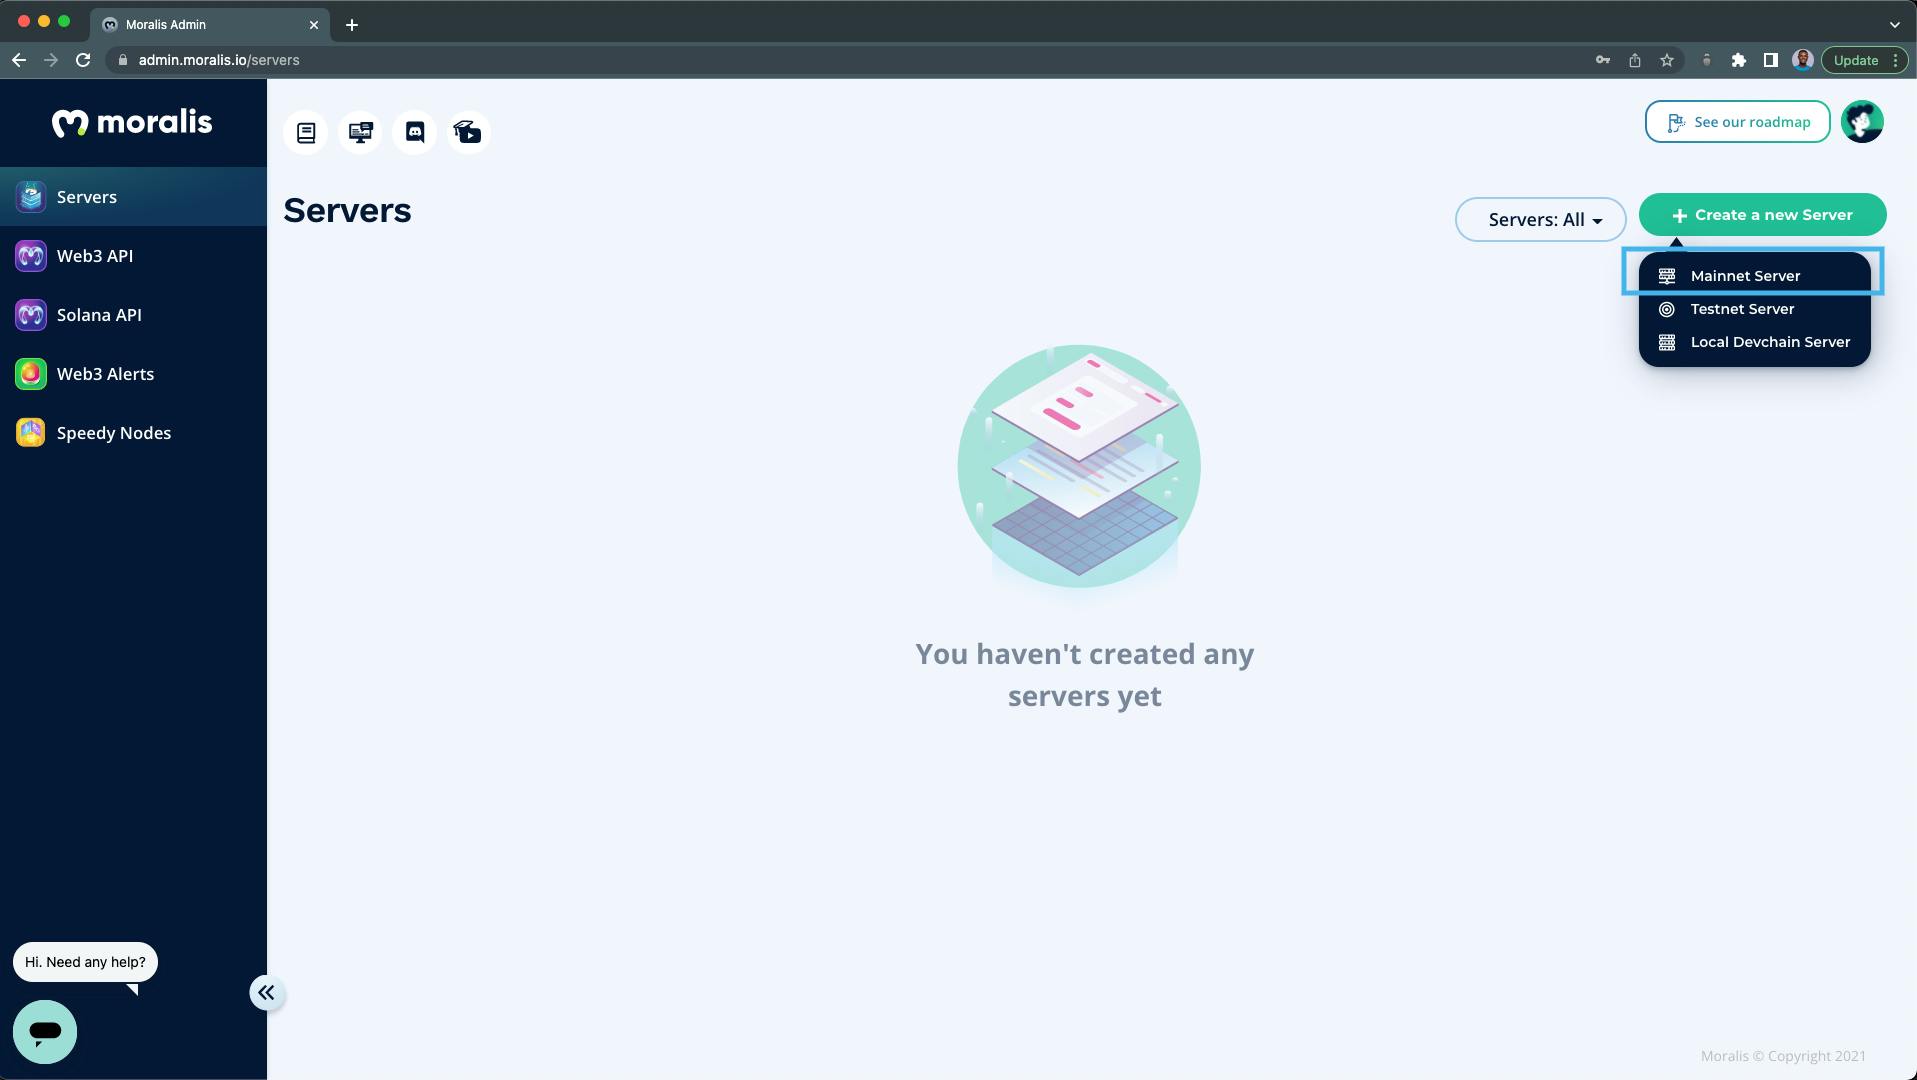
1. Click on the "Create a new Server" button:
2. Select the "Mainnet Server":
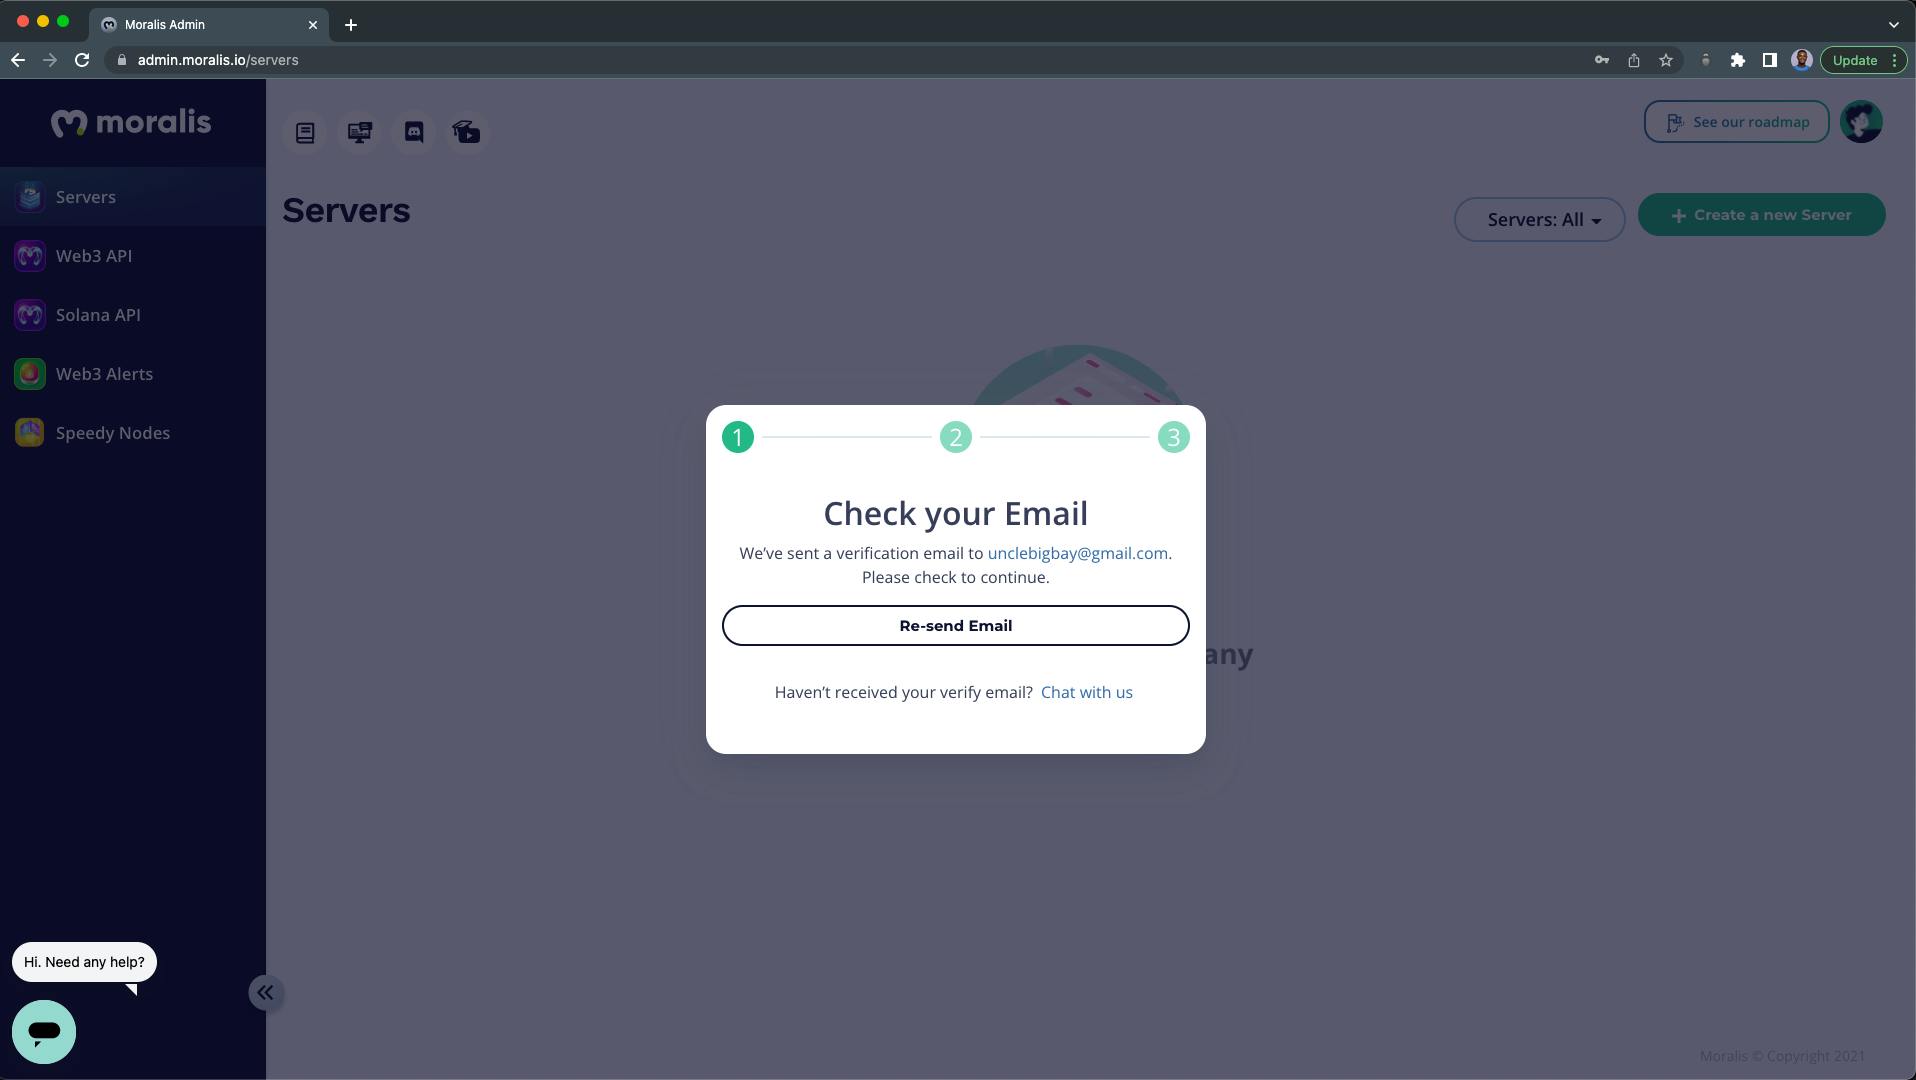
3. You'll be prompted to confirm your registered email address:
4. Adding a new Mainnet Server:
From the popup:
- Name your Moralis Server/Instance (nft-explorer).
- Select the Region closest to you.
- Select a Network (Mainnet).
- For this tutorial, we're going to select all the available chains.
- Click on the "Add Instance" button when you're done.

5. Wait for Moralis to set up your server instance:

Step 5 - Moralis Server Details
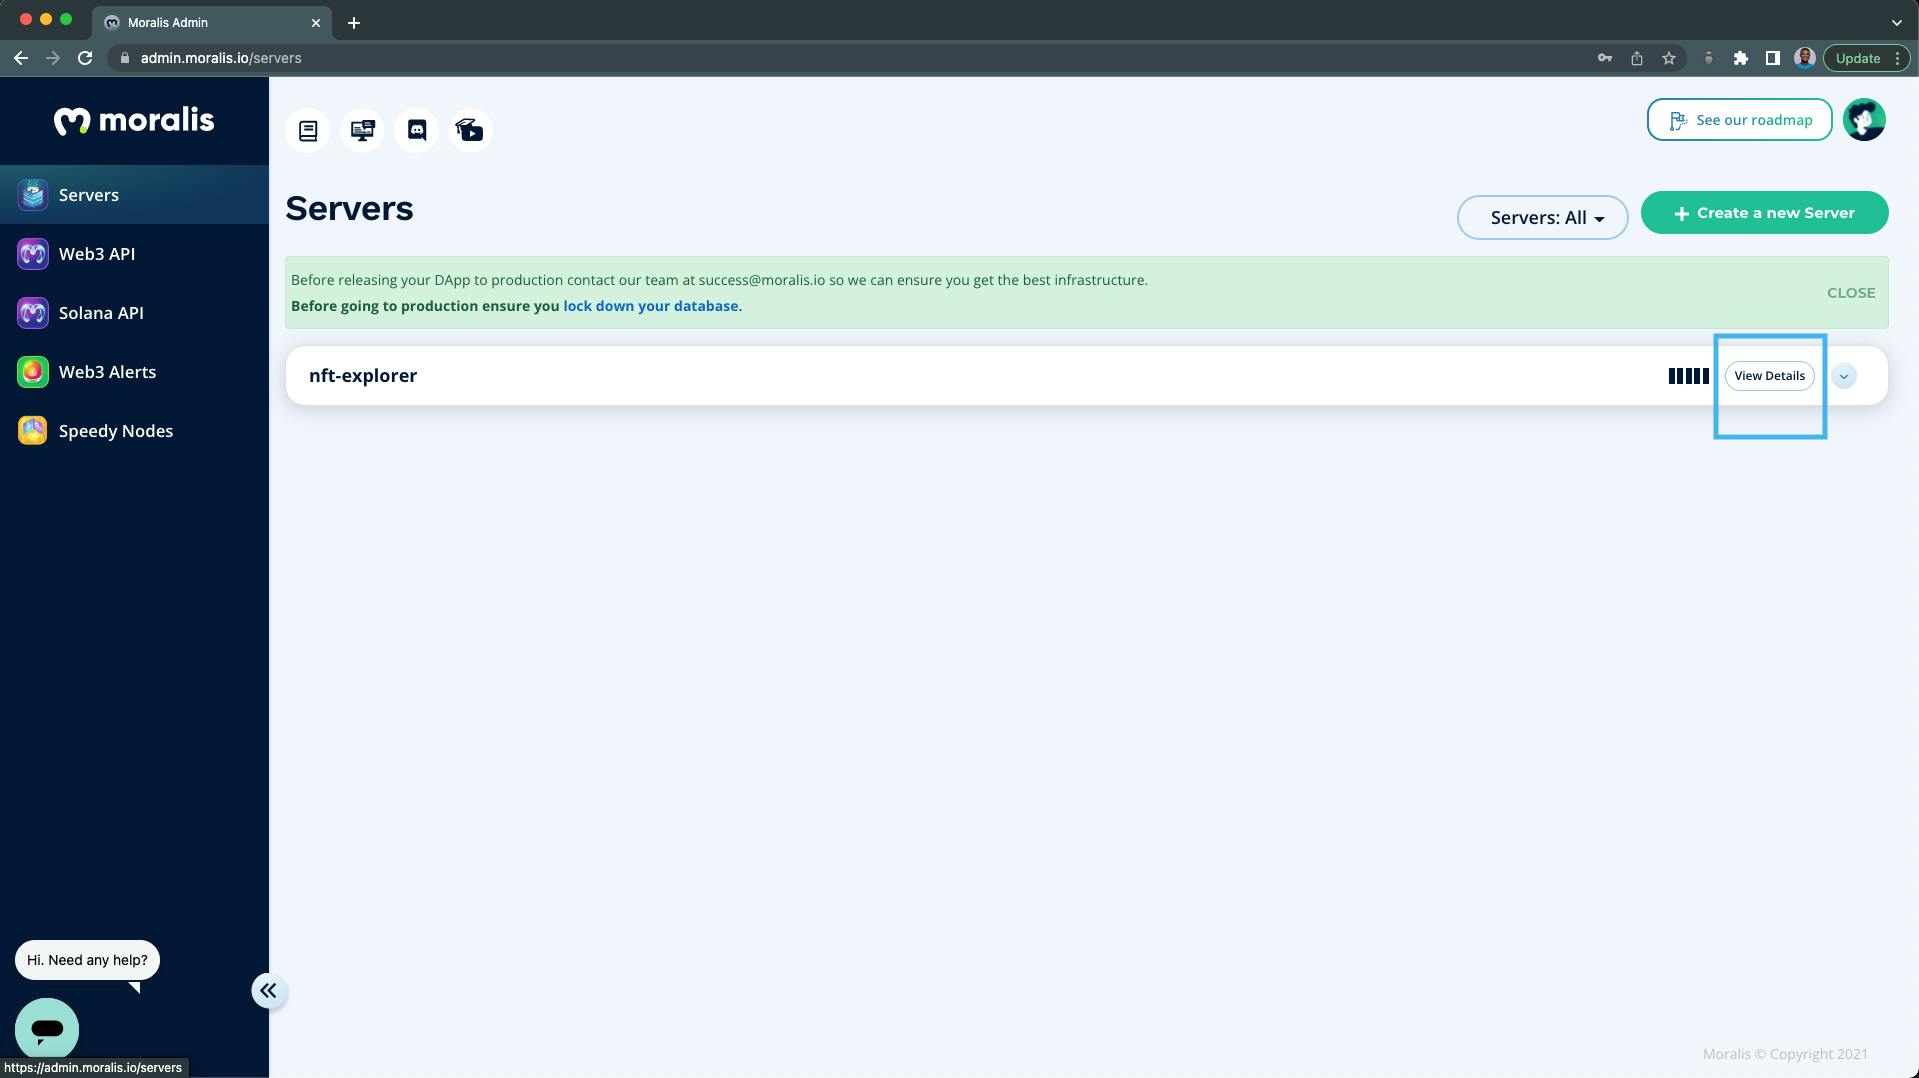
After your server instance has been created, you can view your server credentials by clicking on the "View Details" button:
The important server details that we need are:
- The Server URL
- The Application ID
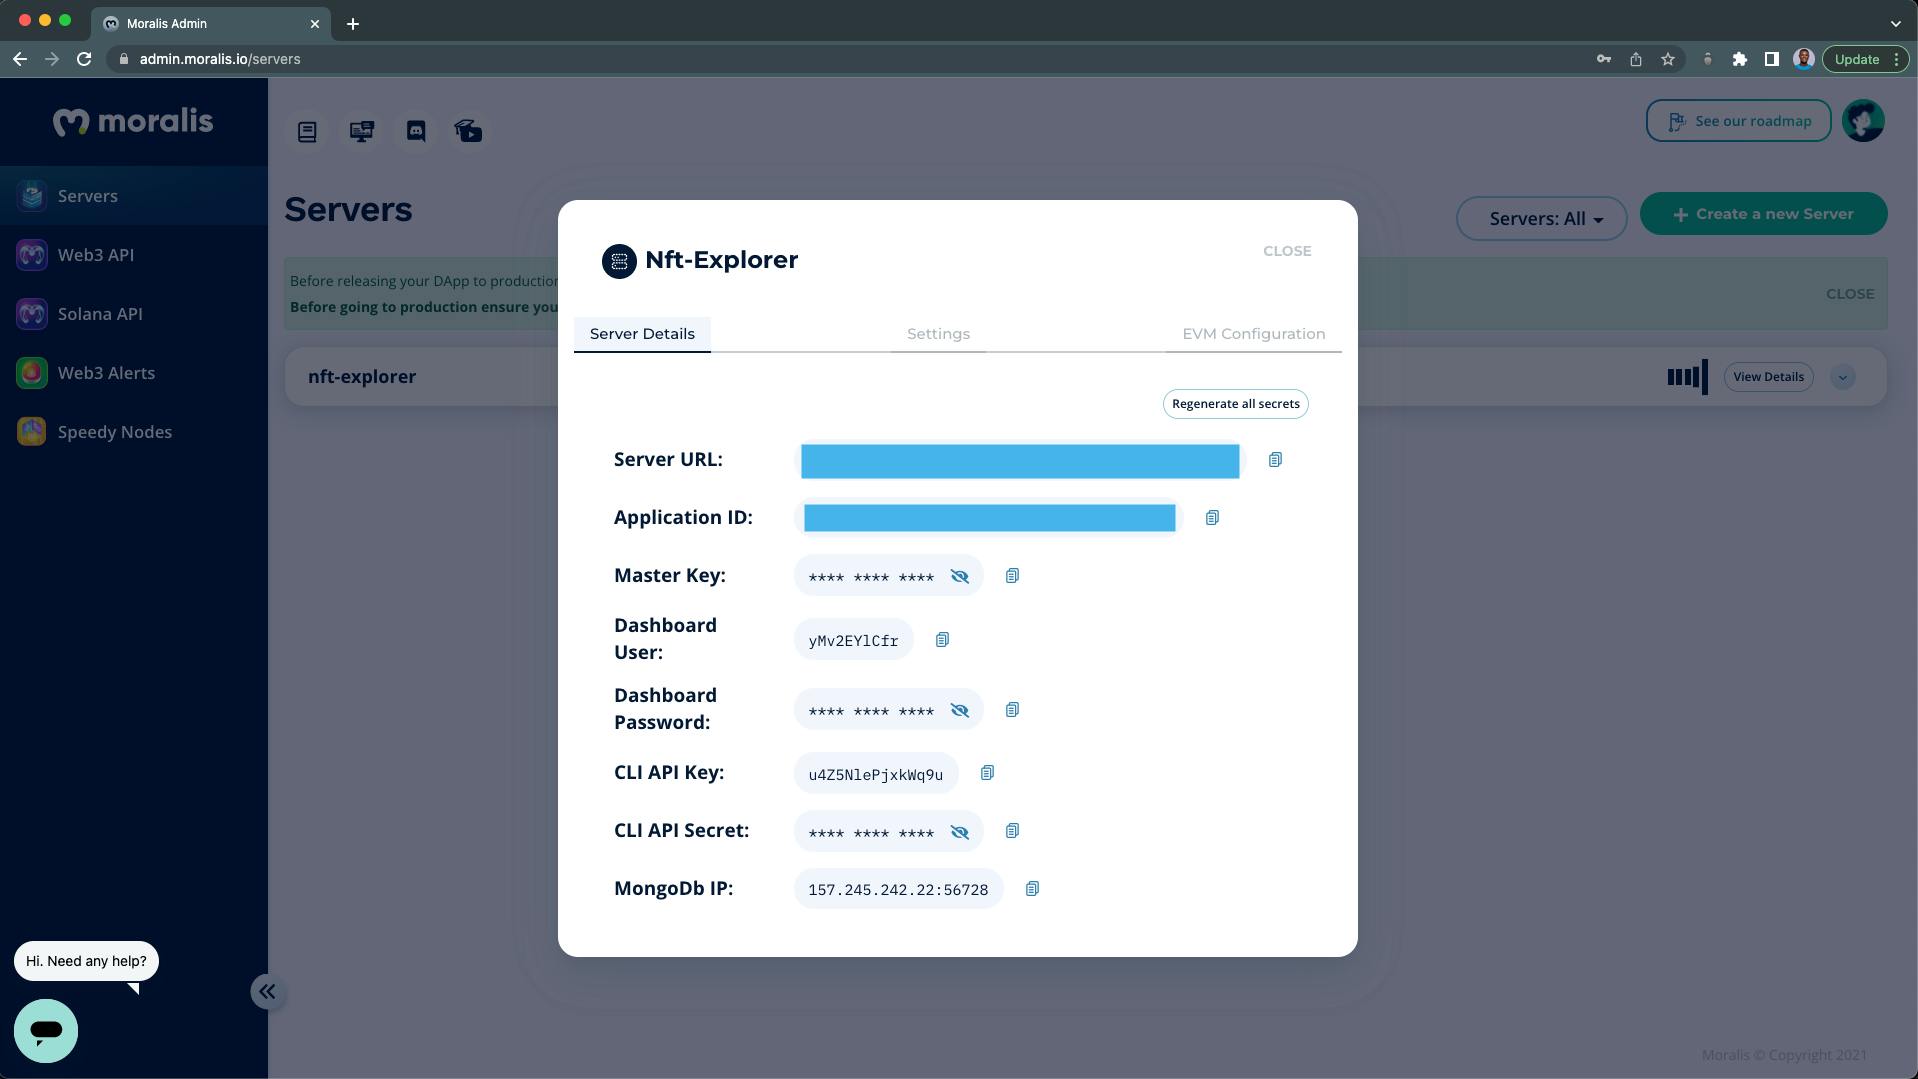
Pro tip: Do not expose your server details, as they give access to your dApp.
Step 6 - Initializing Moralis SDK in React
After setting up your Moralis server and installing the Moralis SDK (see Step 2), the next step is to establish a connection between our React app and our Moralis server through the Moralis SDK.
Create a .env file at the root of your project and store your Moralis server details above like this:
REACT_APP_SERVER_URL=https://XXXXXX.usemoralis.com:2053/server
REACT_APP_APP_ID=XXXXXXXXXXXXXXXXXXXXXXXXXXXXXX
Replace the placeholders with your Moralis credentials. Next, we need to restart our server after updating the src/.env file.
Use the short key below to stop your server:
ctrl + c
Start your server again with:
npm run start
Next, we'll create an initMoralis function in our App.js file like this:
import logo from "./logo.svg";
import "./App.css";
import Moralis from "moralis";

function App() {

// initMoralis function
  const initMoralis = async () => {
// connect to Moralis server
    await Moralis.start({
      serverUrl: process.env.REACT_APP_SERVER_URL,
      appId: process.env.REACT_APP_APP_ID,
    });
  };

// call/invoke initMoralis function
  initMoralis();

  return (
    <div className='App'>
      <header className='App-header'>
        <img src={logo} className='App-logo' alt='logo' />
        <p className='bg-red-900'>
          Edit <code>src/App.js</code> and save to reload.
        </p>
        <a
          className='App-link'
          href='https://reactjs.org'
          target='_blank'
          rel='noopener noreferrer'
        >
          Learn React
        </a>
      </header>
    </div>
  );
}

export default App;
The Moralis.start() method in our initMoralis function will establish a connection with our Moralis server, allowing us to access the Moralis SDK resources and NFT APIs.
Pro tip: Do not hard code your Moralis details in the
initMoralisfunction.
What is an NFT API?
NFTs are non-fungible tokens, and they're stored on the blockchain. An API is an Application Programming Interface that enables two or more softwares to interact and share resources with each other.
NFT APIs are endpoints that allow your dApps to connect to the blockchain and query metadata for NFTs, retrieve NFTs transfer data, verify NFT ownership, lookup the price of an NFT, and return information about all NFT collections from different blockchains.
NFT API - Moralis NFT API
Moralis NFT API is an indexed API that is easily manageable and easy to integrate into your dApps. It's a cross-chain NFT interface for returning metadata and getting all information regarding an NFT through Moralis.
Below are the Moralis NFT API endpoints that we're going to use in building our NFT explorer for this tutorial:
- The
searchNFTsAPI - For searching NFTs - The
getNFTTransfersAPI - For getting NFT transfer histories
You can find the complete lists of Moralis NFT API endpoints from here.
Step 7 - Creating the Components
In this tutorial step, we're going to be creating eight components:
src/pages
NftExplore.jsx
src/components
NftSearchBar.jsxNftCardContainer.jsxNftCard.jsxNftDescriptionModal.jsxNftHistoryTable.jsxNftChainRadio.jsxThemeSwitch.jsx
Let's create the NftExplore component, which will serve as our NFT explorer main page.
In your src folder:
- Create a new
pagesfolder. - In the pages folder, create a new
NftExplore.jsxfile.
Copy and paste the React component below inside of your NftExplore.jsx file:
import React from "react";
export const NftExplore = () => {
  return <div className='text-white'>NftExplore</div>;
};
Your folder structure should look like this:
Update your src/App.js file with the code below:
import "./App.css";
import Moralis from "moralis";
import { useState } from "react";
import { NftExplore } from "./pages/NftExplore";

function App() {
  const userCurrentTheme = JSON.parse(localStorage.getItem("isDark"));
  const [isDark, setisDark] = useState(userCurrentTheme || true);

 // initMoralis function
  const initMoralis = async () => {
 // connect to Moralis server
    await Moralis.start({
      serverUrl: process.env.REACT_APP_SERVER_URL,
      appId: process.env.REACT_APP_APP_ID,
    });
  };

 // call/invoke initMoralis function
  initMoralis();

  return (
    <main className={isDark ? "dark" : ""}>
      <div className='dark:bg-gray-800 pt-10 px-8 bg-gray-50'>
        <section className='container mx-auto w-full max-w-screen-xl min-h-screen'>
          <NftExplore settheme={setisDark} />
        </section>
      </div>
    </main>
  );
}

export default App;
Our NFT explorer will have a dark theme by default, which can be switched to a light theme (see demo), we'll use the isDark component state to keep track of the changes. We also want to keep track of the user's last theme by getting it from the user's local storage.
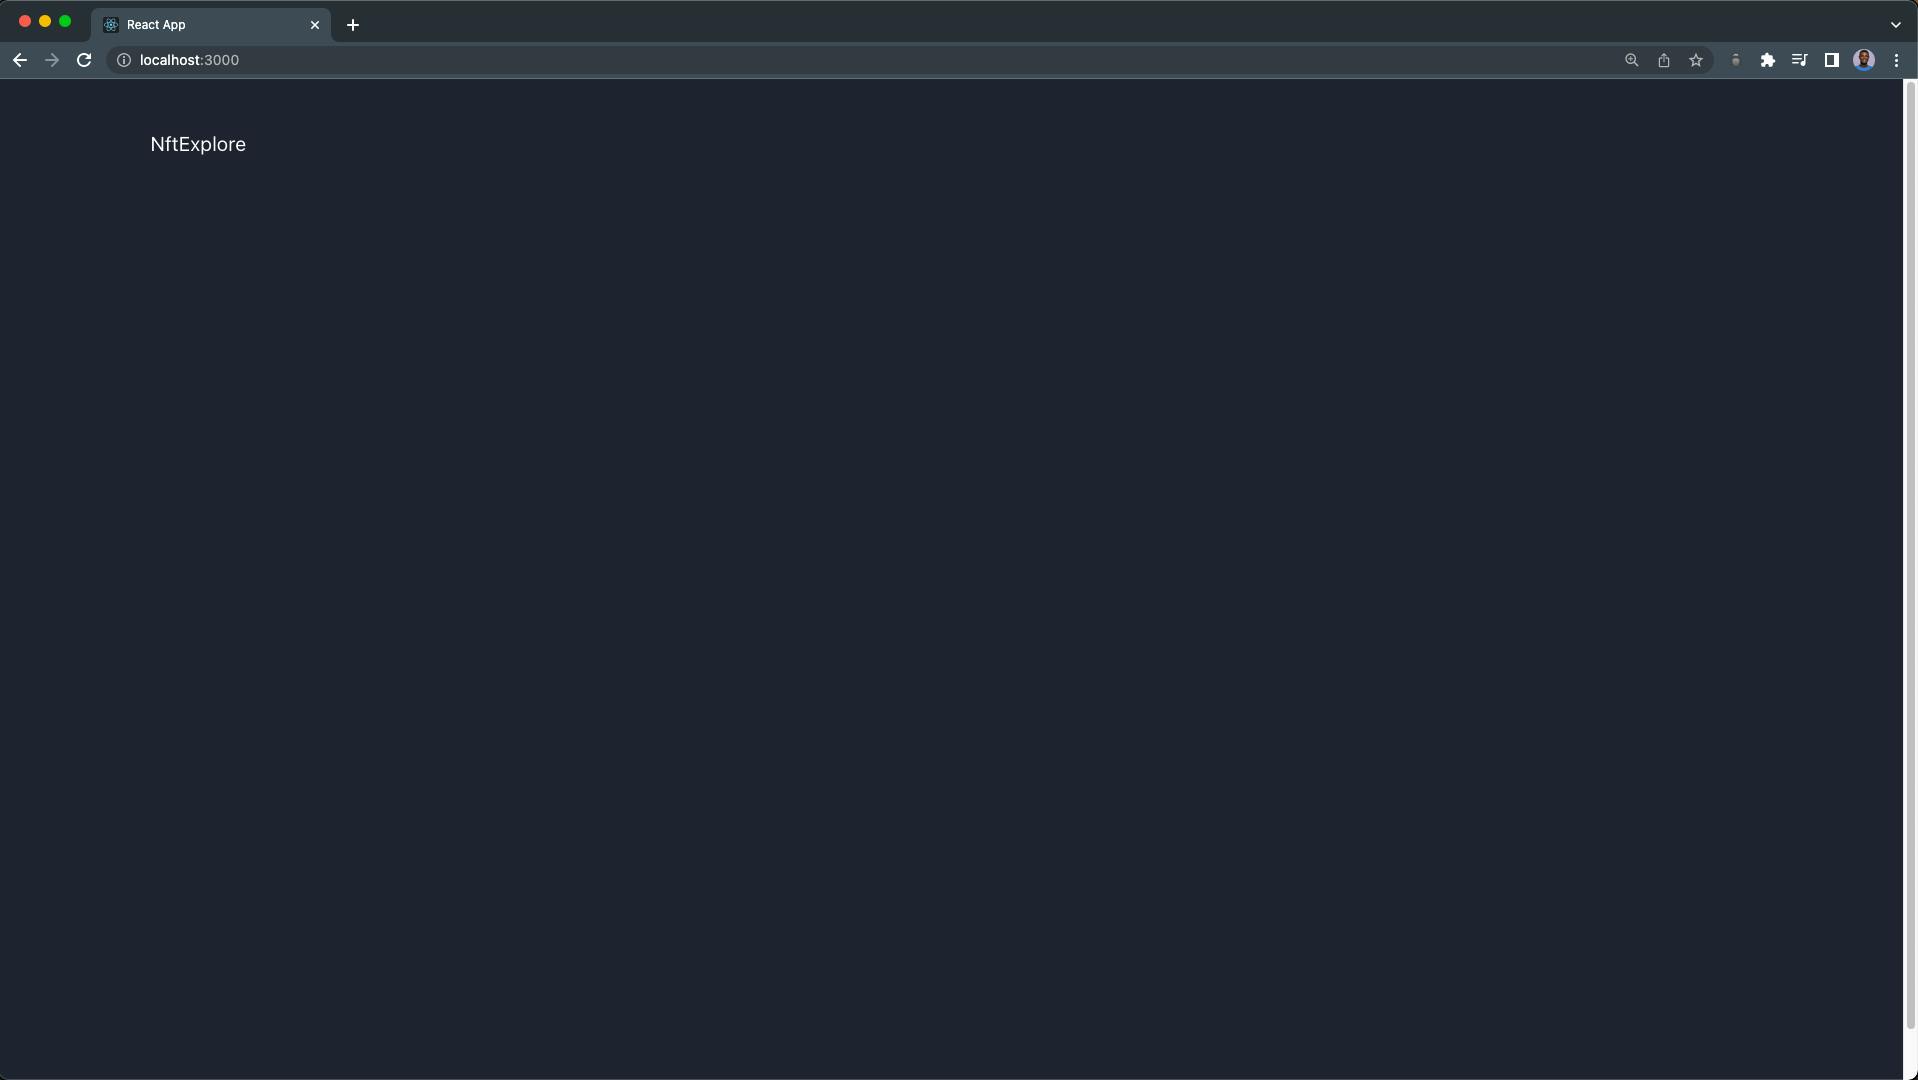
Our NFT explorer page should look like this:
Building the NFT Search Bar
Our first component is the NftSearchBar, which is an input box and a search button for the user to enter and search for NFTs by their name.
In your src folder:
- Create a new
componentsfolder. - Next, create a new
Nftsfolder inside thesrc/componentsfolder. - Finally, create a new
NftSearchBar.jsxfile inside thecomponents/Nftsfolder and paste the code below:
import React from "react";

export const NftSearchBar = ({
  searchQuery,
  searchNFTs,
  handleChange
}) => {
  return (
    <React.Fragment>
      <div className='shadow p-4 flex mx-2 dark:bg-gray-700 rounded'>
        <span className='w-auto flex justify-center items-center text-grey p-2'>
          <svg
            aria-hidden='true'
            focusable='false'
            data-prefix='fas'
            data-icon='search'
            className='w-4 text-gray-300'
            role='img'
            xmlns='http://www.w3.org/2000/svg'
            viewBox='0 0 512 512'
          >
            <path
              fill='currentColor'
              d='M505 442.7L405.3 343c-4.5-4.5-10.6-7-17-7H372c27.6-35.3 44-79.7 44-128C416 93.1 322.9 0 208 0S0 93.1 0 208s93.1 208 208 208c48.3 0 92.7-16.4 128-44v16.3c0 6.4 2.5 12.5 7 17l99.7 99.7c9.4 9.4 24.6 9.4 33.9 0l28.3-28.3c9.4-9.4 9.4-24.6.1-34zM208 336c-70.7 0-128-57.2-128-128 0-70.7 57.2-128 128-128 70.7 0 128 57.2 128 128 0 70.7-57.2 128-128 128z'
            />
          </svg>
        </span>
        <input
          className='w-full rounded p-2 dark:bg-gray-800 dark:text-white focus:bg-gray-200 outline-none'
          type='text'
          value={searchQuery}
          placeholder="Try 'Apes' or 'Mimir Assault'"
          onChange={handleChange}
        />
        <button
          className='bg-blue-600 mx-2 text-white rounded p-2 px-6 hover:bg-blue-500'
          onClick={searchNFTs}
        >
          <p className='font-medium text-lg'>Search</p>
        </button>
      </div>
    </React.Fragment>
  );
};
The NftSearchBar component will receive three props:
- The searchQuery, which is the value entered by the user.
- The searchNFTs function for the search button, and
- The handleChange function to keep track of the searchQuery input changes.
Your folder structure should look like this:
Update your NftExplore.jsx file component with the following lines of code:
import React, { useState, useEffect } from "react";
import Moralis from "moralis";
import { NftSearchBar } from "../components/Nfts/NftSearchBar";

export const NftExplore = ({ settheme }) => {

  // 1. loading state
  const [loading, setLoading] = useState(false);

  // 2. The search query state
  const [searchQuery, setSearchQuery] = useState("");

  // 3. The chain state
  const [chain, setchain] = useState("eth");

  // 4. The search results state
  const [searchResult, setSearchResult] = useState(null);

  // 5. The search query handler
  const handleChange = (e) => {
    setSearchQuery(e.target.value);
  };

  // 6. The search function
  const searchNFTs = async () => {
    try {

      // 6.1. Set the loading state to true
      setLoading(true);

      // 6.2. Search for the NFTs
      const options = {
        q: searchQuery || "bored",
        chain: chain,
        filter: "name",
        limit: "30",
      };

      // 6.3. Get the search results
      const NFTs = await Moralis.Web3API.token.searchNFTs(options);

      // 6.4. If there is a result
      if (NFTs.result) {

        // 6.4.1. Convert the result metadata to an array
        const convertMetadata = NFTs.result.map((nft) => {
          nft.metadata = JSON.parse(nft.metadata);
          return nft;
        });

        // 6.4.2. Set the search result state
        setSearchResult(convertMetadata);

        // 6.4.3. Set the loading state to false
        setLoading(false);
      }
    } catch (error) {
      // 6.4.4. If there is an error, alert the user
      alert(error);

      // 6.4.5. Set the loading state to false
      setLoading(false);
    }
  };

  // 7. Search for "bored" NFTs on mount
  useEffect(() => {
    searchNFTs();
  }, []);

  console.log(searchResult);

  return (
    <React.Fragment>
      {/* NFT search bar section */}
      <NftSearchBar
        searchQuery={searchQuery}
        searchNFTs={searchNFTs}
        handleChange={handleChange}
      />
    </React.Fragment>
  );
};
From the NftExplore.jsx component above, we're making use of the Moralis.Web3API.token.searchNFTs(options) to find all the NFTs whose name matches the user's query from the blockchain (eth by default).
The options parameter is an object containing the following:
- The query of the user ("bored" by default).
- The chain; we want to search from on the blockchain.
- The filter; we want to filter by name.
- The limit; we only want 30 NFTs search results from the eth chain.
Because the metadata of the returned NFTs is a typeof string, we're making use of the JSON.parse method to convert each of the NFT metadata from string into an object before setting them into our searchResult state.
Finally, when the page loads, the useEffect will run the searchNFTs function with the "bored" query by default.
Our NFT explorer page should look like this:
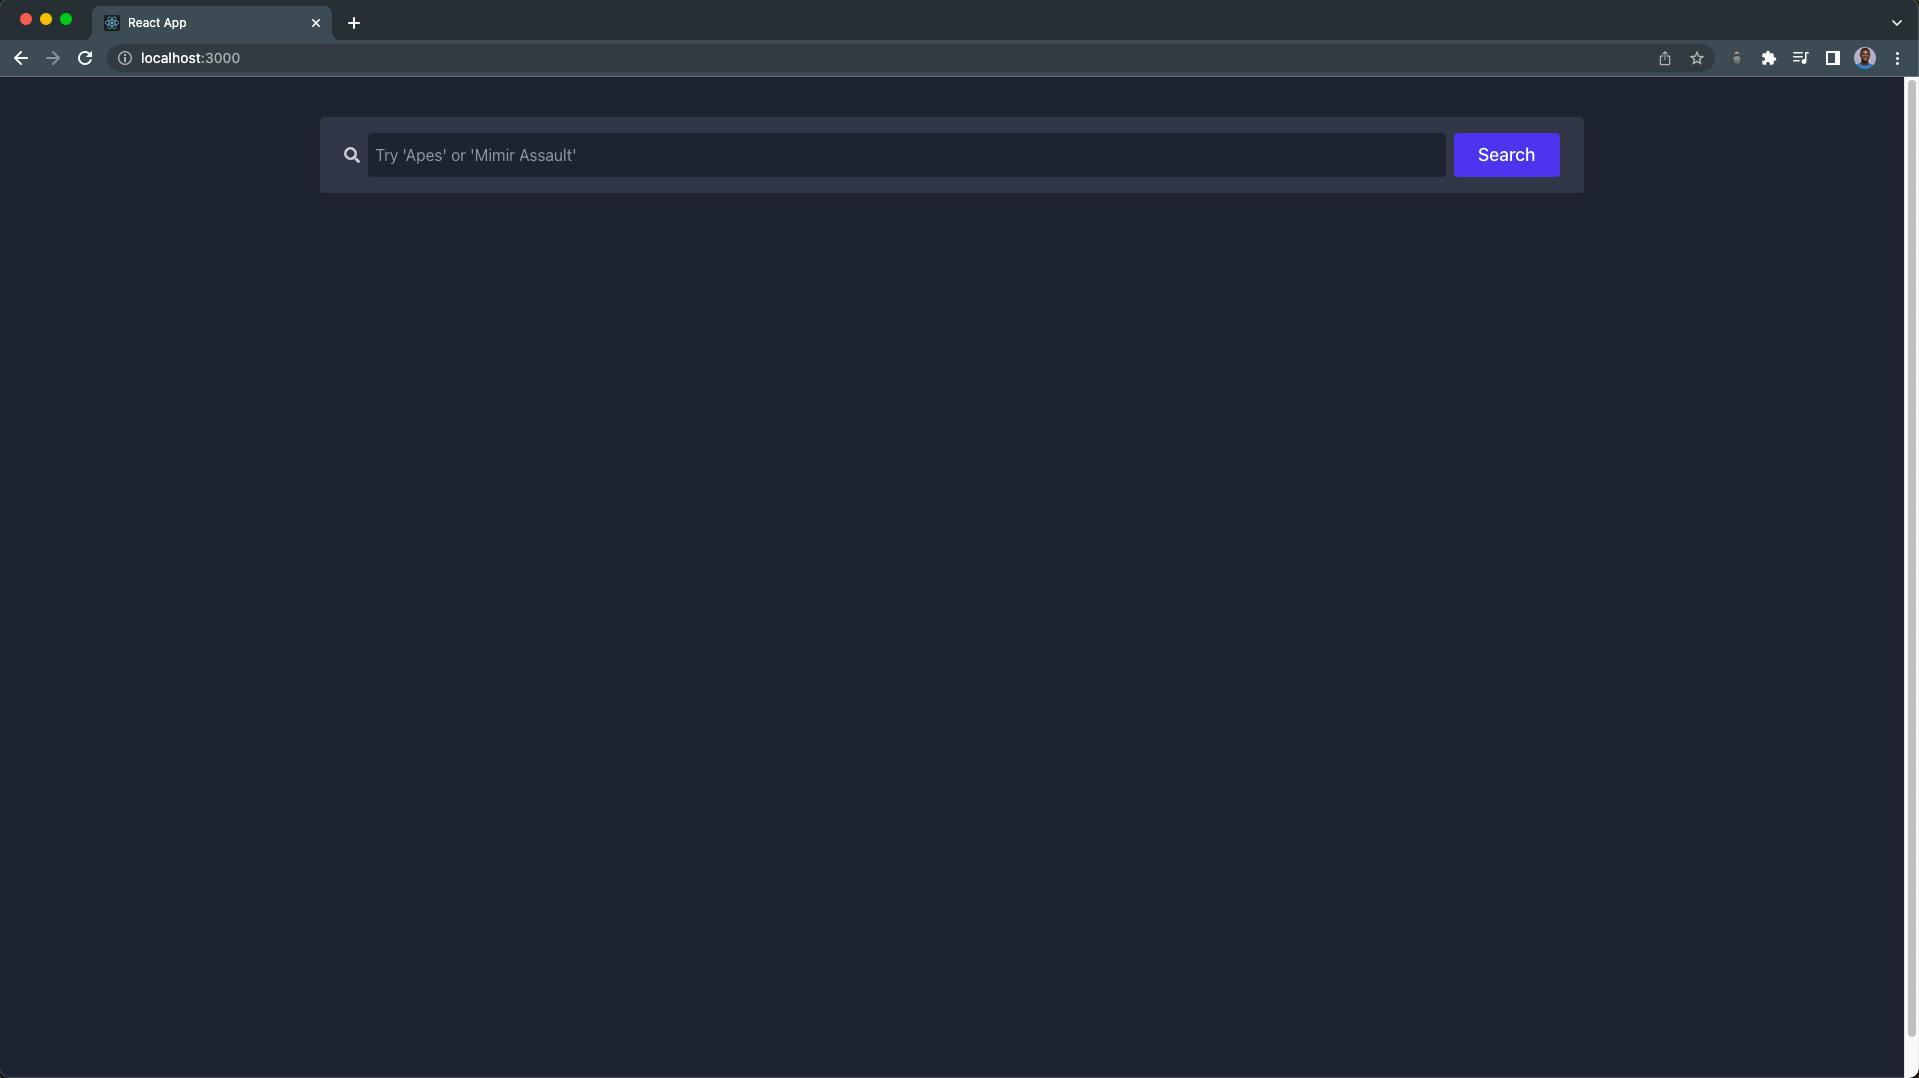
You can go ahead and search for any of your favorite NFTs.
Building the NFT Card
Now that we can search and retrieve NFTs from the blockchain, let's create the NftCardContainer.jsx component to render the NFT results in a card.
The NftCardContainer component will receive two props: the searchResult and the loading state of the search query.
In the Nfts folder:
- Create a new
NftCardContainer.jsxfile and paste the code below:
import React from "react";
import { NftCard } from "./NftCard";

export const NftCardContainer = ({ searchResult, loading }) => {
  return (
    <React.Fragment>
      <section
        className={`grid grid-cols-1 mt-7 sm:grid-cols-2 md:grid-cols-3 xl:grid-cols-4
       ${loading ? "opacity-5 transition-opacity" : null}`}
      >
        {searchResult?.length > 0 ? (
          searchResult?.map((nft, index) => <NftCard data={nft} key={index} />)
        ) : (
          <h3 className='dark:text-gray-400 mx-2'>
            No Result found. Try "apes"
          </h3>
        )}
      </section>
    </React.Fragment>
  );
};
Next, we'll create the NftCard component to display the image, name, the number of children the NFT has, the birthday, and the NFT generation.
Create a new NftCard.jsx file in your Nfts folder and paste the following code:
import React, { useState } from "react";
import DateFormater from "../../helper/dateFormater";
import NftDescriptionModal from "./NftDescriptionModal";

export const NftCard = ({ data }) => {
  const { metadata, token_address } = data;
  const {
    name,
    image_url_png,
    image,
    children,
    birthday,
    description,
    generation,
  } = metadata;

  const [showModal, setShowModal] = useState(false);

  const handleShowModal = () => {
    setShowModal(!showModal);
  };

  return (
    <React.Fragment>
      <div
        className='max-w-sm bg-white m-2 rounded shadow-md dark:bg-gray-700 dark:border-gray-400'
        onClick={handleShowModal}
      >
        <img
          className='p-8 h-64 w-full'
          src={image_url_png || image}
          alt={name}
        />
        <div className='px-5 pb-5'>
          <h5 className='text-xl capitalize h-16 font-semibold tracking-tight text-gray-900 dark:text-white'>
            {name.slice(0, 50)}
          </h5>

          {generation ? (
            <span className='bg-blue-100 text-blue-800 text-xs font-semibold px-2.5 py-0.5 rounded dark:bg-blue-200 dark:text-gray-800'>
              Generation {generation}
            </span>
          ) : null}

          <div className='flex flex-wrap justify-between items-center mt-5'>
            {children && (
              <span className='text-md font-bold text-gray-900 dark:text-white'>
                Children: {children?.length}
              </span>
            )}

            {birthday && (
              <div className='text-white bg-blue-600 hover:bg-blue-500 focus:ring-4 focus:outline-none focus:ring-blue-300 font-medium rounded text-sm px-5 py-2.5 text-center dark:bg-gray-600 dark:hover:bg-blue-600 dark:focus:ring-blue-300'>
                🎂
                <span className='ml-2'>
                  {DateFormater.yearMonthDate(birthday)}
                </span>
              </div>
            )}
          </div>
        </div>
      </div>

      {/* Nft description modal */}
      {showModal && (
        <NftDescriptionModal
          token_address={token_address}
          nftName={name}
          nftDescription={description}
          handleShowModal={handleShowModal}
        />
      )}
    </React.Fragment>
  );
};
From the code above, the NftCard component will receive a data prop, which contains the metadata and token_address of each NFT. Next, we're destructuring the NFT details from their metadata object.
Metadata is "data that provides information about other data" - Wikipedia
We want to display the generation and birthday information if the NFT has the data in their metadata. Also, the NFTs' birthdays are in ISO date format, we'll make use of a date helper to convert this into a Month, Day Year format.
Steps to create the DateFormater helper in your src folder:
- Create a new helper folder.
- In the
src/helperfolder, create a newdateFormater.jsfile and paste the code below:
// format ISOdate date to Month, Day Year
const yearMonthDate = (ISOdate) => {
  const date = new Date(ISOdate);
  const monthName = date.toLocaleString("default", { month: "short" });
  return (
    monthName + ", " + date.getDate() + " " + date.getFullYear()
  );
};

const DateFormater = {
  yearMonthDate,
};

export default DateFormater;
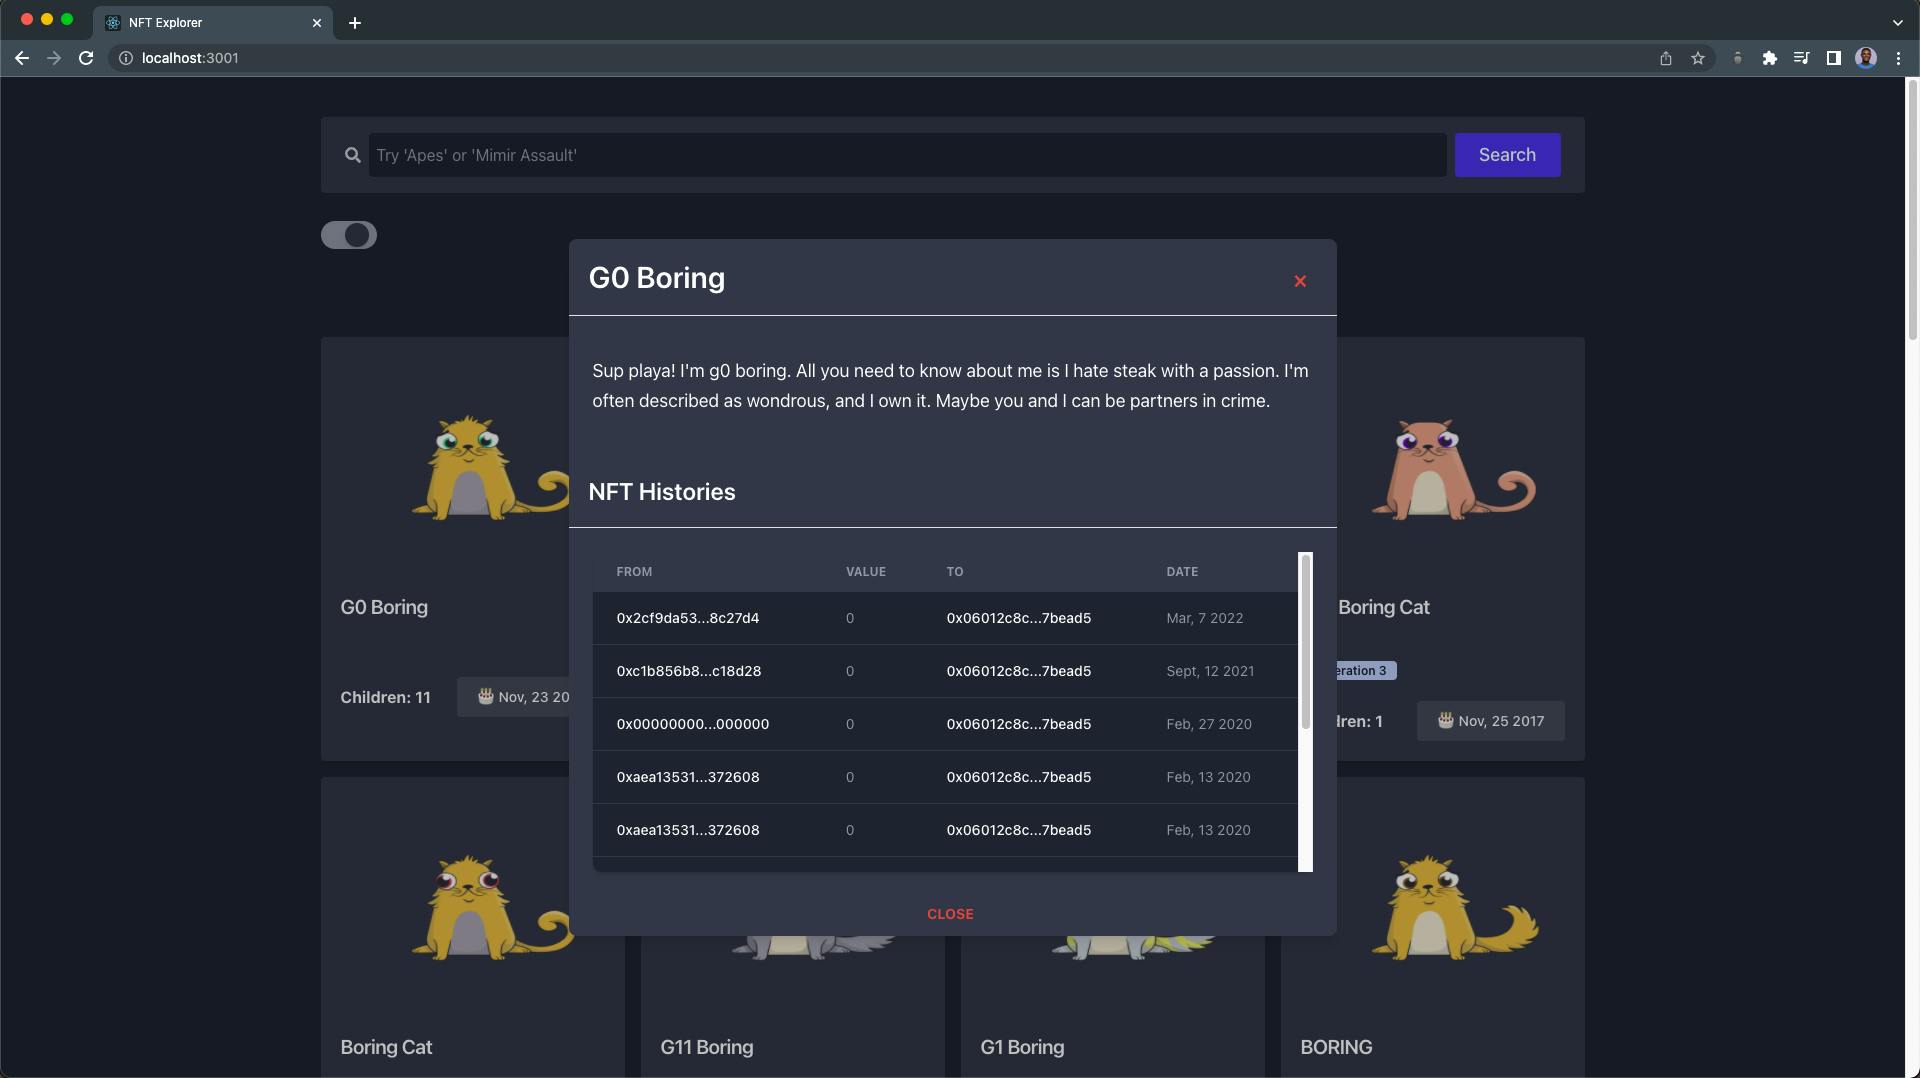
Next, the NftDescriptionModal component is the modal that pops up when an NFT is clicked, and it receives and displays the name, description, and the last 10 transfer transaction histories of the NFT.
Create a new NftDescriptionModal.jsx file in your Nfts folder and paste the code below:
import React from "react";
import { NftHistoryTable } from "./NftHistoryTable";

export default function NftDescriptionModal({
  nftName,
  nftDescription,
  handleShowModal,
  token_address,
}) {
  return (
    <React.Fragment>
      <div className='justify-center items-center flex overflow-x-hidden overflow-y-auto fixed inset-0 z-50 outline-none focus:outline-none pt-5'>
        <div className='relative my-6 mx-auto w-9/12 max-w-3xl'>
          {/*content*/}
          <div className='border-0 rounded-lg dark:bg-gray-700 shadow-lg relative flex flex-col w-full bg-white outline-none focus:outline-none'>
            {/*header*/}
            <div className='flex items-start justify-between p-5 border-b border-solid border-blueGray-200 rounded-t'>
              <h3 className='text-3xl font-semibold dark:text-white capitalize'>
                {nftName}
              </h3>
              <button
                className='p-1 ml-auto dark:bg-gray-700 bg-transparent border-0 text-black float-right text-3xl leading-none font-semibold outline-none focus:outline-none'
                onClick={handleShowModal}
              >
                <span className='bg-transparent text-red-500 h-6 w-6 text-2xl block outline-none focus:outline-none'>
                  ×
                </span>
              </button>
            </div>
            {/*body*/}
            <div className='relative p-6 flex-auto'>
              <p className='my-4 dark:text-white text-lg leading-relaxed'>
                {nftDescription}
              </p>
            </div>
            <h3 className='p-5 text-2xl font-semibold dark:text-white'>
              NFT Histories
            </h3>
            <div className='p-6 border-t border-solid border-blueGray-200 rounded-b'>
              <NftHistoryTable nftAddress={token_address} />
            </div>
            <button
              className='text-red-500 background-transparent font-bold uppercase px-6 py-2 text-sm outline-none focus:outline-none mr-1 mb-1 ease-linear transition-all duration-150'
              type='button'
              onClick={handleShowModal}
            >
              Close
            </button>
          </div>
        </div>
      </div>
      <div className='opacity-25 fixed inset-0 z-40 bg-black'></div>
    </React.Fragment>
  );
}
Building the NFT History Component
In this section, we'll use the getNFTTransfers endpoint to retrieve the last 10 transfer transaction histories of any selected NFT, using their token address, which is passed as a prop to the NftHistoryTable component.
Create a new NftHistoryTable.jsx file in your Nfts folder and paste the code below:
import Moralis from "moralis";
import React, { useEffect, useState } from "react";
import DateFormater from "../../helper/dateFormater";

export const NftHistoryTable = ({ nftAddress }) => {
  // history state
  const [history, setHistory] = useState(null);

  const fetchNftHistory = async () => {
    try {
      const options = {
        address: nftAddress,
        limit: "10",
      };
      const transfersNFT = await Moralis.Web3API.account.getNFTTransfers(
        options
      );
      setHistory(transfersNFT.result);
    } catch (error) {
      alert(error);
    }
  };

  useEffect(() => {
    fetchNftHistory();
  }, [nftAddress]);

  return (
    <div className='relative overflow-y-scroll h-80 shadow-md sm:rounded-lg w-full'>
      {history ? (
        <table className='w-full text-sm text-left text-gray-500 dark:text-gray-400'>
          <thead className='text-xs text-gray-700 uppercase bg-gray-50 dark:bg-gray-700 dark:text-gray-400'>
            <tr>
              <th scope='col' className='px-6 py-3'>
                From
              </th>
              <th scope='col' className='px-6 py-3'>
                Value
              </th>
              <th scope='col' className='px-6 py-3'>
                To
              </th>
              <th scope='col' className='px-6 py-3'>
                Date
              </th>
            </tr>
          </thead>
          <tbody>
            {history.length > 0 ? (
              history.map(
                (
                  { from_address, value, to_address, block_timestamp },
                  index
                ) => {
                  return (
                    <tr
                      className='bg-white border-b dark:bg-gray-800 dark:border-gray-700 hover:bg-blue-600 hover:text-white dark:hover:bg-gray-600'
                      key={index}
                    >
                      <td className='px-6 py-4 font-medium text-gray-900 dark:text-white whitespace-nowrap'>
                        {from_address.substring(0, 10)}...
                        {from_address.substring(12, 18)}
                      </td>
                      <td className='px-6 py-4'>{value}</td>
                      <td className='px-6 py-4 font-medium text-gray-900 dark:text-white whitespace-nowrap'>
                        {to_address.substring(0, 10)}...
                        {to_address.substring(12, 18)}
                      </td>
                      <td className='px-6 py-4'>
                        {DateFormater.yearMonthDate(block_timestamp)}
                      </td>
                    </tr>
                  );
                }
              )
            ) : (
              <tr className='bg-white border-b dark:bg-gray-800 dark:border-gray-700 hover:bg-gray-50 dark:hover:bg-gray-600'>
                <th
                  scope='row'
                  className='px-6 py-4 font-medium text-gray-900 dark:text-white whitespace-nowrap'
                  colSpan={4}
                >
                  No History Found
                </th>
              </tr>
            )}
          </tbody>
        </table>
      ) : (
        <div className='text-center text-gray-500 p-5 dark:text-gray-400'>
          Loading histories...
        </div>
      )}
    </div>
  );
};
Next, import the NftCardContainer component inside of the NftExplore.jsx component:
import { NftCardContainer } from "../components/Nfts/NftCardContainer";
Finally, render the NftCardContainer.jsx component like this:
{/* Render below the Nft Search Bar component*/}
<NftCardContainer searchResult={searchResult} loading={loading} />
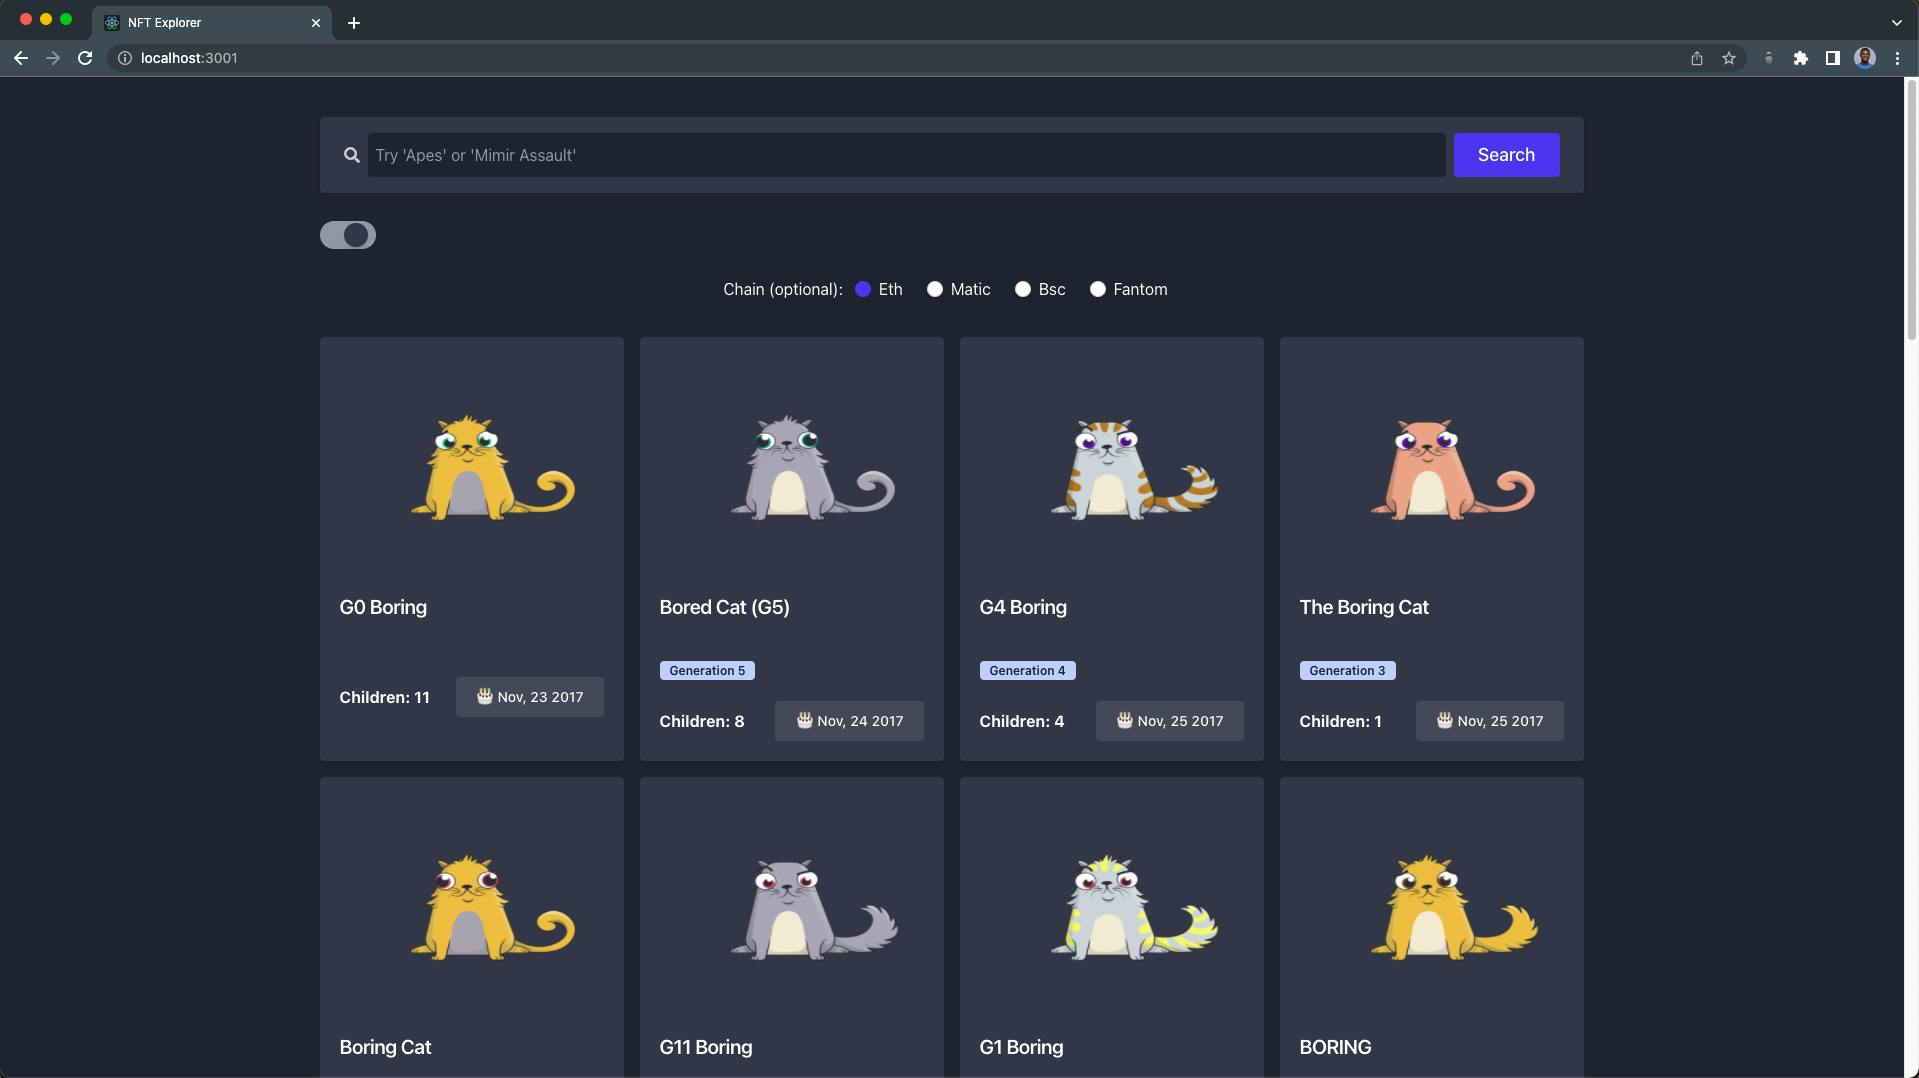
Our NFT explorer page should look and function like this:
In the video demonstration above, the explorer page displays 30 bored NFTs by default and renders the user's new search result. The description and history modal will pop up when an NFT card is clicked.
Go ahead and search for any NFT of your choice 🔎
Building the NFT Chain Component
Up to this section, we're only searching from the Ethereum chain. In this section, we're going to create the NFT chain radio input component. This will allow the user to search for NFTs from different blockchains.
Our NFT explorer will support the following chains:
- eth (default) - Ethereum chain
- matic - Polygon chain
- bsc - Binance Smart chain
- fantom - Fantom chain
You can check out the complete lists of supported chains on Moralis here.
In our Nfts folder:
- Create a new
NftChainRadio.jsxfile, and paste the code below inside:
import React from "react";

export const NftChainRadio = ({ handleSelectedChain }) => {
  const chains = ["eth", "matic", "bsc", "fantom"];
  return (
    <React.Fragment>
      <div className='flex justify-center mt-7'>
        <h3 className='text-gray-700 dark:text-white'>Chain (optional):</h3>

        {chains.map((chainNickname) => {
          return (
            <div
              className='form-check form-check-inline px-3'
              key={chainNickname}
            >
              <input
                className='form-check-input form-check-input appearance-none rounded-full h-4 w-4 border border-gray-300 bg-white checked:bg-blue-600 checked:border-blue-600 focus:outline-none transition duration-200 mt-1 align-top bg-no-repeat bg-center bg-contain float-left mr-2 cursor-pointer'
                type='radio'
                name='chain'
                value={chainNickname}
                id={chainNickname}
                onChange={handleSelectedChain}
              />
              <label
                className='form-check-label inline-block text-gray-800 dark:text-white capitalize'
                htmlFor={chainNickname}
              >
                {chainNickname}
              </label>
            </div>
          );
        })}
      </div>
    </React.Fragment>
  );
};
In the code above, we're displaying the chains in a radio input by looping through the array of supported chains. The NftChainRadio component accepts a handleSelectedChain prop, a function that keeps track of the user's selected chain (see Building the NFT Search Bar).
Next, import the NftChainRadio component inside of the NftExplore.jsx page component:
import { NftChainRadio } from "../components/Nfts/NftChainRadio";
Next, add the handleSelectedChain function:
const handleSelectedChain = (e) => {
    setchain(e.target.value);
  };
Finally, render the NftChainRadio above the NftCardContainer component like this:
<NftChainRadio handleSelectedChain={handleSelectedChain} />

<NftCardContainer searchResult={searchResult} loading={loading} />
Now, our NFT explorer should look and function like this:
You can find the complete code gist for this section (NftExplore.jsx) here.
Building the Theme Switch Component
The next and final component in our NFT explorer application is the ThemeSwitch component. We’ll use this to toggle between the dark and light theme in our NFT explorer.
In your components folder:
- Create a new
ThemeSwitch.jsxfile and paste the code below:
components/ThemeSwitch.jsx
import React, { useEffect, useState } from "react";

export const ThemeSwitch = ({ settheme }) => {
  const [toggle, setToggle] = useState(true);
  const isDarkToggleClass = "transform translate-x-5 bg-gray-500";

  const handleToggle = () => {
    localStorage.setItem("isDark", !toggle);
    setToggle(!toggle);
    settheme(!toggle);
  };

  useEffect(() => {
    const isDark = JSON.parse(localStorage.getItem("isDark")) || true;

    if (isDark) {
      setToggle(true);
      settheme(true);
    } else {
      setToggle(false);
      settheme(false);
    }
  }, []);

  return (
    <React.Fragment>
      <section className='flex items-center mt-7'>
        <div
          className='mx-2 md:w-14 md:h-7 w-12 h-6 flex items-center bg-gray-400 rounded-full p-1 cursor-pointer'
          onClick={handleToggle}
        >
          <div
            className={
              "bg-gray-700 md:w-6 md:h-6 h-5 w-5 rounded-full shadow-md transform duration-300 ease-in-out" +
              (toggle ? isDarkToggleClass : null)
            }
          ></div>
        </div>
      </section>
    </React.Fragment>
  );
};
In the code above, we're storing the users' preferred theme in their browser localStorage and updating the theme state in the App.js component using the settheme from Step 7. This will result in toggling between the current theme and the other theme.
Next, import the ThemeSwitch.jsx component in NftExplore.jsx:
import { ThemeSwitch } from "../components/ThemeSwitch";
Render the ThemeSwitch component below the NftSearchBar.jsx component like this:
<ThemeSwitch settheme={settheme} />
Our theme switch component should function like this:
Hooray 🎉🎉🎉
Our NFT explorer is fully built and below is the demo video of the final output and functionality:
Congratulations 👏 on making it to the end of this tutorial, you can find the complete source code for our NFT Explorer tutorial here.
Bringing It Together
This Moralis build allows you to create dApps faster and makes interacting with multiple blockchains easier from your dApp by providing the web3 NFT APIs and SDK.
In this tutorial, we've learned how to set up a Moralis cloud server and work with the Moralis React SDK and Moralis web3 NFT API.
Where do you go next?
Now that you know how to build an NFT explorer and have seen how you can interact with blockchain using web3 NFT API:
- Learn How to Build a Web3 Login with Web3.js Library here.
If you're interested in learning web3 as a developer or want to brush up your knowledge on web3 technologies, we've got you covered on our web3 blog!
You can also find more educational articles about web3 in general, NFTs, DAOs, etc. on our web3 blog here.