


Solidity Tutorial - How to Build and Deploy an NFT Minting dApp with Solidity and React 🛠


Table of contents
- Introduction
- Prerequisites
- What We're Building
- How It Works
- 1. Minters will log into the dApp by connecting their wallet (e.g. Metamask).
- 2. They will then supply the name, image, and description of the digital asset they want to mint.
- 3. Our NFT minter will turn the digital asset into an NFT when they click the "Mint NFT" button.
- 4. All minted NFTs will be listed on the OpenSea Testnet Marketplace, where everyone can view them and can also be put on sale by their owner.
- Demo
- Step 1 - Writing the NFT Minting Smart Contract
- Step 2 - Compiling the NFT Minting Smart Contract
- Step 3 - Getting a Test Ether Faucet
- Step 4 - Deploying the NFT Minting Smart Contract
- Step 5 - Setting up a Moralis Testnet Server
- Step 6 - Getting Moralis Server Details
- Step 7 - Creating a New Project with Create React App
- Step 8 - Installing Moralis React SDK
- Step 9 - Initializing Moralis SDK in React
- Step 9 - Installing Web3.js
- Step 10 - Rewiring React to Work With Web3.js
- Step 11 - Building the NFT Minter App
- Step 12 - Creating the Connect Wallet Page Component
- Step 13 - Creating the NFT Minter Page Component
- Step 14 - Creating the Success Page Component
- Step 15 - Testing Our NFT Minter
- You Made It 👏
- Where Do You Go Next?
Introduction
This tutorial will guide you on how to build and deploy an NFT minting dApp with a Solidity smart contract and ReactJS frontend.
If you're new to writing smart contracts with Solidity, we recommend you to check out How to build your first Smart Contract before moving on with this tutorial.
Prerequisites
This tutorial uses the following technologies:
- React
- Remix IDE
- Solidity
- Web3.js
- Moralis React SDK
- HTML and CSS
Before you start with this tutorial, you should have an intermediary understanding of React components, props and what smart contracts are.
What We're Building
We'll create and deploy an NFT minting smart contract written in Solidity that’ll be linked to a React frontend application.
An NFT minter or generator is a decentralized application that converts a digital asset (e.g. piece of art) into an NFT, which is then accessible on an NFT marketplace like OpenSea, where the owner can put it for sale.
Upon completing this tutorial, you'll have an understanding of how NFTs are programmatically created, stored, and accessed on an NFT marketplace.
How It Works
Check out the basic flow of how our NFT minting dApp will function below:
1. Minters will log into the dApp by connecting their wallet (e.g. Metamask).
2. They will then supply the name, image, and description of the digital asset they want to mint.
3. Our NFT minter will turn the digital asset into an NFT when they click the "Mint NFT" button.

4. All minted NFTs will be listed on the OpenSea Testnet Marketplace, where everyone can view them and can also be put on sale by their owner.

In this tutorial, we’re using Testnet environments, although you can apply the same steps when you're ready to deploy to a Mainnet network.
A Testnet network is merely a functional prototype that works with fake cryptocurrencies for a blockchain project, while the Mainnet network is a fully built blockchain platform that allows users to perform real cryptocurrency transactions on the blockchain.
At the end of this tutorial, you'll have a working dApp that allows anyone to mint their digital assets into an NFT.
Demo
Below is the demo video of the NFT minting dApp we're going to build at the end of this tutorial:
You can also check out the live version of what we're building here.
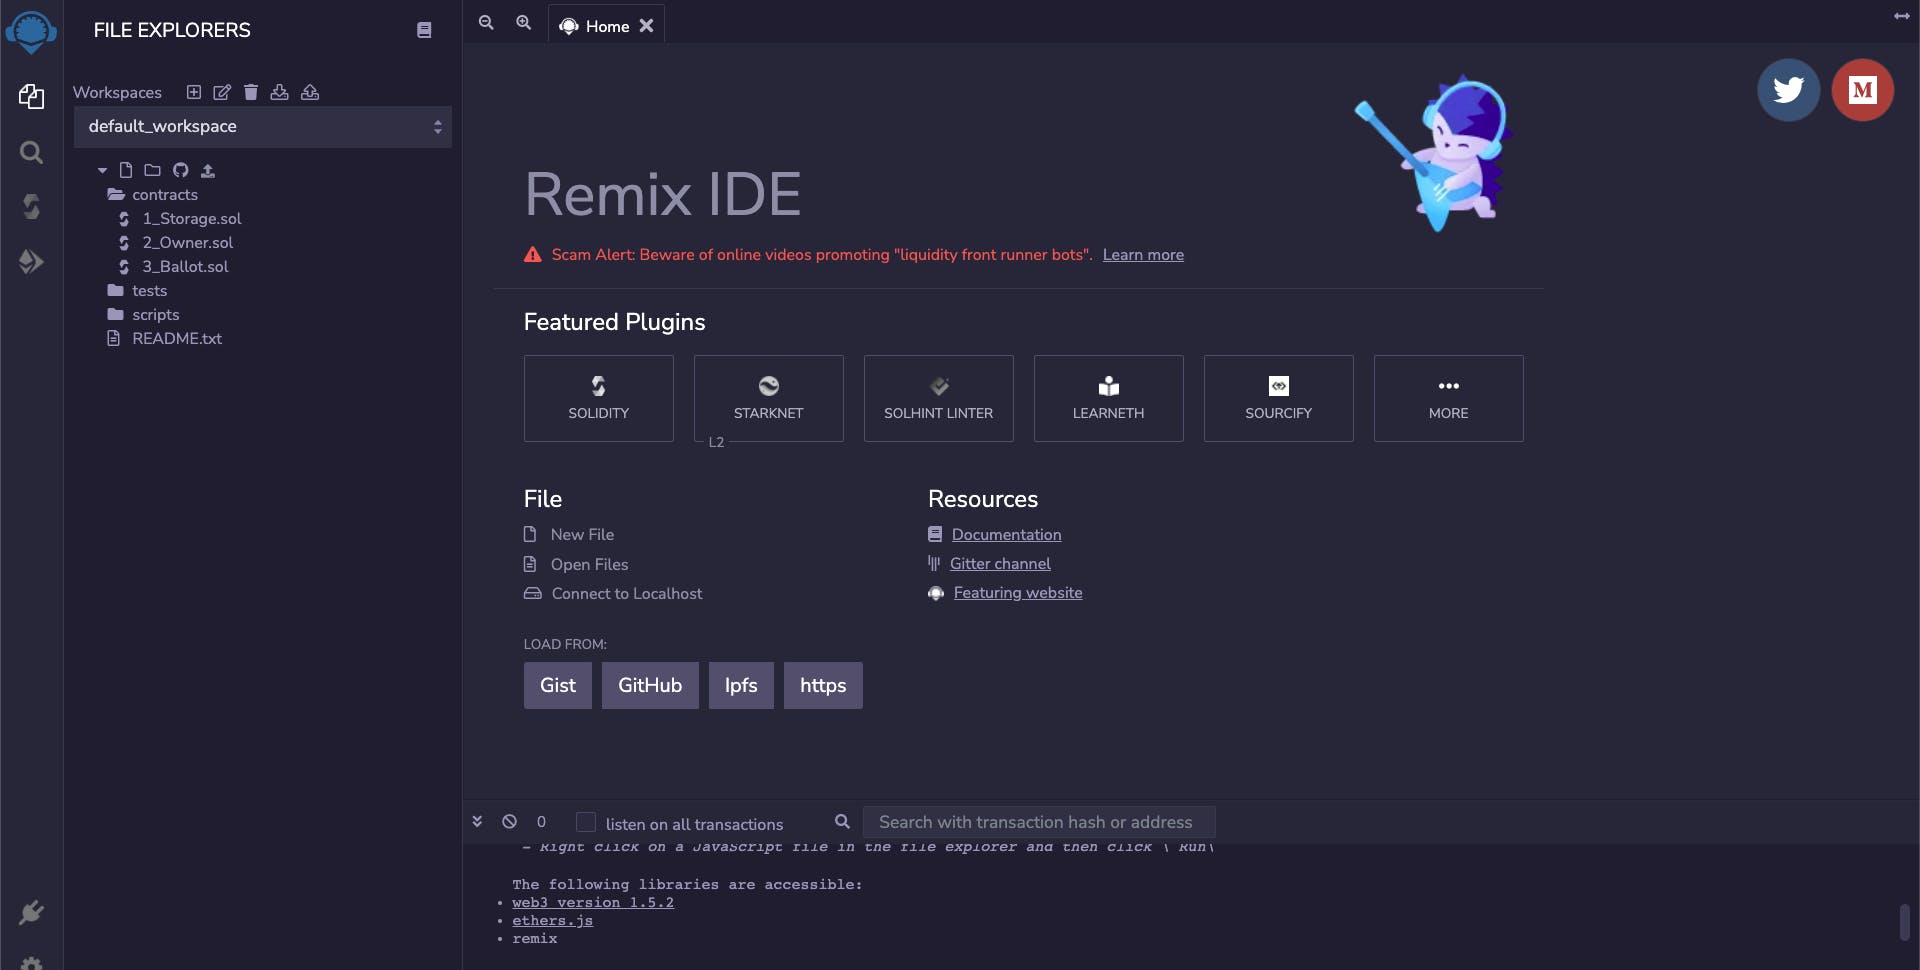
Step 1 - Writing the NFT Minting Smart Contract
In this step, we're going to create a basic Nft_Minter smart contract to accept and mint the digital asset that'll be sent from the frontend as tokenURI.
To begin, open the Remix IDE in your browser:
Next, under the contracts folder, create a new Nft_Minter.sol file as shown below:
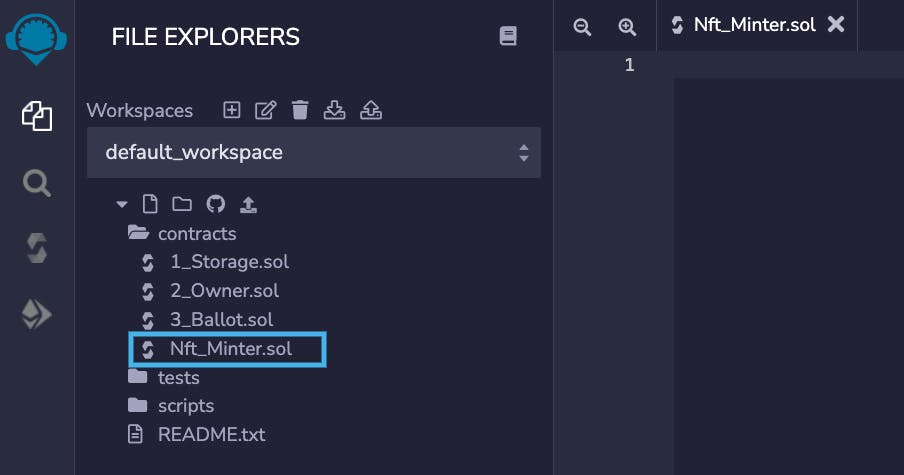
Then, inside the Nft_Minter.sol file, copy and paste the Solidity code below:
// 1. SPDX-License-Identifier: MIT
pragma solidity ^0.8.9;

// 2. Importing web3 Libraries from OpenZeppelin
import "@openzeppelin/contracts/token/ERC721/extensions/ERC721URIStorage.sol";
import "@openzeppelin/contracts/utils/Counters.sol";

// 3. Creating Nft_Minter Smart Contract with storage ability
contract Nft_Minter is ERC721URIStorage {
   // 4. Initializing Counter utility
   using Counters for Counters.Counter;

   // 5. Setting Counters as token id
   Counters.Counter private _tokenIds;

   // 6. Constructors with Contract token name and symbol
   constructor() ERC721("MyNFT", "MNFT") {}

   // 7. Solidity function to mint Nft
   function mintToken(string memory tokenURI) public returns (uint256) {

      // 7.1 Increase the previous token id by 1
      _tokenIds.increment();

      // 7.2 Assign the new id in 7.1 to the new Nft
      uint256 newTokenId = _tokenIds.current();

      // 7.3 Mint the Nft and tie the sender address as owner
      _mint(msg.sender, newTokenId);

      // 7.4 Set the token URI for the new Nft
      _setTokenURI(newTokenId, tokenURI);

      return newTokenId;
   }
}
Here’s a breakdown of the code above:
- We're importing the
ERC721URIStorageand theCountersweb3 libraries from OpenZeppelin (An open-source platform for developing secure smart contracts).
A Solidity best practice is to name your smart contracts the same name as your source file.
Next, we're extending our smart contract by using the
ERC721URIStoragecontract, which will allow our smart contract to store the NFT metadata when it’s minted.More information regarding the ERC721URIStorage may be found here.
The Counter utility function keeps track of all token ids that have been minted, and assigns a new id to all newly minted tokens by incrementing the previous token id by 1.
The token ids are 256-bit integers ranging from 0 to 115792089237316195423570985008687907853269984665640564039457584007913129639935. This ensures that we will never run out of ids while using the Counter utility function.
In the smart contract constructor
constructor() ERC721("MyNFT", "MNFT") {}, we supply the name and symbol of our contract token; you can rename the name and symbol of the contract to suit your dApp.Finally, we're creating a
mintTokenfunction that’ll take atokenURIas a parameter and return a non-negative 256-bit integer.The
_tokenIds.increment();method in themintTokenfunction will increment the previous token by 1. We can retrieve the current id by using the_tokenIds.current();method, which will be assigned as the new token id.The
_mint()function is an internal function that accepts two arguments: the owner’s address and the token id, and is used to mint a new NFT at the specified address. The specified address, or the owner's wallet address, will be provided from the frontend and is obtained using our smart contract'smsg.sendermethod.
- Lastly, we return the
newTokenIdafter using the_setTokenURL()function to set thetokenURlfor the new NFT.
You should check this out for a detailed explanation of Solidity syntax.
Step 2 - Compiling the NFT Minting Smart Contract
Remix IDE allows us to compile our Solidity smart contracts directly from our browser.
Ensure to save your source file with
ctrl + s.If you notice a red flag on the pragma directive like this:
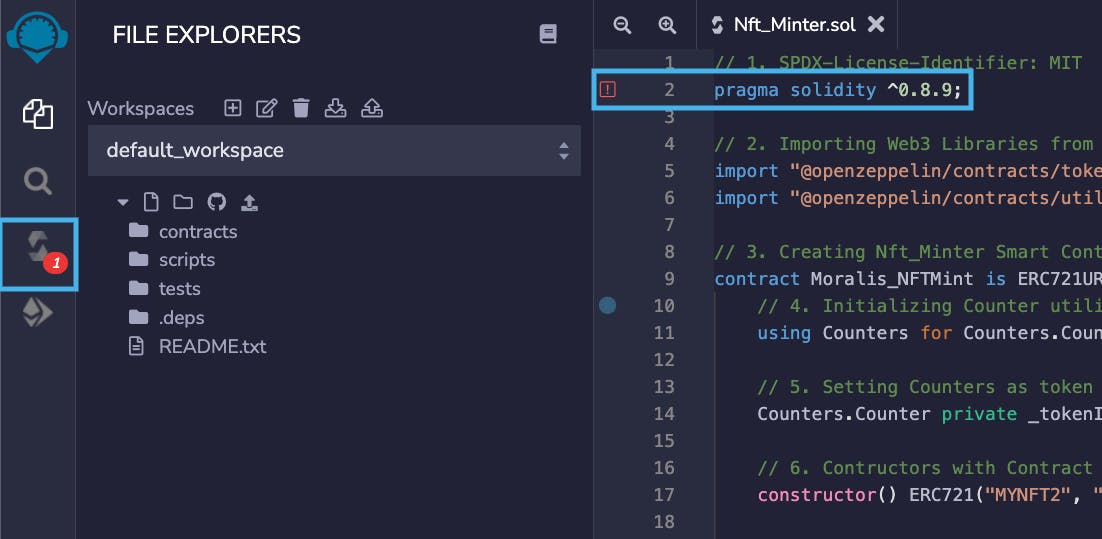
It means that the Remix IDE compiler is not set to the specified Solidity version in our source code.
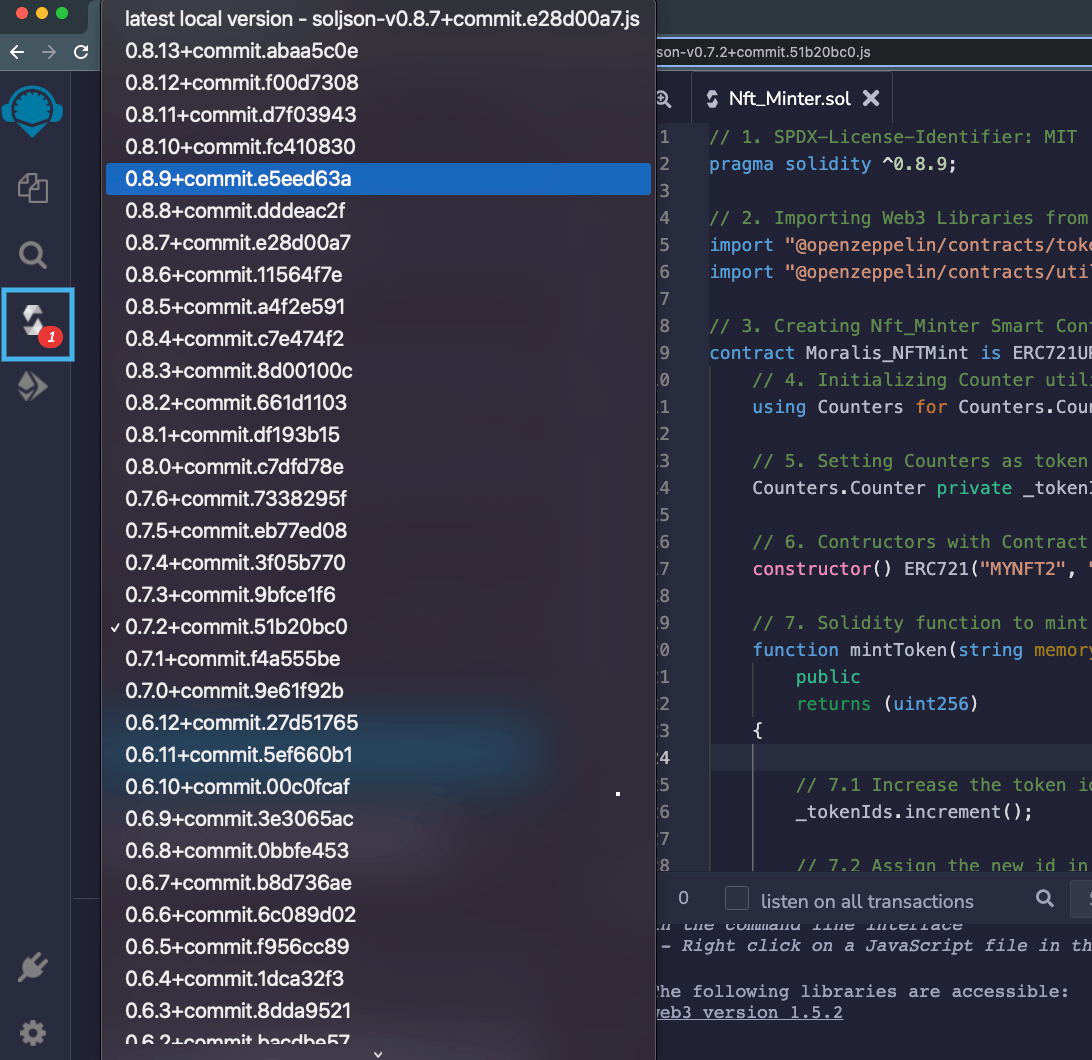
To fix this, click on the Solidity compiler icon and select the Solidity version you're using for your smart contract:
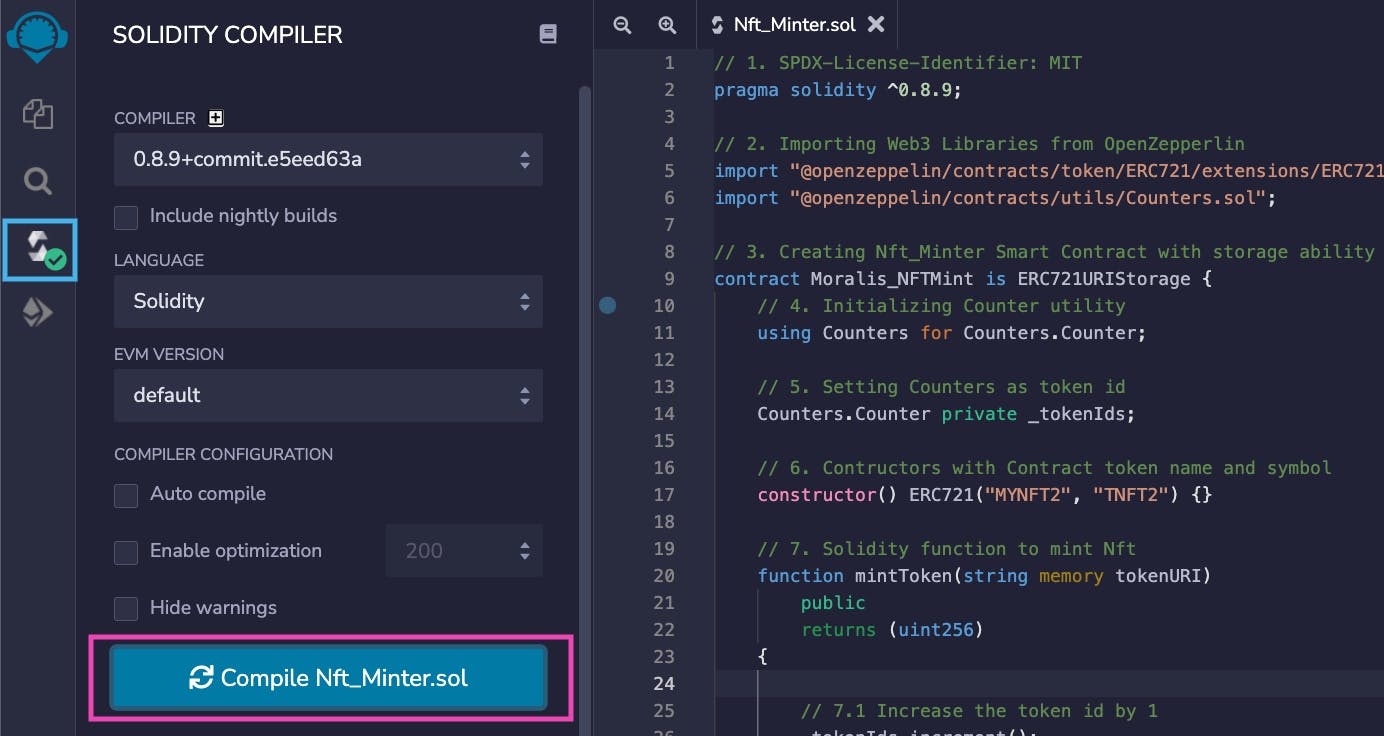
Finally, save your source file with ctrl + s or click on the compile button. Your Solidity compiler icon should change from red flag to green as shown below:
Step 3 - Getting a Test Ether Faucet
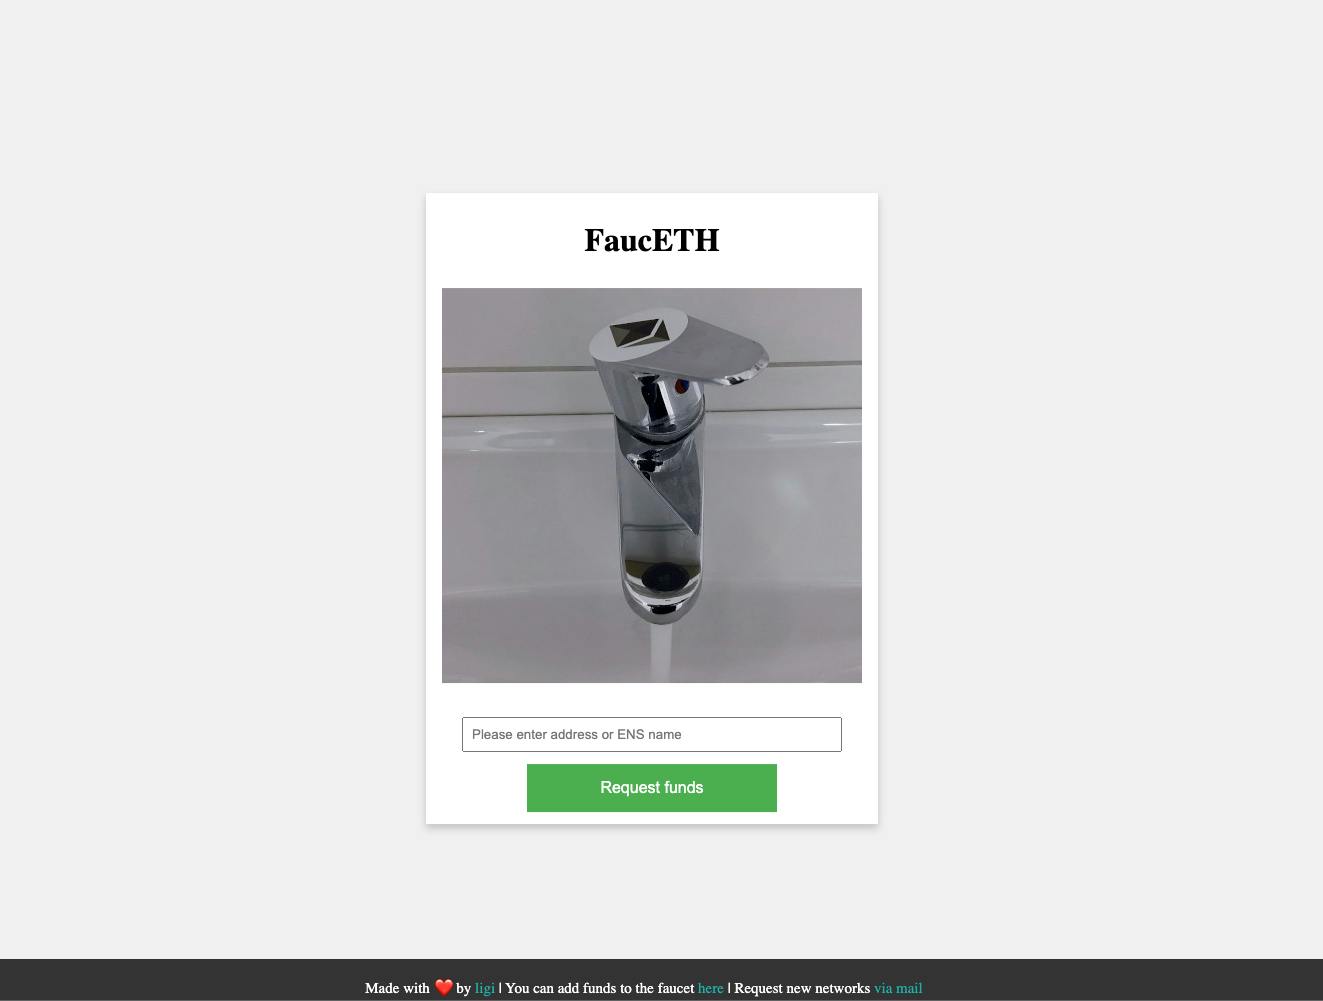
Before we can deploy our smart contract on the Rinkeby Ethereum blockchain, we need to have Testnet ether in our wallet to deploy and interact with the smart contract. We're going to use FaucETH, a website in which you can transfer some free fake ether to your wallet.
Make sure to have Metamask installed on your browser or install it here before you proceed.
- Visit https://fauceth.komputing.org in the browser where Metamask is installed.
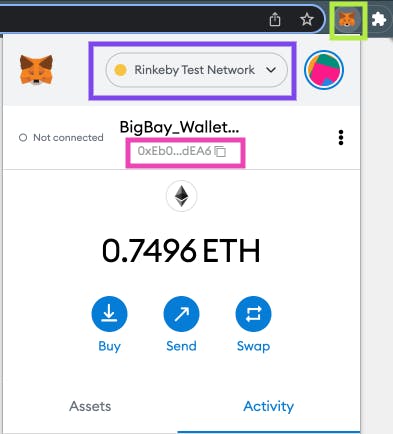
- Next, click on your Metamask icon, make sure to select the "Rinkeby Test Network" and copy your wallet address.
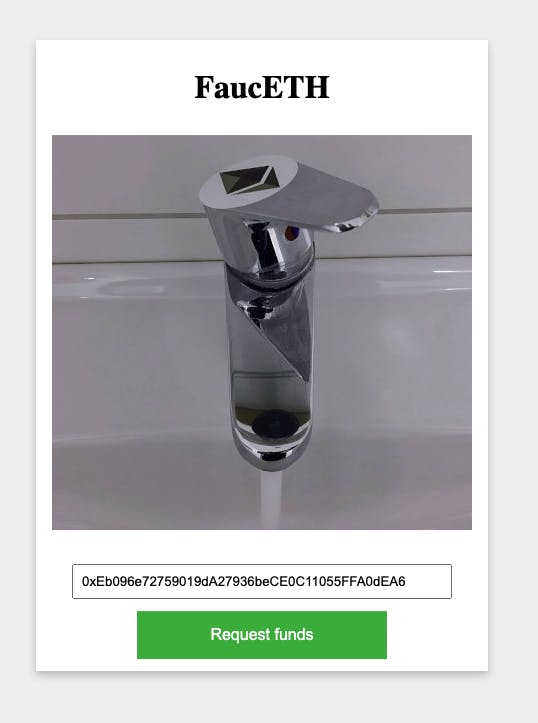
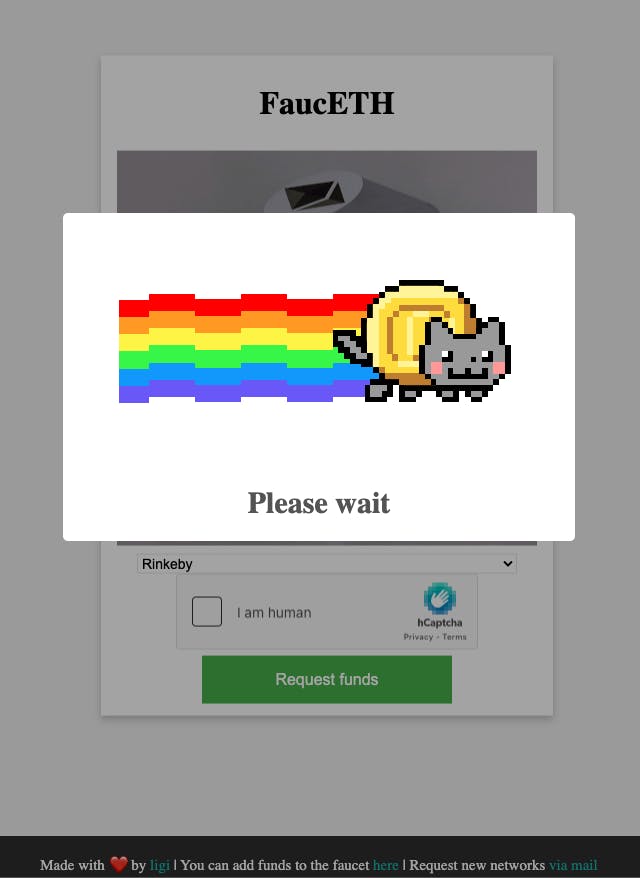
- Next, paste your wallet address inside of the input box as shown below:
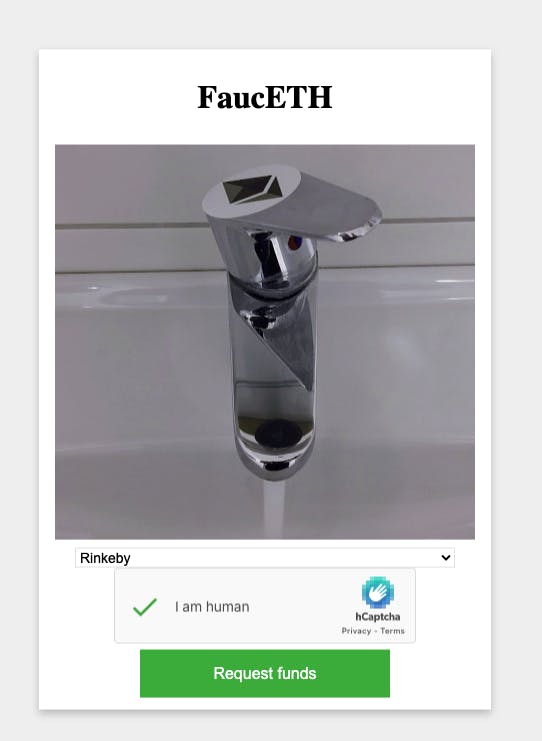
- Select the Rinkeby option, solve the captcha, and click on the "Request Fund" button to process your free ETH:
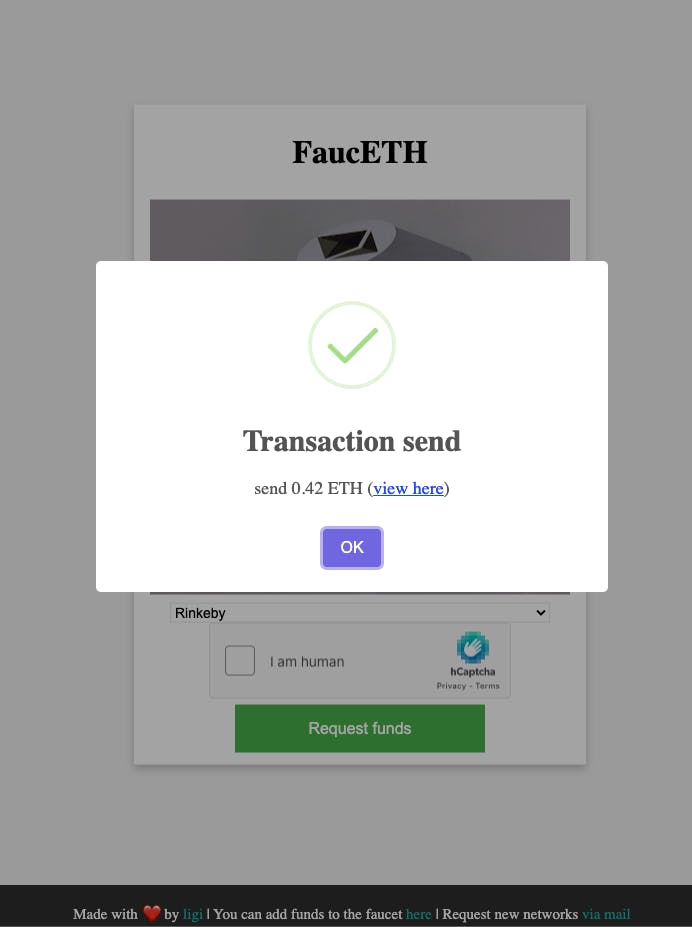
Wait for the page to process your request (this could take a few minutes).
If the requested fund is successful, you'll be notified as shown below:
Next, check your Metamask wallet. Your wallet should be credited with 0.45ETH, like this:
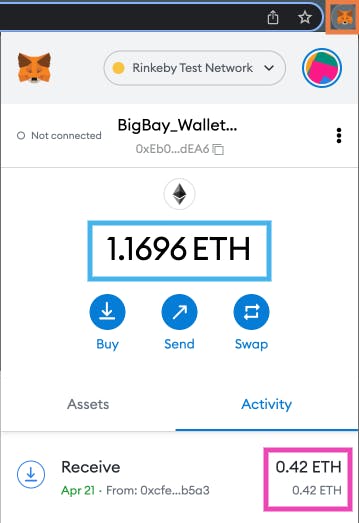
Note: You can only request free ether every 60 minutes.
Step 4 - Deploying the NFT Minting Smart Contract
After compiling the Nft_Minter smart contract (see Step 2) and funding your wallet with free fake ETH, the next thing to do is to deploy the smart contract on the Rinkeby Ethereum blockchain.
Rinkeby is an Ethereum Testnet network that is used for blockchain development testing before deploying on the Mainnet network.
Follow the steps below to deploy your smart contract on the Rinkeby Ethereum blockchain:
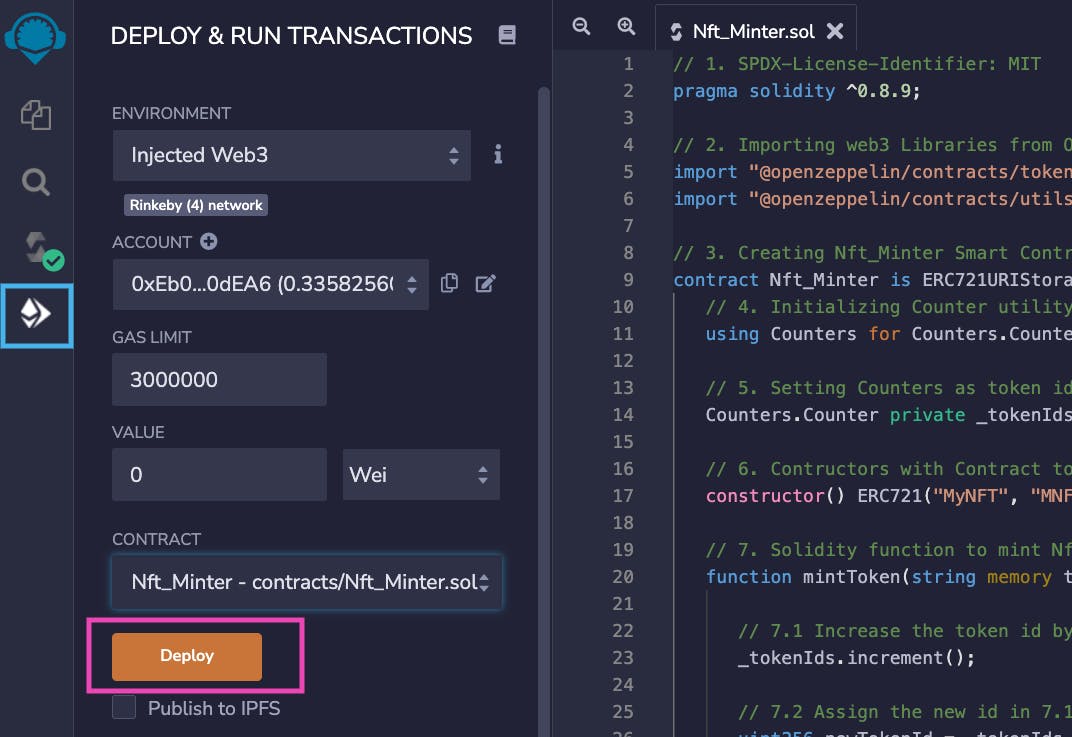
Click on the "Deploy & Run Transaction" icon from the sidebar.
Select the "Injected Web3" as the environment.
Choose your smart contract in the "Contract" section.
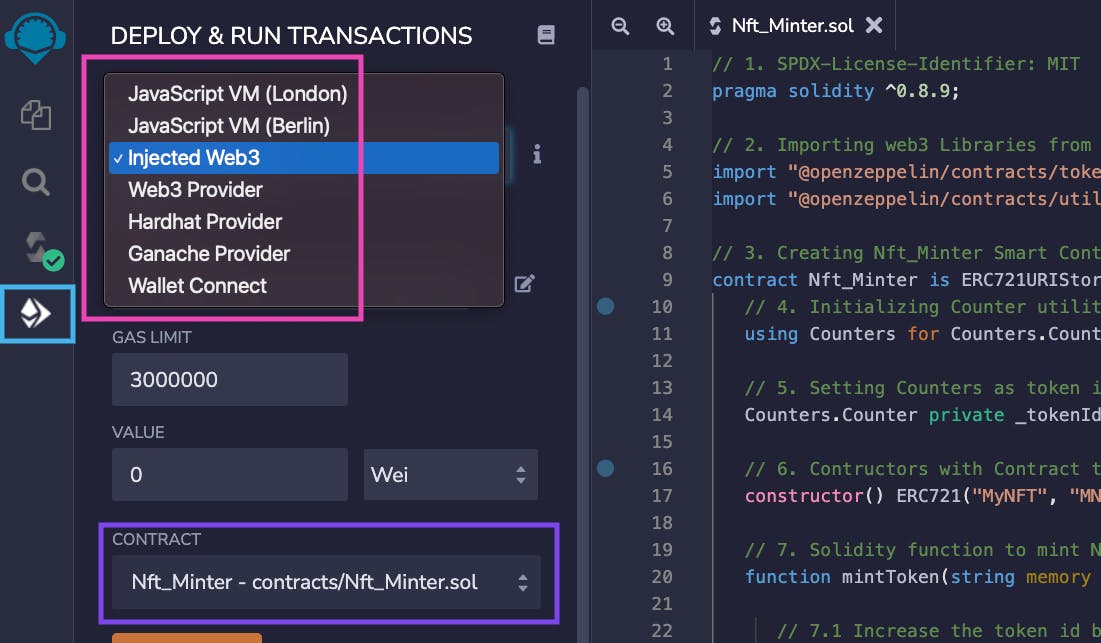
Leave the other default options as they are, and click on the "Deploy" button:
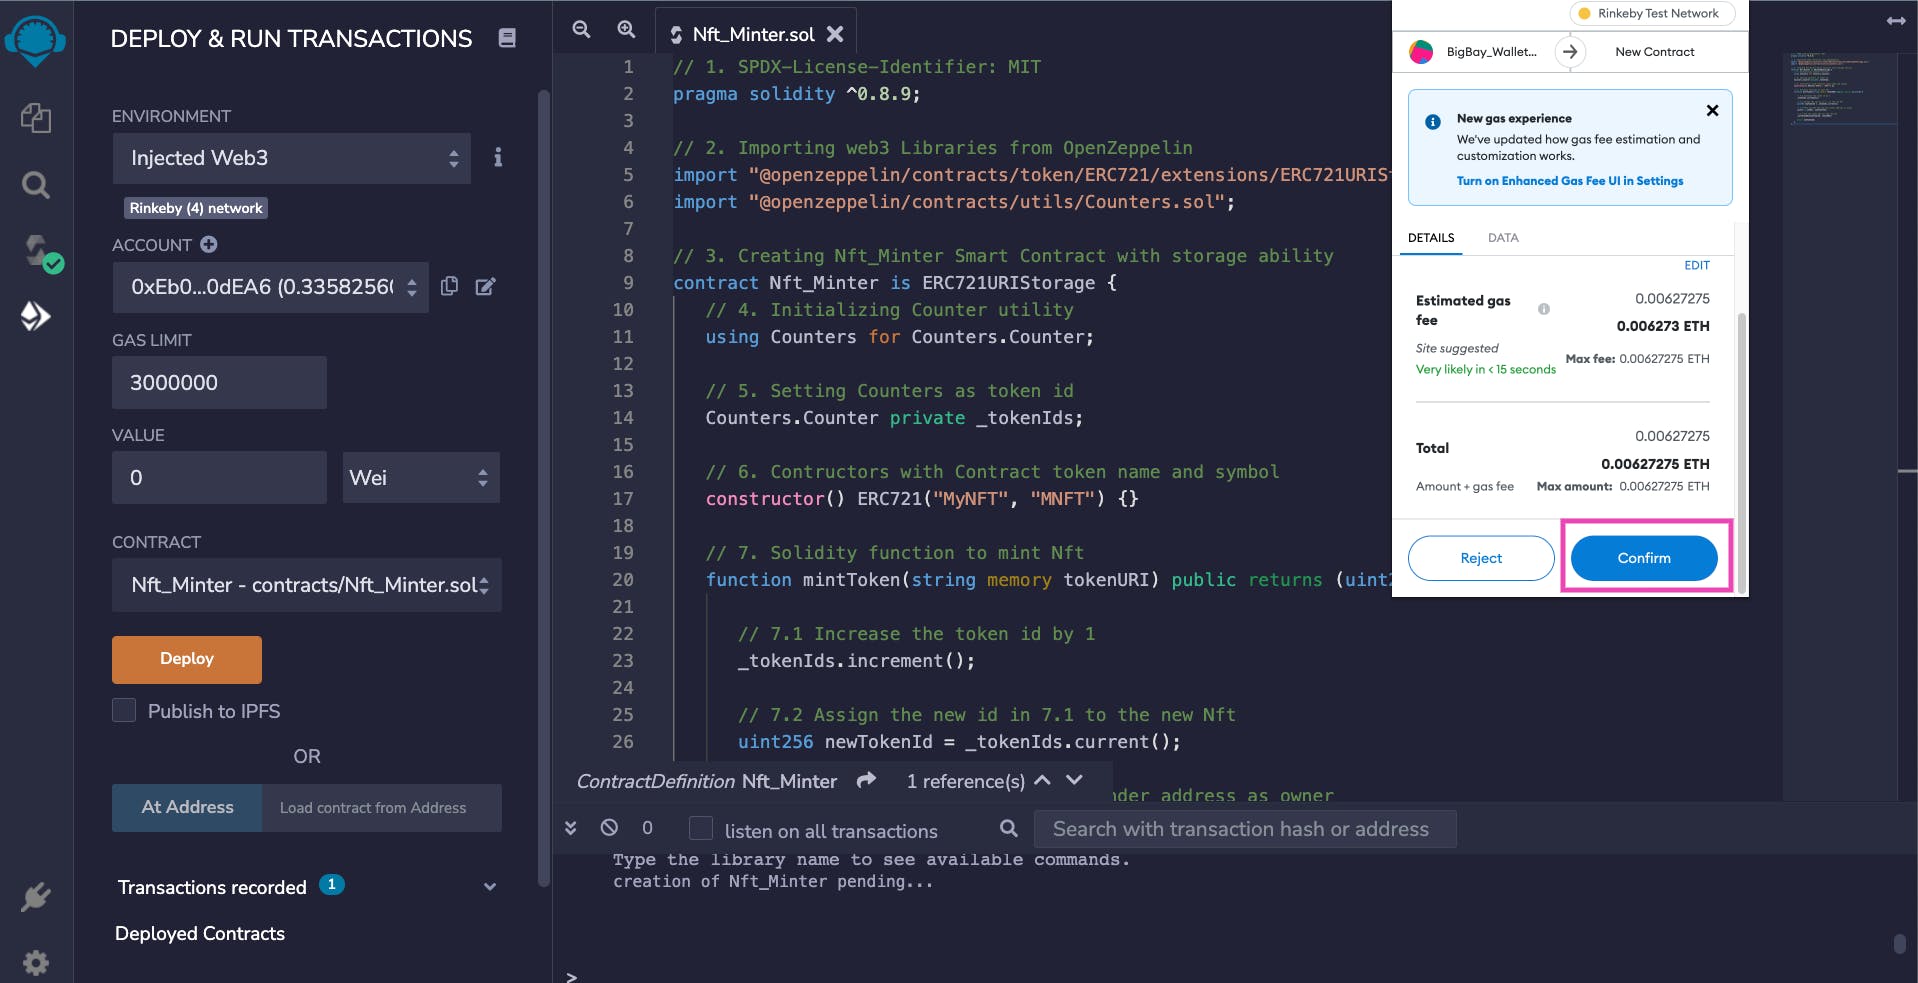
The "Deploy" button will trigger Metamask. From your Metamask pop-up dialog box, click on the "Confirm" button:
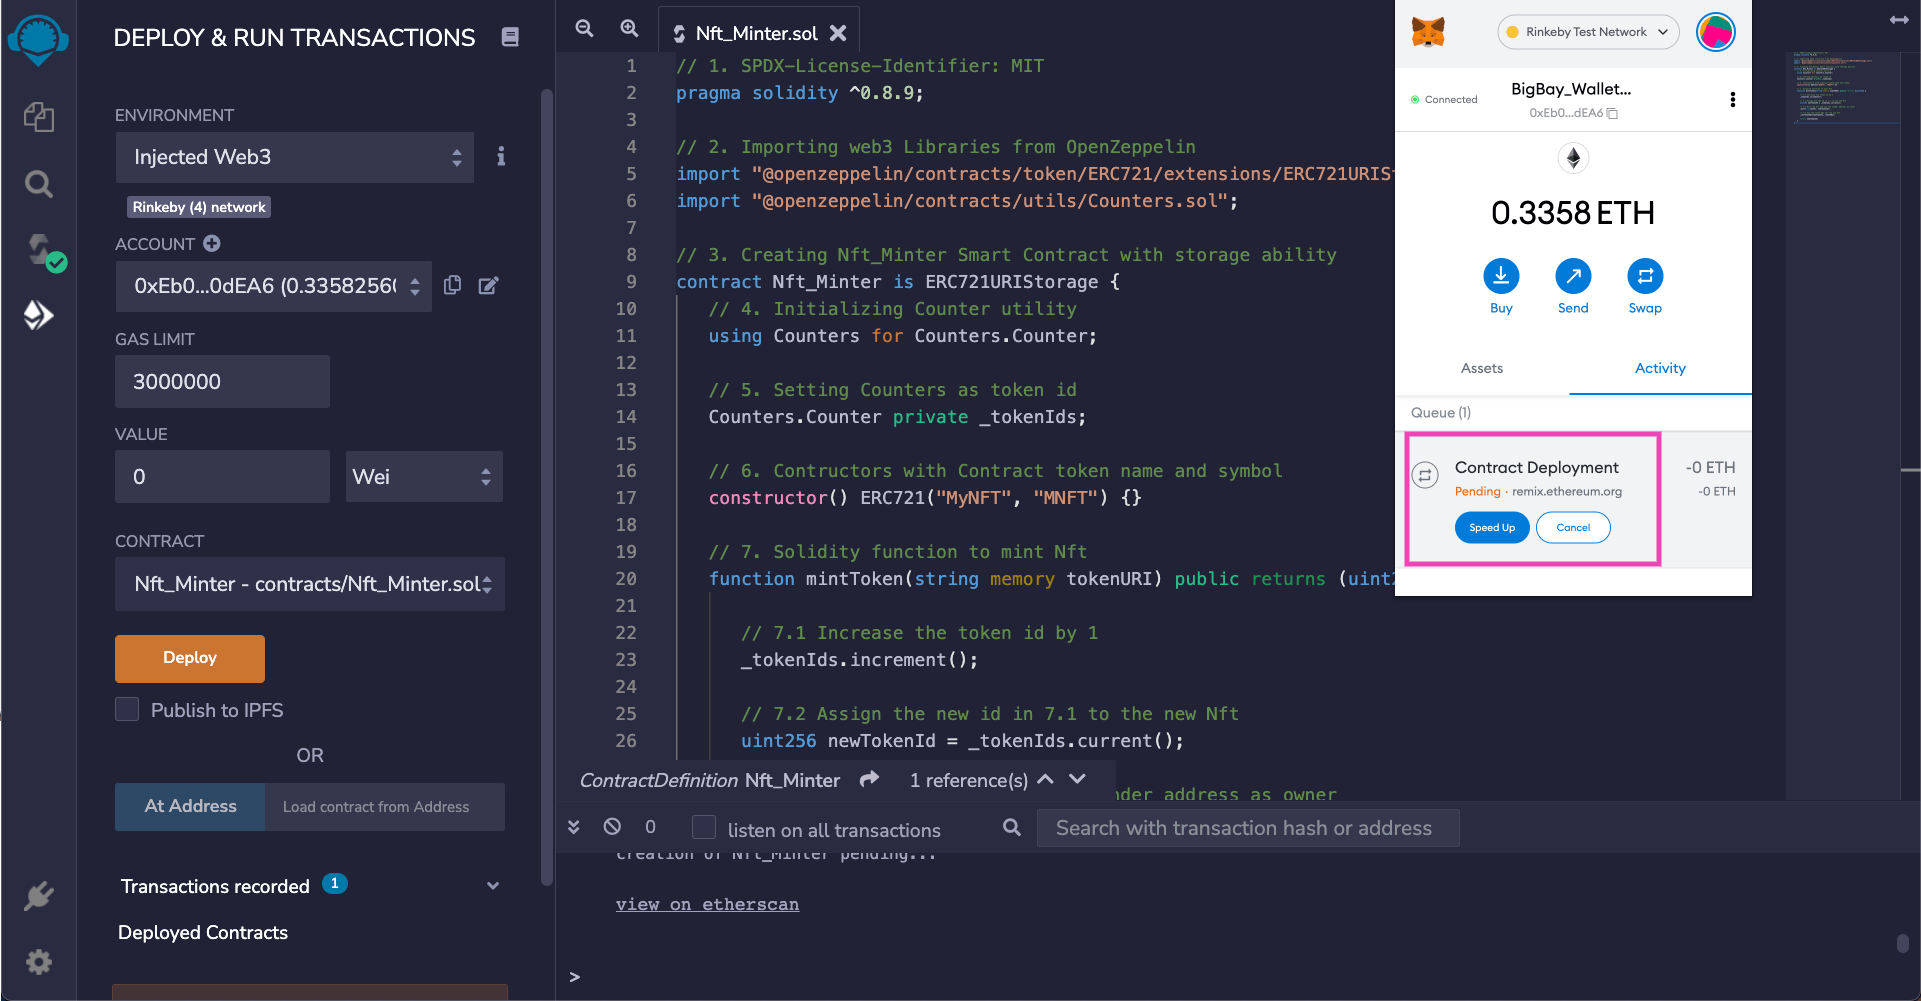
Next, wait for the smart contract to deploy:
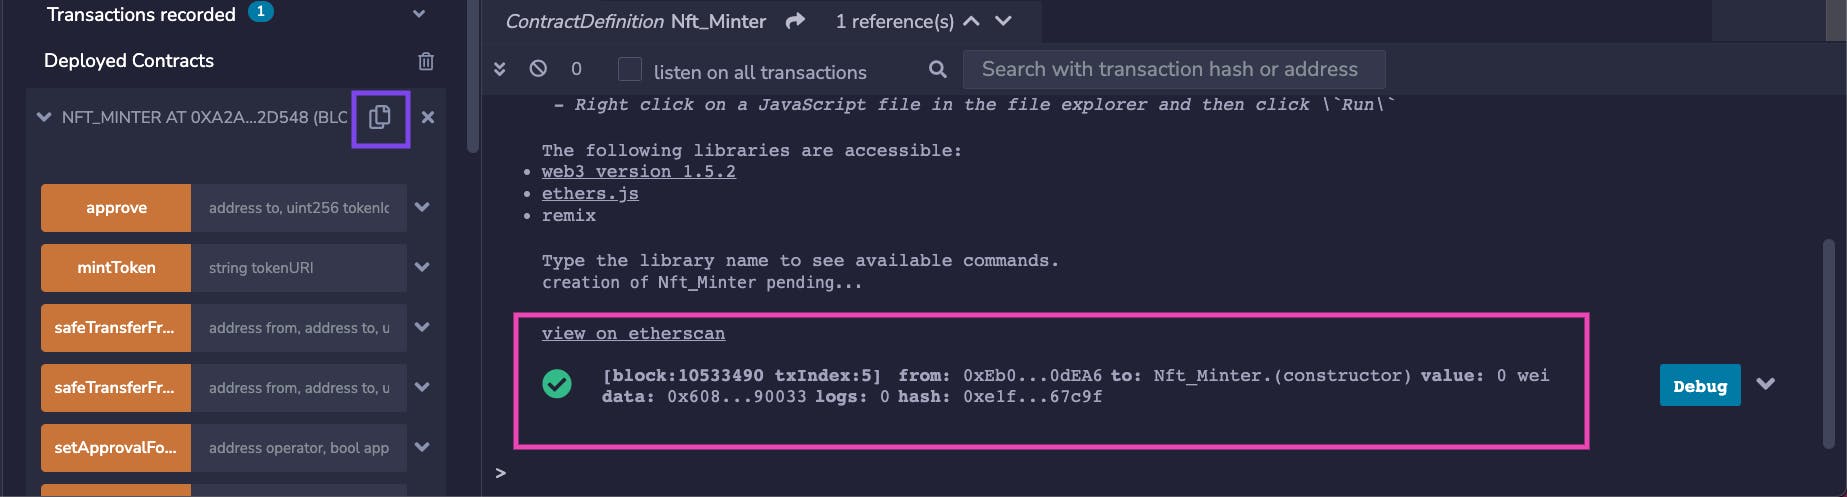
When your smart contract is deployed, you’ll receive a notification in your Remix IDE terminal, as shown below, and you’ll be able to access your smart contract address under the "Deployed Contracts" section:
Another important thing to keep in mind is your smart contract's Application Binary Interface (ABI). Navigate to the Solidity compiler tab, select your smart contract and copy the ABI code as shown below:
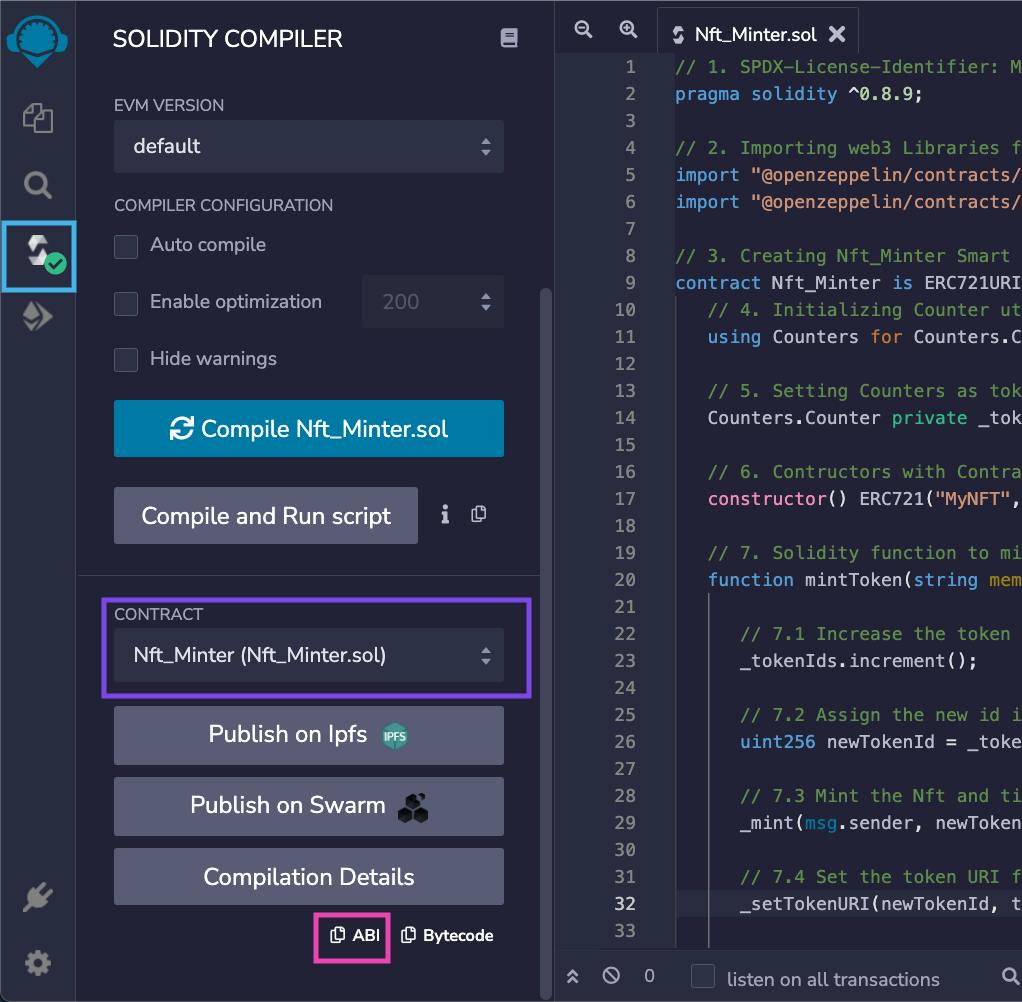
Remember to save your smart contract address and ABI because we'll need them later for our React application.
Step 5 - Setting up a Moralis Testnet Server
“A Moralis server allows you to use the Moralis SDK to speed up the development of your dApp.” - Moralis
Here, we're going to set up our Moralis Cloud Testnet Server and generate our Moralis Server API keys.
Go to Moralis.io and click on the "Sign Up for FREE" button:

Provide a valid email address with a password to create your Moralis account:
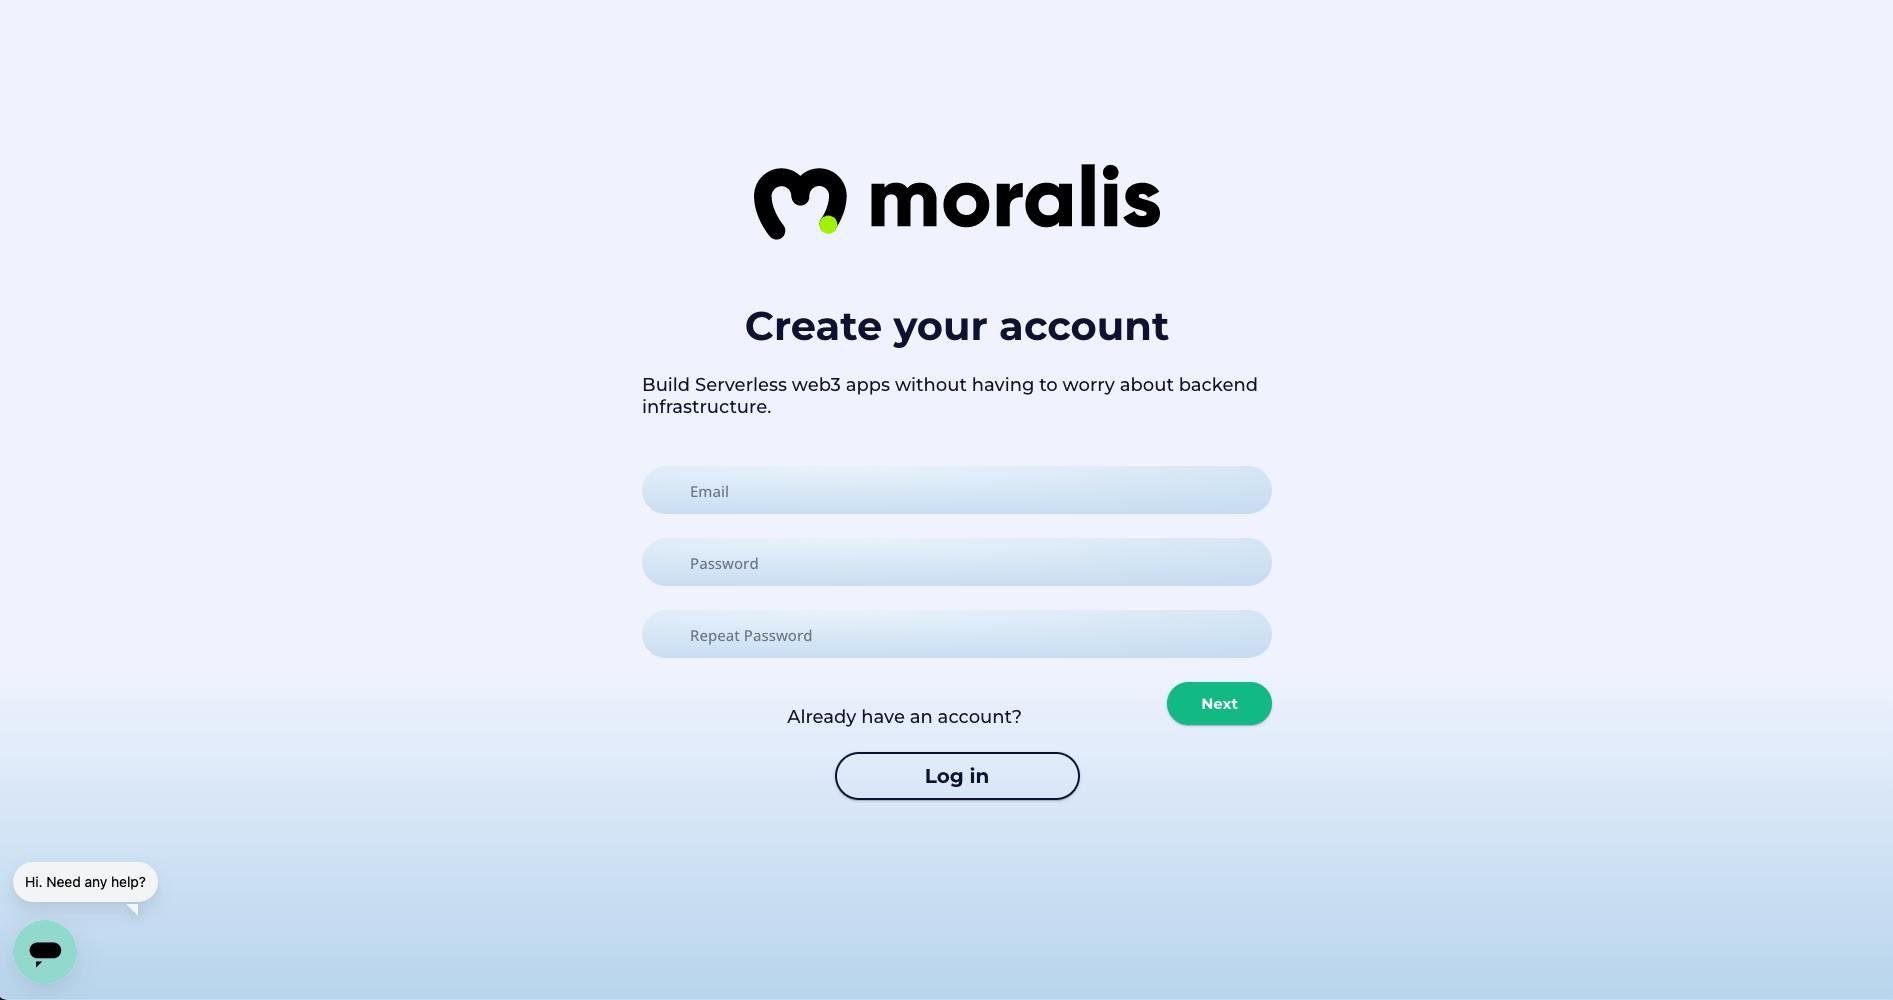
You’ll have to answer a few short questions on the next page.
Click the "Next" button when you're done to create your Moralis account:

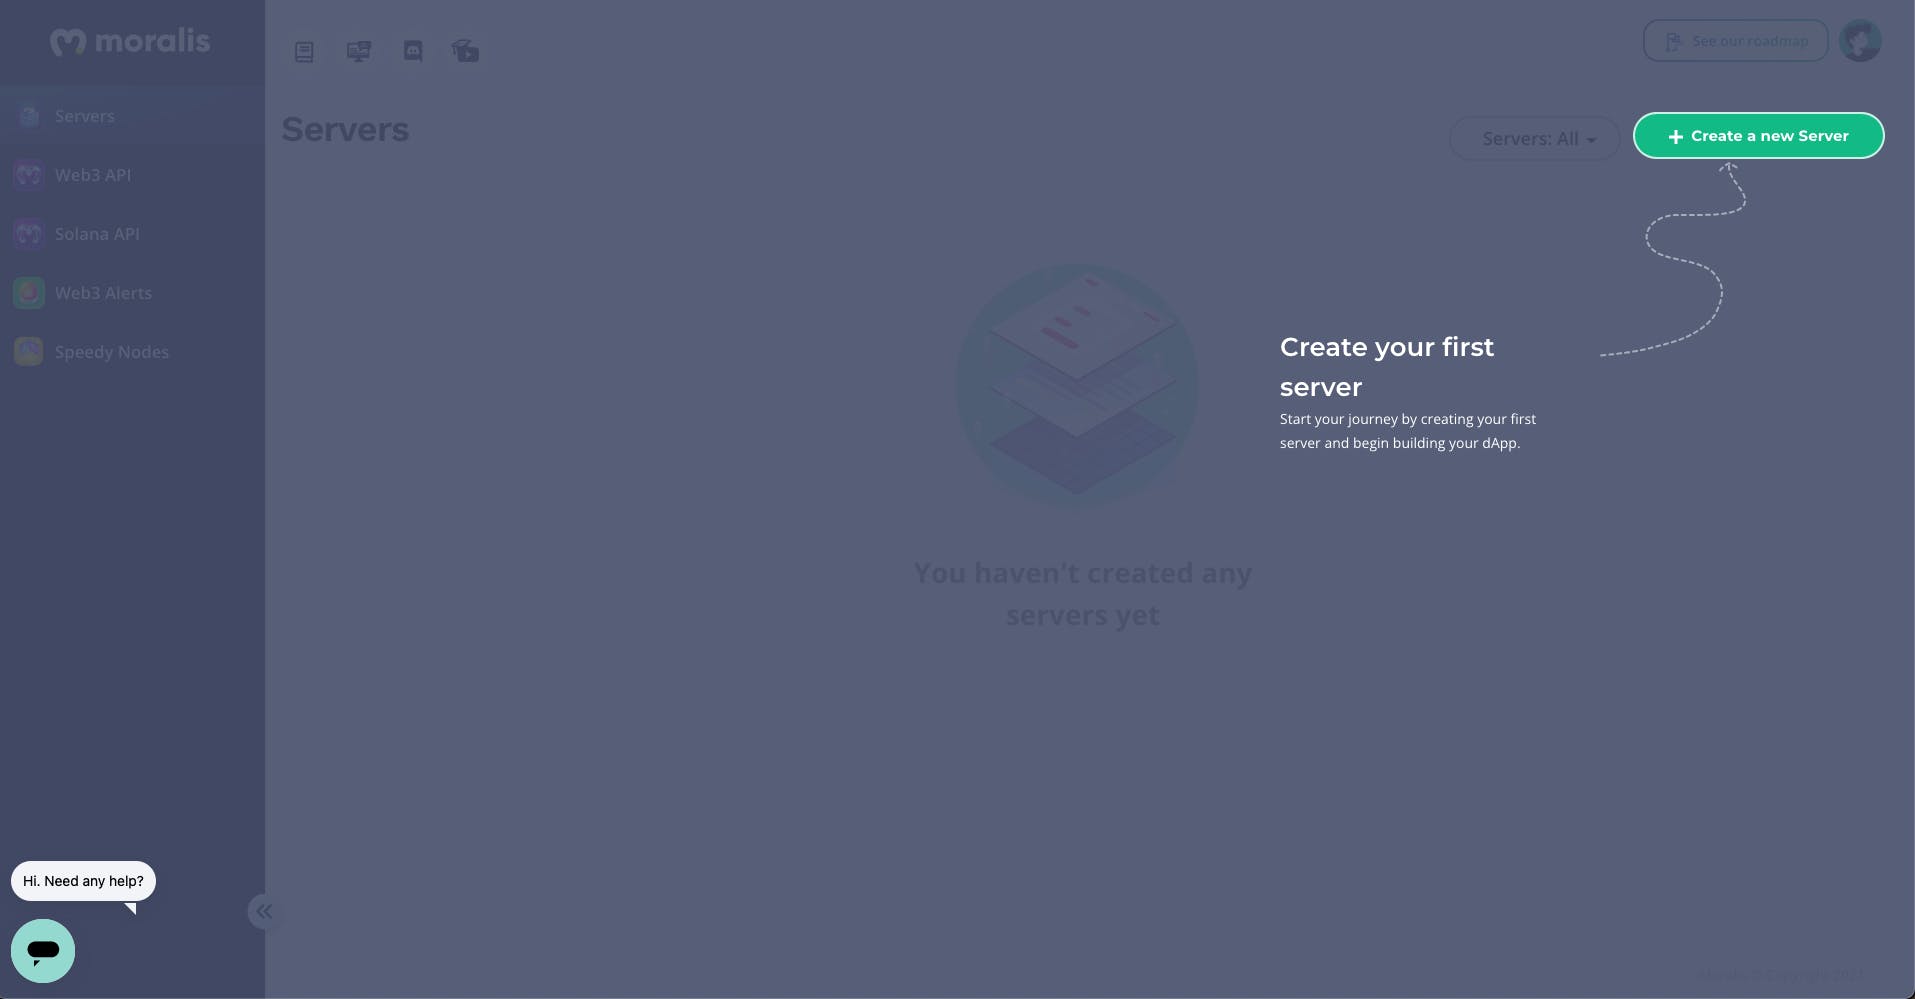
After successful registration, you'll be redirected to your Moralis dashboard.
On your dashboard:
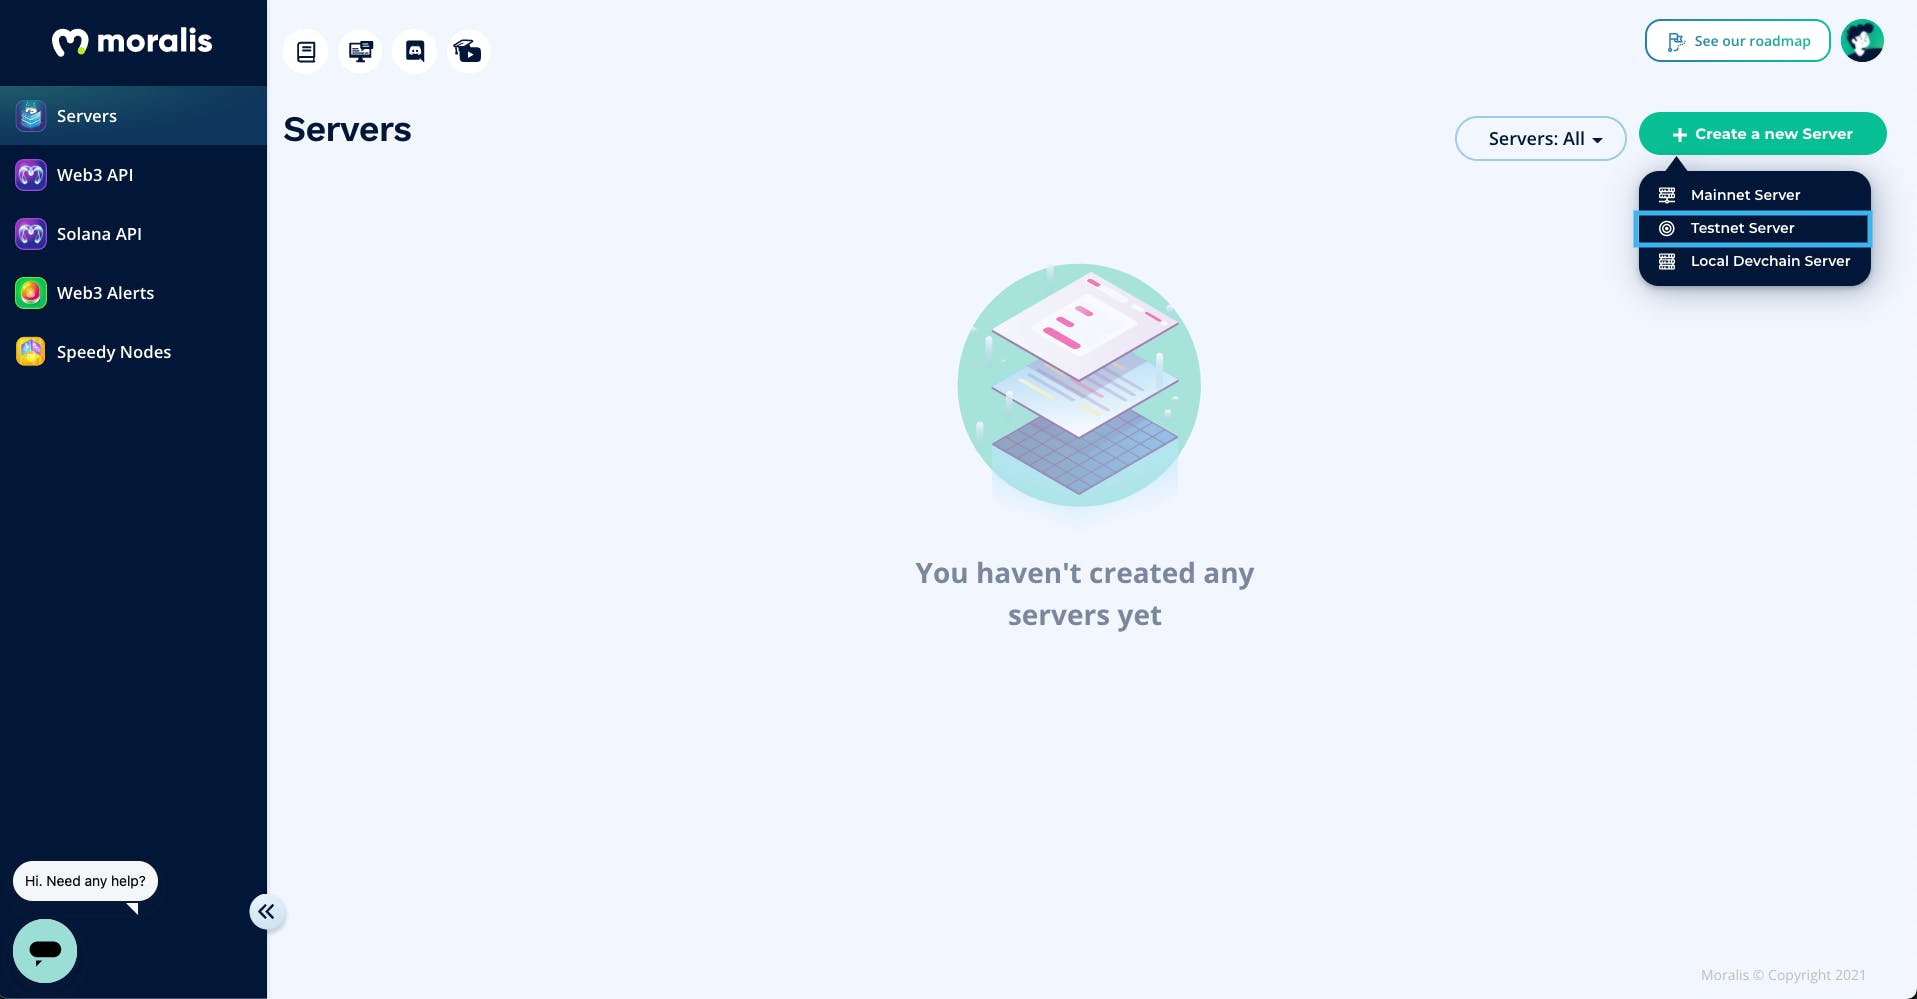
1. Click on the "Create a new Server" button:
2. Select "Testnet Server":
3. You'll be prompted to confirm your registered email address:

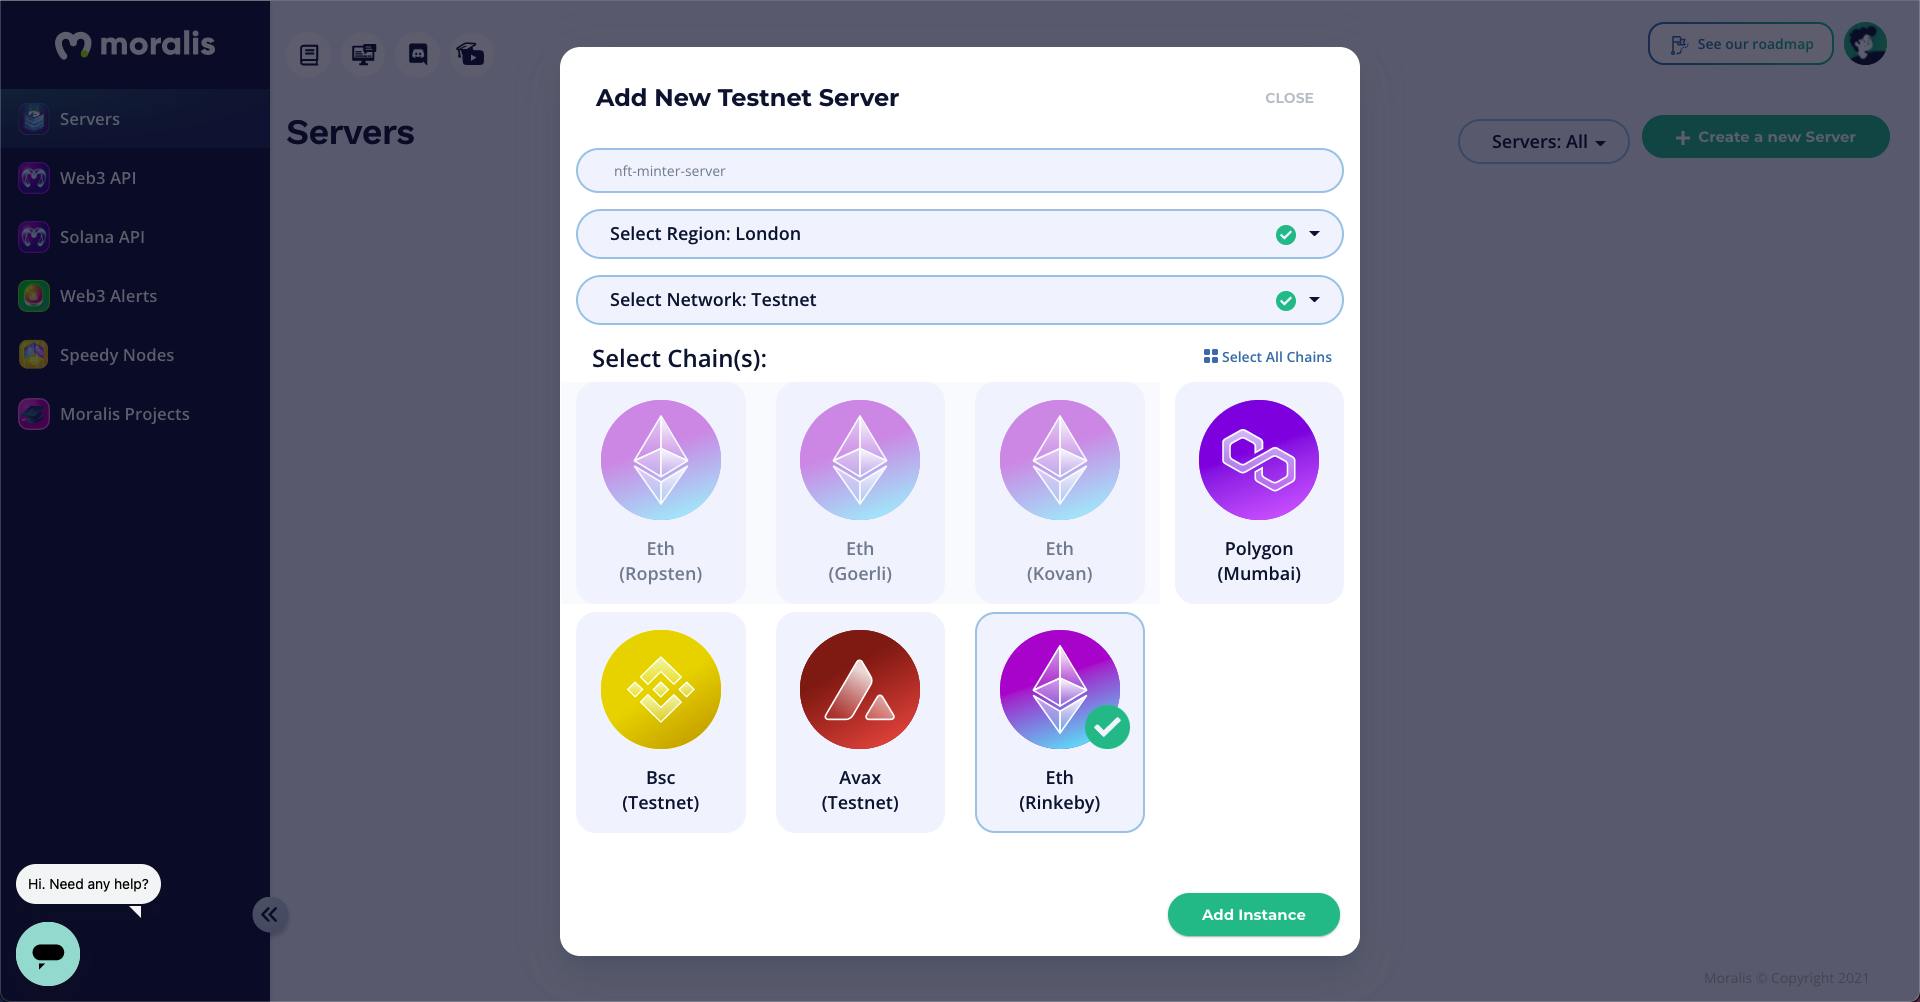
4. Adding a new Testnet Server:
From the "Testnet Server" popup:
- Name your Moralis Server/Instance nft-minter-server.
- Select the Region closest to you.
- Select the Testnet Network.
- For this tutorial, we're going to select the ETH (Rinkeyby) chain.
- Click on the "Add Instance" button when you're done.
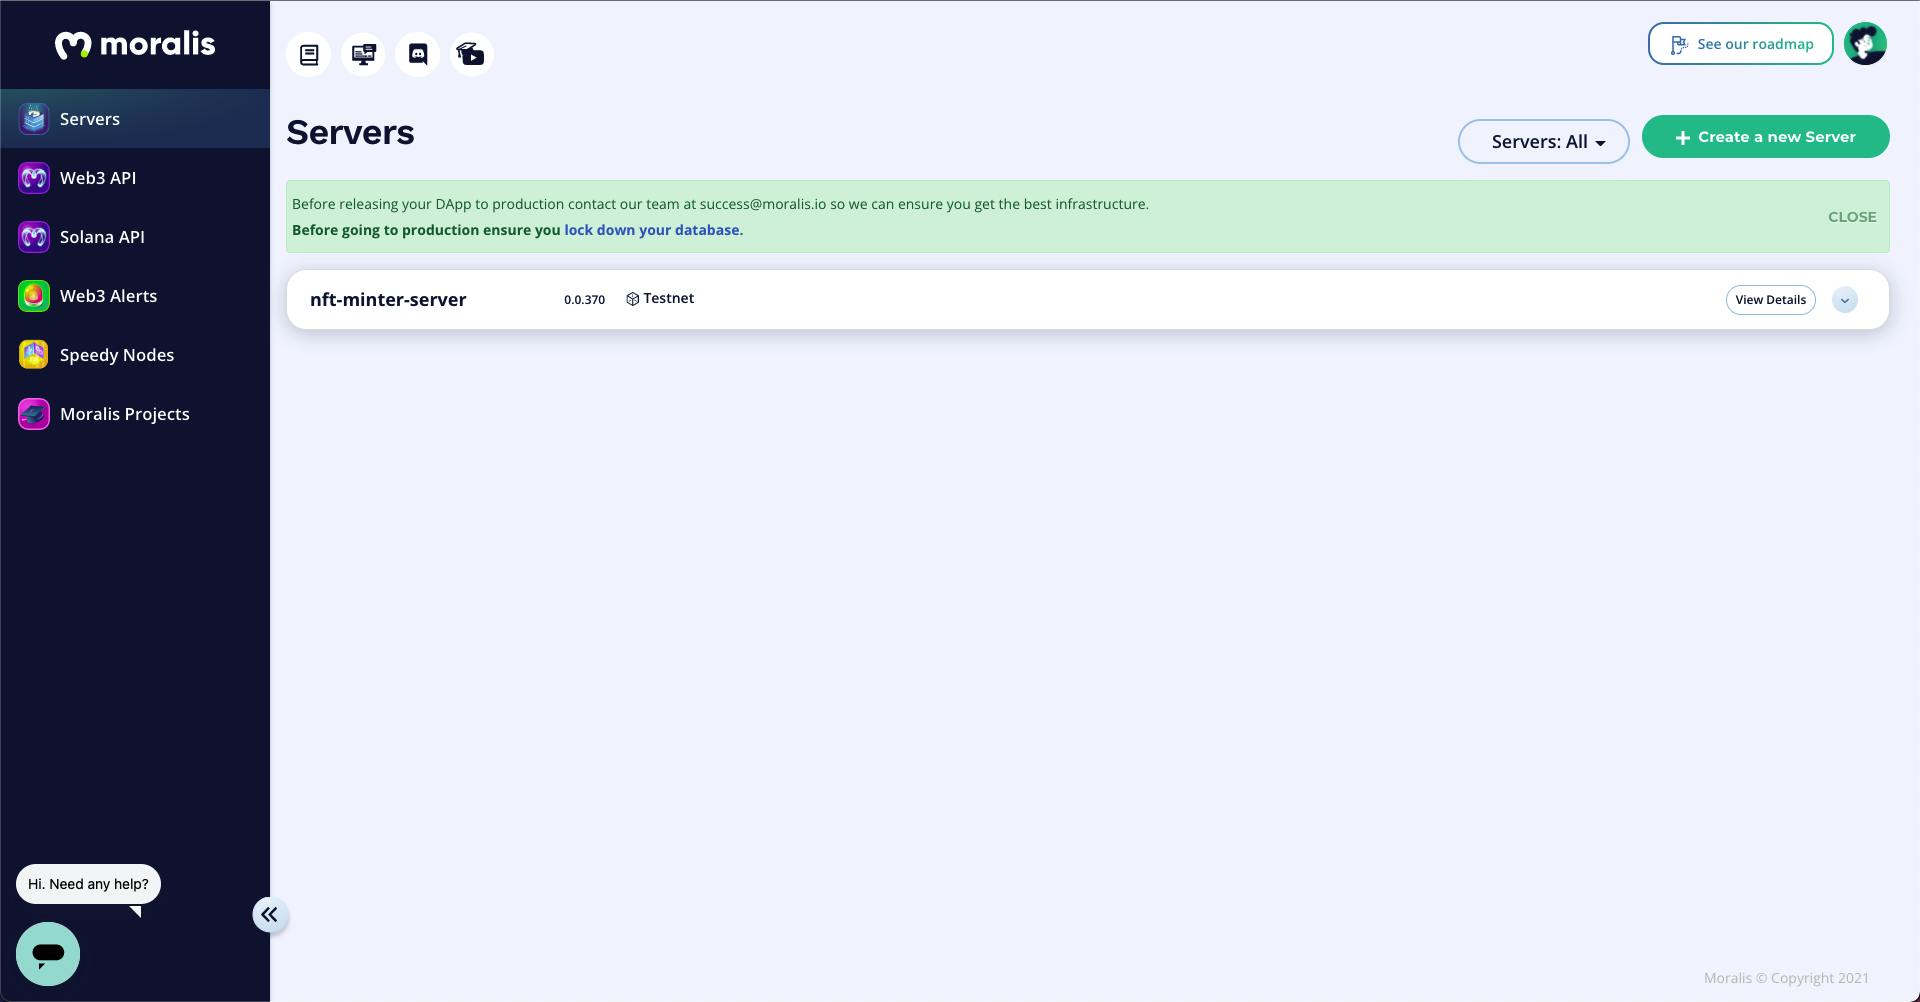
5. Wait for Moralis to set up your Testnet server instance:
Step 6 - Getting Moralis Server Details
After your server instance has been created, you can view your server credentials by clicking on the "View Details" button:
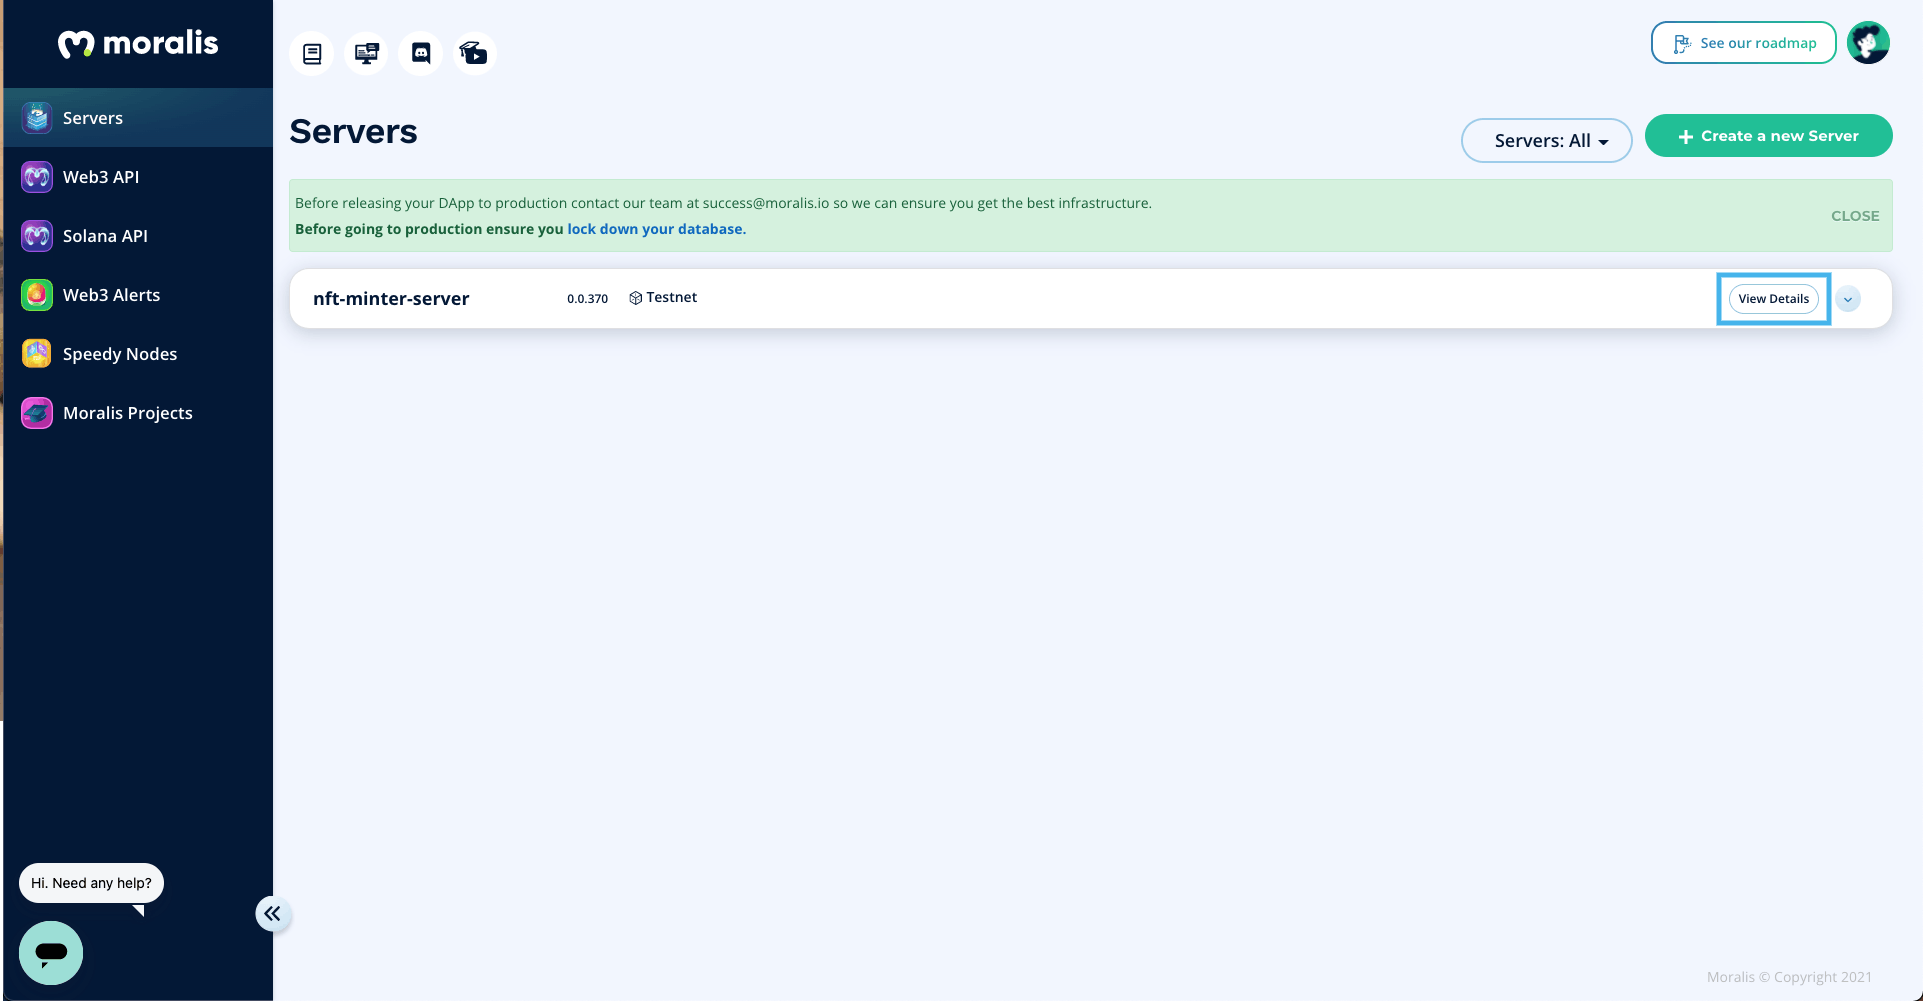
The important server details that we need are:
- The Server URL
- The Application ID

Pro tip: Do not expose your server details, as they give access to your dApp.
Step 7 - Creating a New Project with Create React App
In this step, we'll create a new React application using the npx package manager.
Run the command below to create a new React app for our NFT minter:
npx create-react-app my-nft-minter
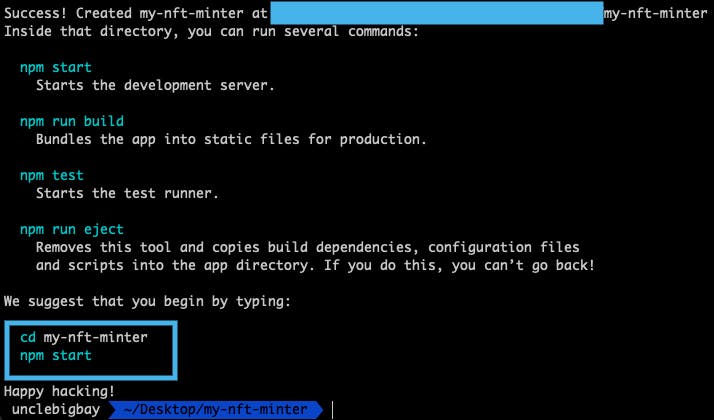
Then, run the command below to navigate into your nft-minter directory:
cd my-nft-minter
Open your project in any code editor. Our project folder structure should look like this:
my-nft-minter
├── node_modules
├── public
├── src
├── .gitignore
├── package-lock.json
├── package.json
└── README.md
Next, start your React project server by running the command below:
npm run start
Our development server will start up on localhost:3000, and our React page should look like this:
Step 8 - Installing Moralis React SDK
Now that our React application is up and running, we're going to install the Moralis React SDK.
Run the following command from your my-nft-minter directory terminal:
npm install moralis react-moralis
The Moralis React SDK includes a useMoralis() hook that will provide the following logic for our dApp:
- The
isAuthenticatedstate to detect whether or not a user’s wallet is connected. - The
authenticatefunction for user's to connect their wallet to our dApp. - The
userobject that contains information (wallet address) of the currently connected user. - The
logoutfunction to end the session for a connected user.
Step 9 - Initializing Moralis SDK in React
After setting up your Moralis Testnet server (see Step 5) and installing the Moralis SDK (see Step 8), the next step is to establish a connection between our React app and our Moralis server through the Moralis SDK.
Create a new admin .env file at the root of your project and store your Moralis server details from Step 6 like this:
REACT_APP_MORALIS_SERVER_URL=https://XXXXXX.usemoralis.com:2053/server
REACT_APP_MORALIS_APP_ID=XXXXXXXXXXXXXXXXXXXXXXXXXXXXXX
Replace the placeholders with your Moralis credentials. Next, we need to restart our server after updating the src/.env file.
Use the short key below to stop your server:
ctrl + c
Start your server again with:
npm run start
Next, we'll wrap our App.js component with the moralisProvider from react-moralis. Update your App.js with the code below:
import logo from "./logo.svg";
import "./App.css";
import { MoralisProvider } from "react-moralis";

function App() {
  const moralisServerUrl = process.env.REACT_APP_MORALIS_SERVER_URL;
  const moralisAppId = process.env.REACT_APP_MORALIS_APP_ID;
  return (
    <MoralisProvider appId={moralisAppId} serverUrl={moralisServerUrl}>
      <div className='App'>
        <header className='App-header'>
          <img src={logo} className='App-logo' alt='logo' />
          <p>
            Edit <code>src/App.js</code> and save to reload.
          </p>
          <a
            className='App-link'
            href='https://reactjs.org'
            target='_blank'
            rel='noopener noreferrer'
          >
            Learn React
          </a>
        </header>
      </div>
    </MoralisProvider>
  );
}

export default App;
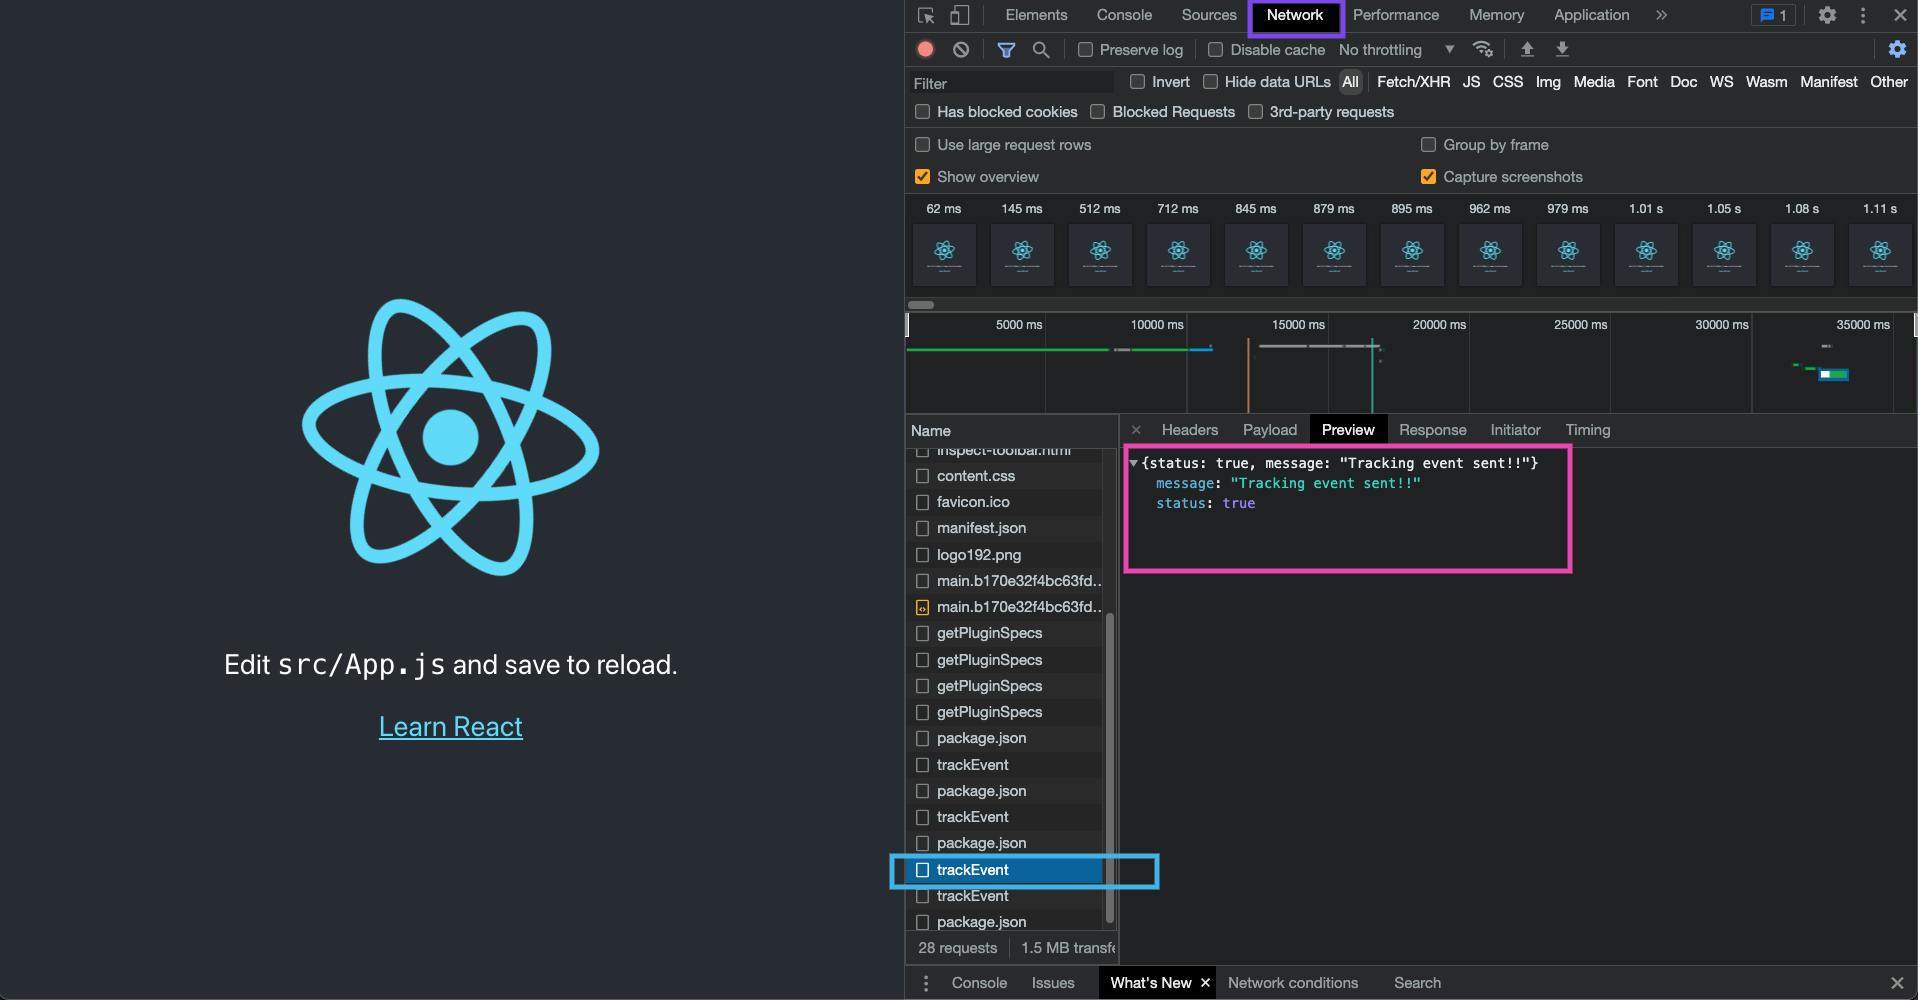
Navigate to your browser network tab and search for the trackEvent request (refresh the page if you can't find it at first). If the response status is set to true, that means our React application has established a connection with our Moralis Testnet server.
Step 9 - Installing Web3.js
In this step, we're going to install the Web3.js library. Web3.js is an Ethereum JavaScript API which allows us to interact with our smart contract, since Moralis only supports read-only smart contracts.
Run the command below to install web3 in your react application:
npm install web3
Step 10 - Rewiring React to Work With Web3.js
If you are using create-react-app version >= 5, you may run into issues building your React app. This is because NodeJS polyfills are not included in the latest version of create-react-app.
To fix this known issue, we'll install the missing modules in our React application.
Run the command below in your terminal:
npm install --save-dev react-app-rewired crypto-browserify stream-browserify assert stream-http https-browserify os-browserify url buffer process
The command above will install react-app-rewired and other missing dependencies.
The react-app-rewired package is used to configure webpack configurations, and it also allows us to manually modify the webpack configurations from the config-overrides.js file.
Create a new config-overrides.js file in the root of your project folder, and copy paste the content below:
const webpack = require('webpack');

module.exports = function override(config) {
    const fallback = config.resolve.fallback || {};
    Object.assign(fallback, {
        "crypto": require.resolve("crypto-browserify"),
        "stream": require.resolve("stream-browserify"),
        "assert": require.resolve("assert"),
        "http": require.resolve("stream-http"),
        "https": require.resolve("https-browserify"),
        "os": require.resolve("os-browserify"),
        "url": require.resolve("url")
    })
    config.resolve.fallback = fallback;
    config.plugins = (config.plugins || []).concat([
        new webpack.ProvidePlugin({
            process: 'process/browser',
            Buffer: ['buffer', 'Buffer']
        })
    ])
    return config;
}
In our package.json file, we'll replace the react-scripts with the new react-app-rewired commands.
Before:
"scripts": {
    "start": "react-scripts start",
    "build": "react-scripts build",
    "test": "react-scripts test",
    "eject": "react-scripts eject"
  },
After:
"scripts": {
    "start": "react-app-rewired start",
    "build": "react-app-rewired build",
    "test": "react-app-rewired test",
    "eject": "react-scripts eject"
},
Restart your React server when you're done.
Use the short key below to stop your server:
ctrl + c
Start your server again with:
npm run start
The missing Node.js polyfills in our React application should be included now, and our React app should be functional with web3.
- If you want to hide the warnings showing in your terminal or browser console, add the following line of code within the
overridefunction inside of yourconfig-overrides.jsfile, like this (restart required):
config.ignoreWarnings = [/Failed to parse source map/];
Step 11 - Building the NFT Minter App
In this step, we're going to create the folder structure and build the layout of our NFT minting app.
First, update your App.js file with the following code:
import "./App.css";
import { Header } from "./components/header/Header";
import NftMinter from "./pages/nft-minter/NftMinter";
import { MoralisProvider } from "react-moralis";

function App() {
  const serverUrl = process.env.REACT_APP_MORALIS_SERVER_URL;
  const appId = process.env.REACT_APP_MORALIS_APP_ID;

  return (
    <MoralisProvider appId={appId} serverUrl={serverUrl}>
      <div className='App'>
        <Header />
        <main>
          <NftMinter />
          <div className='App-overlay'></div>
        </main>
      </div>
    </MoralisProvider>
  );
}

export default App;
From the code above, we're rendering the <Header /> and the <NftMinter /> components, which we'll create soon:
The
<Header />component will contain our dApp logo, the connected wallet address, and the “logout" button.The
<NftMinter />component will contain the authentication logic of our dApp, and also the NFT minting form.
Replace the code in your App.css file with the CSS code below:
.App {
  background: url("./meteor.svg");
  background-color: #000;
  background-repeat: no-repeat;
  background-size: cover;
  background-position: center;
  background-attachment: fixed;
  position: relative;
  min-height: 100vh;
}

.App-overlay {
  background-color: #000;
  position: absolute;
  opacity: 0.5;
  top: 0;
  height: 100%;
  width: 100%;
  min-height: 100vh;
  left: 0;
}

main {
  display: flex;
  justify-content: center;
  flex-direction: column;
}

@media (min-width: 768px) {
  main {
    padding: 5rem 2rem;
  }
}
Replace the code in your index.css file with the CSS code below:
* {
  margin: 0;
  padding: 0;
  font-family: "Arial", sans-serif;
  --webkit-font-smoothing: antialiased;
  box-sizing: border-box;
}

/* UTIL */

.hide-on-sm {
  display: none;
}

.btn-wrap {
  border: 1px solid #fff;
  padding: 5px;
  border-radius: 5px;
}

.text-style {
  background-image: linear-gradient(90deg, #fff000, #af48ff 80%);
  -webkit-background-clip: text;
  -webkit-text-fill-color: transparent;
  background-clip: text;
}

@media (min-width: 768px) {
  /* UTIL */
  .hide-on-sm {
    display: inline;
  }

  .hide-on-md {
    display: none;
  }
}
In order to have the same interface as this tutorial, download the images below in your src folder:
- Download Metamask SVG logo - save it as
metamask.svg
- Download app background image - save it as
meteor.svg
Next, we'll create the <Header /> and the <NftMinter /> components.
In your src folder, create the following folder structure:
- Create a new
componentsfolder. - Next, create a new
headerfolder inside of yourcomponentsfolder. - Then, create a
Header.jsxand aheader.cssfile inside of theheaderfolder.
Copy and paste the code below, inside of the Header.jsx file:
import React from "react";
import { useMoralis } from "react-moralis";
import metaMaskLogo from "../../metamask.svg";
import "./header.css";

export const Header = () => {
  // Get auth state from moralis
  const { isAuthenticated, logout, user } = useMoralis();
  const userEthAddress = user && user.get("ethAddress");

  // Handle logout
  const handleLogout = (e) => {
    e.preventDefault();
    logout();
  };

  return (
    <header>
      <nav>
        <h1 className='app-name text-style'>My-NFT Minter</h1>
        {/* Connect wallet button */}
        {isAuthenticated && (
          <button className='wallet-btn' onClick={handleLogout}>
            <img src={metaMaskLogo} alt='Metamask logo' />
            <span>
              {userEthAddress.slice(0, 4).toUpperCase()}...
              {userEthAddress.slice(-4).toUpperCase()}
            </span>
            <svg
              xmlns='http://www.w3.org/2000/svg'
              width={16}
              height={16}
              fill='currentColor'
              className='bi bi-power'
              viewBox='0 0 16 16'
            >
              <path d='M7.5 1v7h1V1h-1z' />
              <path d='M3 8.812a4.999 4.999 0 0 1 2.578-4.375l-.485-.874A6 6 0 1 0 11 3.616l-.501.865A5 5 0 1 1 3 8.812z' />
            </svg>
          </button>
        )}
      </nav>
    </header>
  );
};
In the code above, we're pulling out the isAuthenticated state, the logout function, and the user object from the useMoralis() hook (see Step 8).
The "logout" button will only be rendered when a user
isAuthenticated.Next, we're getting the current user's Ethereum wallet address from the
userobject and displaying the first and last four letters of their wallet address.When the "logout" button is clicked, the
authenticationstate is set tofalse, so it’ll end the connection between our dApp and the user’s Metamask.
Update the header.css file with the CSS code below:
nav {
  z-index: 1;
  position: relative;
  width: 100%;
  display: flex;
  padding: 1rem;
  justify-content: space-between;
  align-items: center;
}

.wallet-btn {
  background-color: #f5f5f5;
  border: 1px solid #0f0f0f;
  border-radius: 5px;
  padding: 10px;
  cursor: pointer;
  display: flex;
  align-items: center;
  gap: 6px;
  font-size: 18px;
}

.wallet-btn img {
  width: 20px;
  height: 20px;
}

.wallet-btn svg {
  width: 20px;
  height: 20px;
}

@media (min-width: 768px) {
  nav {
    padding: 2rem 3rem;
  }

  .app-name {
    font-size: 26px;
  }
}
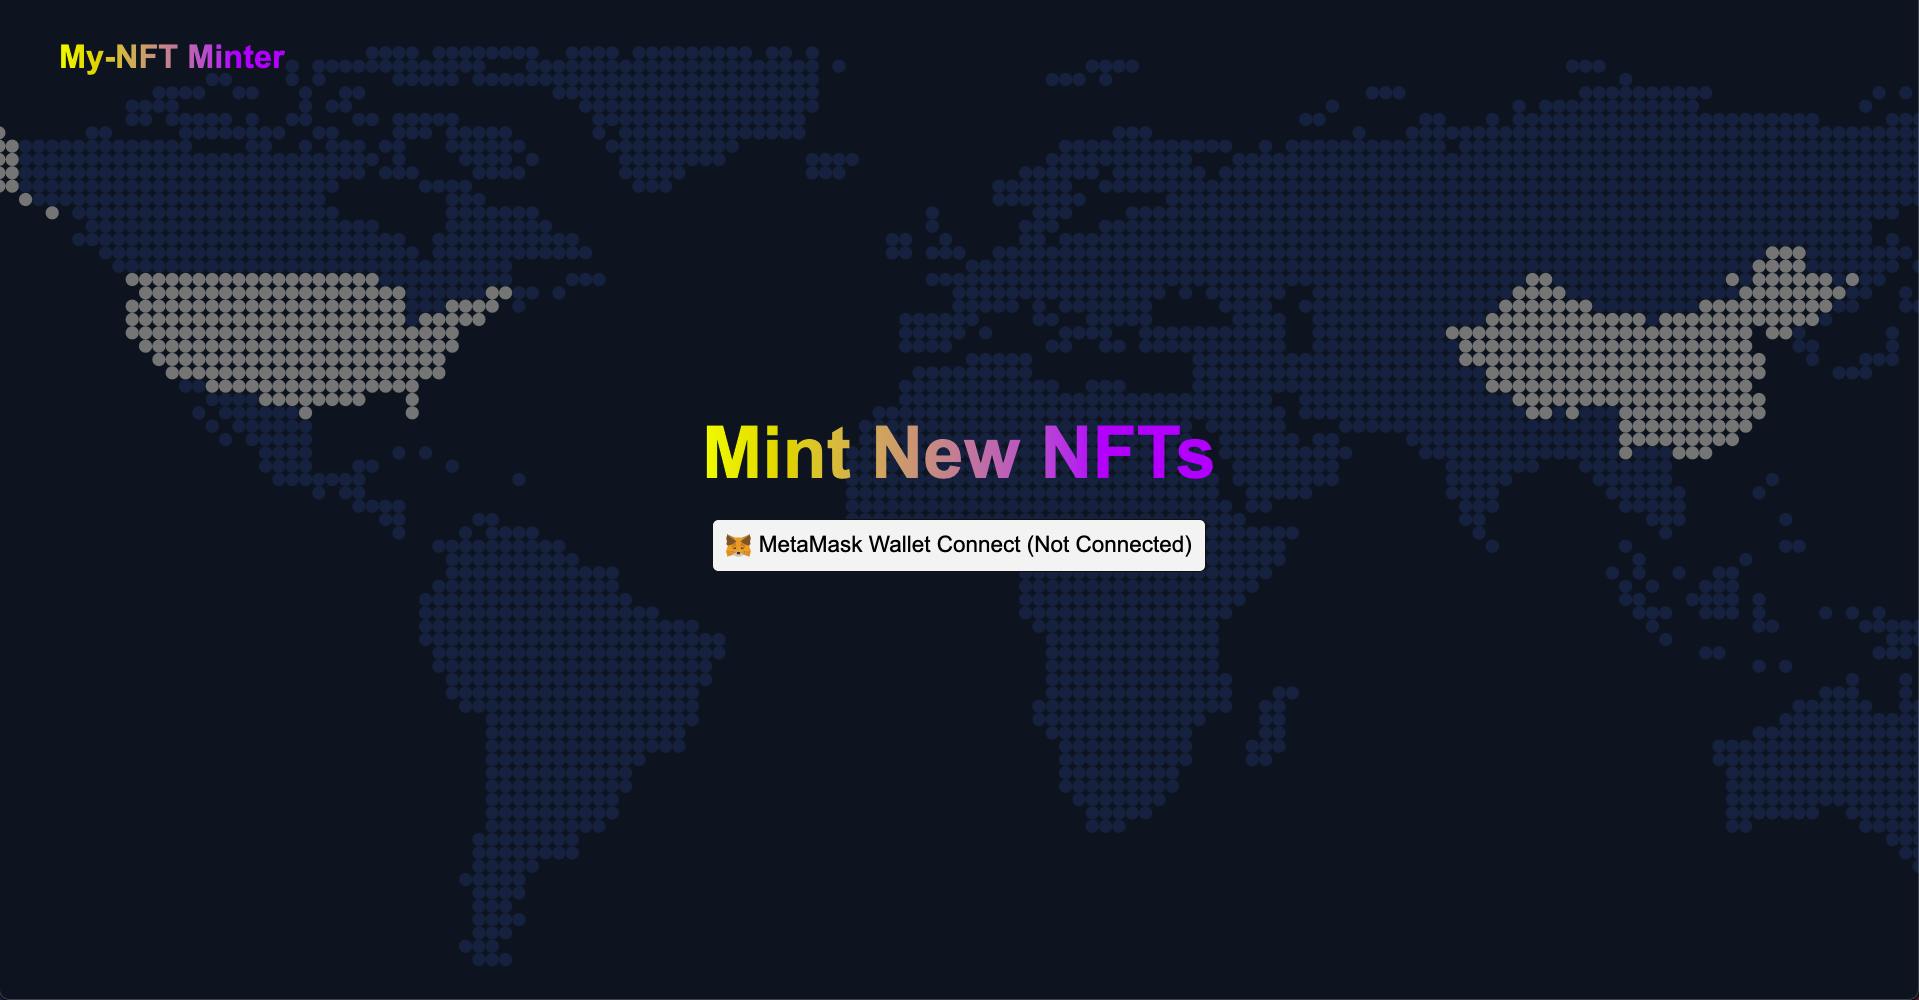
Step 12 - Creating the Connect Wallet Page Component
In this step, we're going to build the authentication interface where users can connect their wallets to our NFT minting application.
In your src folder:
- Create a new
pagesfolder. - Next, create a new
authfolder. - In the
authfolder, create a newConnectWallet.jsxfile with the code below:
import React from "react";
import { useMoralis } from "react-moralis";
import metaMaskLogo from "../../metamask.svg";

export const ConnectWallet = () => {
  const { authenticate, isAuthenticated } = useMoralis();

  // handle authentication
  const handleAuthentication = (e) => {
    e.preventDefault();
    authenticate();
  };

  // true/false
  console.log(isAuthenticated);

  return (
    <button className='wallet-btn' type='button' onClick={handleAuthentication}>
      <img src={metaMaskLogo} alt='Metamask logo' />
      <span className='hide-on-sm'>
        MetaMask Wallet Connect (Not Connected)
      </span>
      <span className='hide-on-md'> Connect Wallet </span>
    </button>
  );
};
In the code above, the authenticate() function will trigger the user's Metamask and prompt them to connect to their wallet. Once the user's wallet is connected, the isAuthenticated state will change from false to true across our app components through the MoralisProvider.
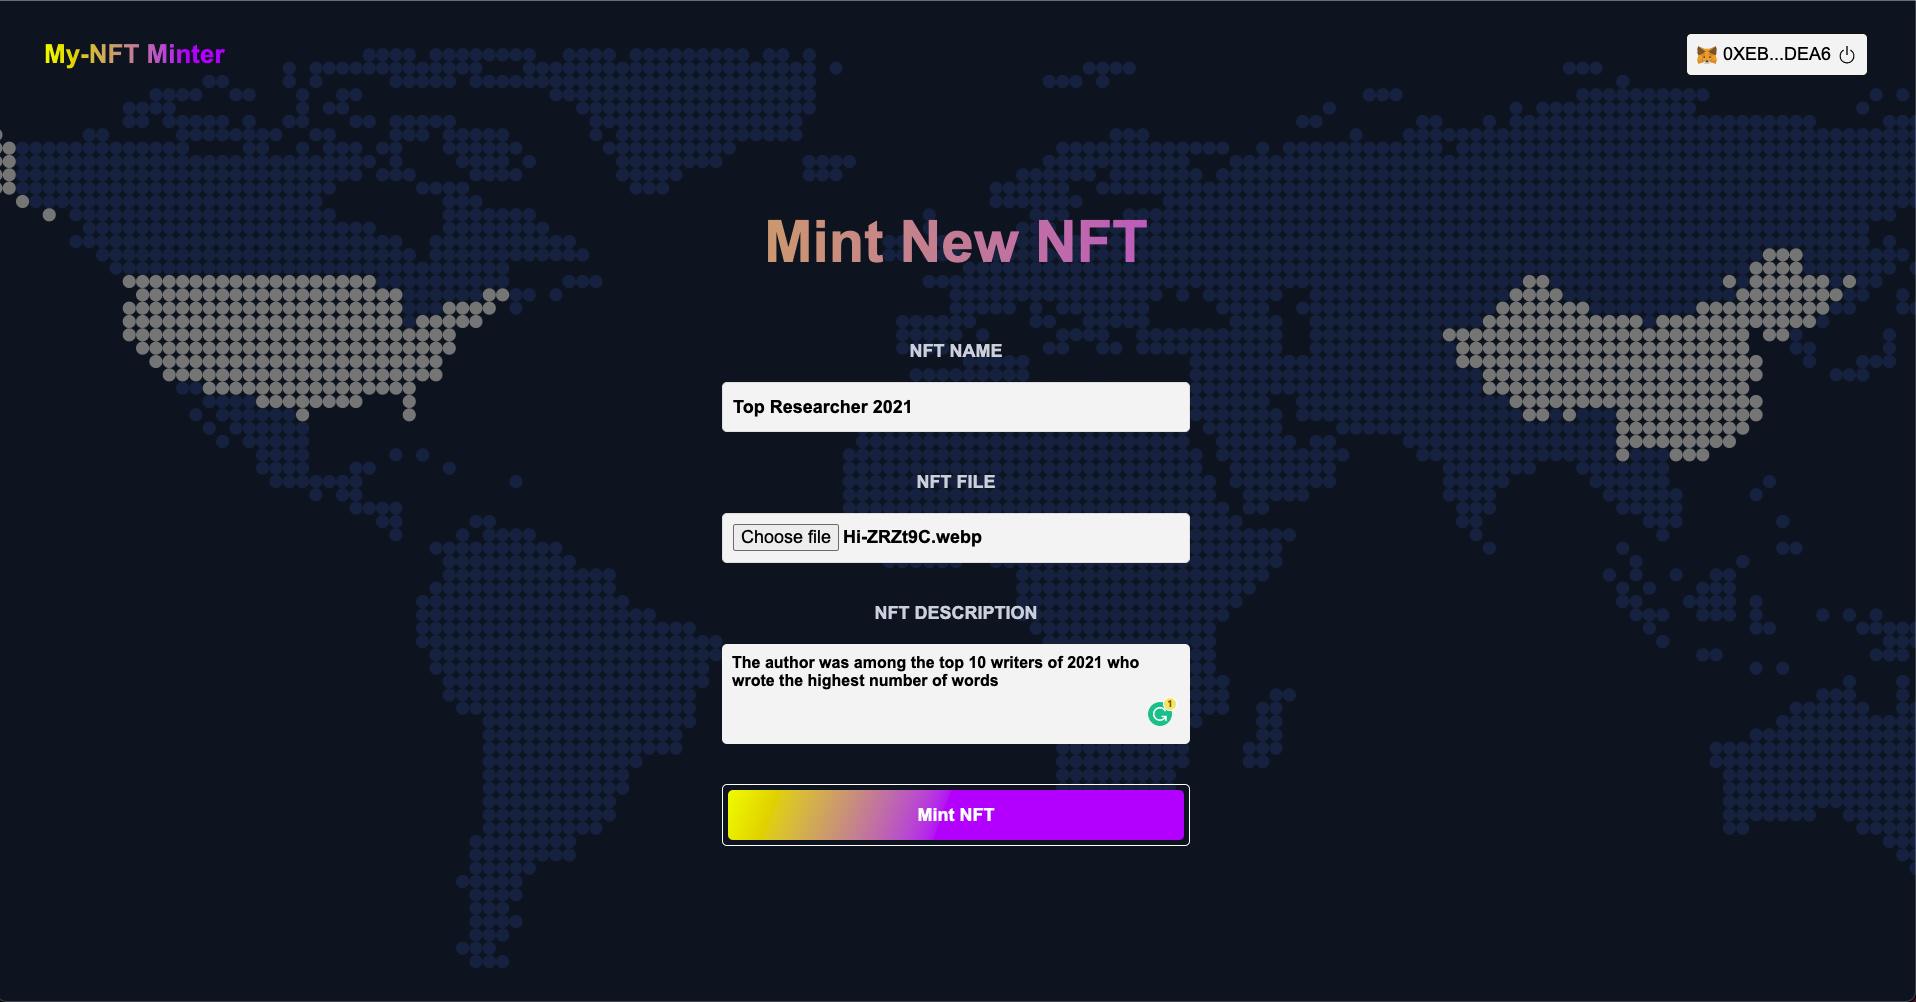
Step 13 - Creating the NFT Minter Page Component
In this step, we're going to create our main minting component and its functionalities.
- First, create a new
nft-minterfolder in thepagesfolder. - Next, in the
nft-minterfolder, create aNftMinter.jsxand anft-minter.cssfile.
Then, copy and paste the following lines of code in the nft-minter.css file:
.auth-section {
  display: flex;
  justify-content: center;
  align-items: center;
  flex-direction: column;
  margin: 10px 0;
  min-height: 50vh;
  width: 100%;
}

.hero-title {
  font-size: 40px;
  font-weight: bold;
  text-align: center;
  font-weight: 600;
}

.nft-minting-section {
  z-index: 1;
  position: relative;
}

.page-hero {
  margin: 100px 0px 30px 0px;
}

.form-wrapper {
  margin: 0 auto;
  z-index: 1;
  padding: 1rem;
}

form {
  display: flex;
  flex-direction: column;
  align-items: center;
  justify-content: center;
  width: 100%;
  margin-top: 30px;
}

label {
  font-size: 18px;
  font-weight: bold;
  margin-bottom: 20px;
  text-transform: uppercase;
  color: #d1d7e3;
}

.form-group {
  display: flex;
  flex-direction: column;
  align-items: center;
  justify-content: space-between;
  width: 100%;
  height: 100%;
  margin-bottom: 30px;
}

input {
  width: 100%;
  height: 50px;
  border: 1px solid #e5e5e5;
  border-radius: 5px;
  padding: 10px;
  font-size: 18px;
  font-weight: bold;
  background-color: #f5f5f5;
  margin-bottom: 10px;
  outline: none;
  transition: all 0.3s ease;
}

textarea {
  width: 100%;
  height: 100px;
  border: 1px solid #e5e5e5;
  border-radius: 5px;
  padding: 10px;
  font-size: 16px;
  font-weight: bold;
  background-color: #f5f5f5;
  margin-bottom: 10px;
  resize: none;
  border: none;
  outline: none;
}

input:focus,
textarea:focus {
  border: 1px solid #7927ff;
  box-shadow: 0 0 10px #7927ff;
}

.connect-info {
  margin-bottom: 10px;
}

.mint-btn {
  width: 100%;
  height: 50px;
  border: none;
  border-radius: 5px;
  padding: 10px;
  font-size: 18px;
  font-weight: bold;
  cursor: pointer;
  background: linear-gradient(90deg, #7927ff, #af48ff 80%);
  background-image: linear-gradient(-250deg, #fff000, #af48ff 50%);
  color: white;
}

.mint-btn:hover {
  opacity: 0.8;
}

@media (min-width: 600px) {
  .form-wrapper {
    width: 500px;
  }
}

@media (min-width: 768px) {
  .page-hero {
    margin: 20px;
  }

  .hero-title {
    font-size: 58px;
  }

  .form-wrapper {
    width: 500px;
  }
}
Finally, copy and paste the following lines of code inside of the NftMinter.jsx file:
import React, { useState } from "react";
import "./nft-minter.css";
import Web3 from "web3";
import Moralis from "moralis";
import { useMoralis } from "react-moralis";
import { Success } from "../success/Success";
import { ConnectWallet } from "../auth/ConnectWallet";
// Contract Address and ABI
import { contractAddress, contractABI } from "../../contracts/nft-contract";

export default function NftMinter() {
  const { isAuthenticated, user } = useMoralis();
  const [nftName, setnftName] = useState("");
  const [nftDescription, setnftDescription] = useState("");
  const [nftImage, setnftImage] = useState("");
  const [nftAddress, setNftAddress] = useState("");
  const [isminted, setisminted] = useState(false);
  const [isMinting, setisMinting] = useState(false);
  const [mintingStatus, setmintingStatus] = useState("");

  // Get the current web3 provider
  let web3 = new Web3(Web3.givenProvider);

  // Minting logic
  const mintNft = async (e) => {};

  // Display the success page when the minting is set to True
  if (isminted) {
    return (
      <React.Fragment>
        <Success setisminted={setisminted} nftAddress={nftAddress} />
      </React.Fragment>
    );
  }

  return (
    <section className='nft-minting-section'>
      {isAuthenticated ? (
        <React.Fragment>
          {/* Display Minting Form */}
          <section className='page-hero'>
            <h2 className='hero-title text-style'>Mint New NFT</h2>
          </section>
          <section className='form-wrapper'>
            <form>
              <div className='form-group'>
                <label htmlFor='nft-name'>NFT Name</label>
                <input
                  type='text'
                  className='form-control'
                  id='nft-name'
                  placeholder='e.g Apes'
                  value={nftName}
                  onChange={(e) => setnftName(e.target.value)}
                />
              </div>
              <div className='form-group'>
                <label htmlFor='nft-image'>NFT File</label>
                <input
                  type='file'
                  onChange={(e) => setnftImage(e.target.files[0])}
                  className='form-control'
                  id='nft-image'
                />
              </div>
              <div className='form-group'>
                <label htmlFor='nft-description'>NFT Description</label>
                <textarea
                  type='text'
                  className='form-control'
                  id='nft-description'
                  placeholder='Write a short description of your NFT'
                  value={nftDescription}
                  onChange={(e) => setnftDescription(e.target.value)}
                />
              </div>
              {/* Mint button */}
              <div className='form-group btn-wrap'>
                <button type='button' className='mint-btn' onClick={mintNft}>
                  {isMinting ? mintingStatus : "Mint NFT"}
                </button>
              </div>
            </form>
          </section>
        </React.Fragment>
      ) : (
        <React.Fragment>
          {/* Display Authentication Page */}
          <section className='auth-section'>
            <section className='page-hero'>
              <h2 className='hero-title text-style'>Mint New NFTs</h2>
            </section>
            <ConnectWallet />
          </section>
        </React.Fragment>
      )}
    </section>
  );
}
The Nftminter.jsx component above tells the minting form to render when the isAuthenticated state is true. On the other hand, it renders connectWallet when the isAuthenticated state is false.
The mintNft function will contain our main minting logic (we'll create this soon). We also need to create a new contracts/nft-contract.js file to hold our smart contract address and our smart contract ABI (see the end of Step 4 to get your smart contract credentials).
In your src folder:
- Create a new
contractsfolder. - Next, create a new
nft-contract.jsfile.
Copy and paste your smart contract credentials inside of the nft-contract.js file, as shown below:
export const contractAddress = "0x7AB057XXXXXXX1f62c51f9E518";

export const contractABI = [
  {
    inputs: [],
    stateMutability: "nonpayable",
    type: "constructor",
  }
// ...
]
The smart contract ABI is an encoded version of our smart contract, it allows us to interact and get data from the smart contract.
Update your mintNft function with the code below:
// Minting logic
  const mintNft = async (e) => {
    e.preventDefault();
    // 1. Set Minting to true
    setisMinting(true);
    try {
      // 2. Upload the NFT to IPFS
      setmintingStatus("Uploading NFT image...");
      const file = new Moralis.File(nftImage.name, nftImage);
      await file.saveIPFS();
      const fileUrl = file.ipfs();

      // 3. Get the file ID from the IPFS hash
      const fileId = fileUrl.split("/")[4];
      // 4. Use Moralis gateway url to access the file
      const moralisGateWayIPFAddress = "https://gateway.moralisipfs.com/ipfs";
      const gatewayFileUrlAddress = `${moralisGateWayIPFAddress}/${fileId}`;

      // 5. NFT meta data object
      const nftMetaData = {
        name: nftName,
        description: nftDescription,
        image: gatewayFileUrlAddress,
      };

      // 6. NFT minting logic
      const metaDataFile = new Moralis.File(`${nftName}metadata.json`, {
        base64: Buffer.from(JSON.stringify(nftMetaData)).toString("base64"),
      });

      // 7. Upload the NFT metadata to IPFS
      await metaDataFile.saveIPFS();
      const metaDataFileUrl = metaDataFile.ipfs();

      // 8. Get the metadata hash ID from IPFS
      const metaDataFileId = metaDataFileUrl.split("/")[4];

      // 9. New url to access the metadata file
      const metaDataGatewayFileUrlAddress = `${moralisGateWayIPFAddress}/${metaDataFileId}`;

      // 10. Connect to Smart Contract
      setmintingStatus("Minting your NFT...");
      const nftMinterContract = new web3.eth.Contract(
        contractABI,
        contractAddress
      );

      //  11. Mint the NFT using the mintToken function in the smart contract
      const nftMintResponse = await nftMinterContract.methods
        . mintToken(metaDataGatewayFileUrlAddress)
        .send({ from: user.get("ethAddress") });

      // 12. Get the minted NFT address from the response
      const nftAddress = nftMintResponse.events.Transfer.address;
      const nftTokenId = nftMintResponse.events.Transfer.returnValues.tokenId;

      // 13. Set the minted NFT address
      setNftAddress(`${nftAddress}/${nftTokenId}`);
      setisminted(true);
      setisMinting(false);
    } catch (error) {
      console.log(error);
      setisMinting(false);
    }
  };
The mintNft function above uploads the NFT to IPFS (in comment 2), which is a process of storing files on the blockchain. Moralis will then return a URL path to the uploaded image via the file.ipfs() method.
Next (#3 in the commented code), we're retrieving the file id from the IPFS hash URL by splitting the returned URL into four (the URL has 4 backslashes) so that we use the Moralis "gateway" URL to access the file, like this: https://gateway.moralisipfs.com/ipfs/:fileId.
https://gateway.moralisipfs.com/ipfs/QmexbMHy3NVzhfC6hGZgWnojxFyMXdmmfDjjqduJZ9HSAk/

The Moralis gateway URL is a more stable IPFS URL than the one returned from the file.ipfs() function. If the IPFS URL is not available or if it’s down, then our NFT will not display properly on OpenSea Testnet.
You can use the infura IPFS URL as well https://ipfs.infura.io/ipfs/:fileId.

Next (in comment 5-6), we're creating the metadata for the NFT, which is an object containing the name, description, and the URL of the uploaded image. The object is then converted into base64 and stored on the IPFS for the second time with a new URL to the object.
The base64 metadata object is what NFT marketplaces like OpenSea Testnet will locate and use to display the information of an NFT on their website This means that our NFT metadata needs to contain a name, description, and an image URL on an IPFS.
Next (#10 and #11 in commented code), we're initializing a connection to the smart contract using our smart contract address and ABI. This process will trigger the user's Metamask for the sender confirmation. After a successful connection, we can then access the mintToken function in our smart contract as a method of our contract instance nftMinterContract.methods.mintToken().
Finally (#11, #12, #13 in commented code), we retrieved the address and id of the minted NFT from the mintNFT method response. Then, we set the values to their respective states.
Step 14 - Creating the Success Page Component
In this step, we're going to create our last component, the success page, and just as the name implies, it’ll be displayed once the NFT has been successfully minted (when isMinted is set to true).
The success page will also display the address and id of the NFT, and also a link to view the NFT on OpenSea Testnet.
In your pages folder:
- Create a new
successfolder. - Next, create a new
Success.jsxand asuccess-page.cssfile.
Copy and paste the following code inside the success-page.css file.
.minted-nft-section {
  z-index: 1;
  margin: 0 auto;
  padding: 0rem 1rem 1rem 1rem;
}

.success-message {
  color: #fff;
  margin: 20px 0;
}

.minted-address {
  margin: 20px 0px;
}

.minted-address-text {
  font-size: 1.2rem;
  font-weight: bold;
  color: #fff;
  display: block;
  font-size: 1.1rem;
  margin-top: 0.5rem;
}

.view-btn {
  width: 100%;
  height: 50px;
  border: none;
  border-radius: 5px;
  padding: 10px;
  font-size: 18px;
  font-weight: bold;
  cursor: pointer;
  background: linear-gradient(90deg, #7927ff, #af48ff 80%);
  background-image: linear-gradient(-250deg, #fff000, #af48ff 50%);
  color: white;
}

.view-btn:hover {
  opacity: 0.8;
}

.new-mint-wrap {
  display: flex;
  justify-content: center;
  align-items: center;
  flex-direction: column;
  margin: 10px 0;
}

.new-mint-btn {
  background-color: transparent;
  border-radius: 4px;
  padding: 10px;
  font-size: 14px;
  font-weight: bold;
  border: none;
  color: #fff;
  cursor: pointer;
}

.new-mint-btn:hover {
  opacity: 0.8;
}

@media (min-width: 768px) {
  .minted-address-text {
    font-size: 1.2rem;
  }
}
Next, copy and paste the following code inside the Success.jsx file:
import React from "react";
import "./success-page.css";

export const Success = ({ setisminted, nftAddress }) => {
  return (
    <section className='minted-nft-section'>
      <div className='minted-address-wrap'>
        <div className='minted-address'>
          {/* Success message */}
          <div className='success-message-wrap'>
            <h3 className='text-style'>
              <span>NFT Minted Successfully!</span>
            </h3>
            <p className='success-message'>
              <span>
                Your NFT has been minted and is available for sale on the NFT
                Market.
              </span>
            </p>
            <p className='success-message'>
              <span>
                You can view your NFT on the NFT Market by clicking the button
                below.
              </span>
            </p>
          </div>
          {/* Show minted address */}
          <h3 className='text-style'>
            Minted NFT Address:
            <span className='minted-address-text'> {nftAddress} </span>
          </h3>
        </div>
        {/* View Minted NFT on OpenSea Testnet*/}
        <div className='btn-wrap'>
          <a
            href={`https://testnets.opensea.io/assets/${nftAddress}`}
            target='_blank'
            rel='noopener noreferrer'
          >
            <button className='view-btn'>
              <span>View NFT on OpenSea</span>
            </button>
          </a>
        </div>

        {/* Navigate to mint new NFT */}
        <div className='new-mint-wrap'>
          <button
            className='new-mint-btn'
            onClick={() => {
              setisminted(false);
            }}
          >
            Mint New NFT
          </button>
        </div>
      </div>
    </section>
  );
};
Step 15 - Testing Our NFT Minter
Our NFT minting dApp is code ready, you can go ahead and connect your wallet and mint an NFT or follow the How it Works.

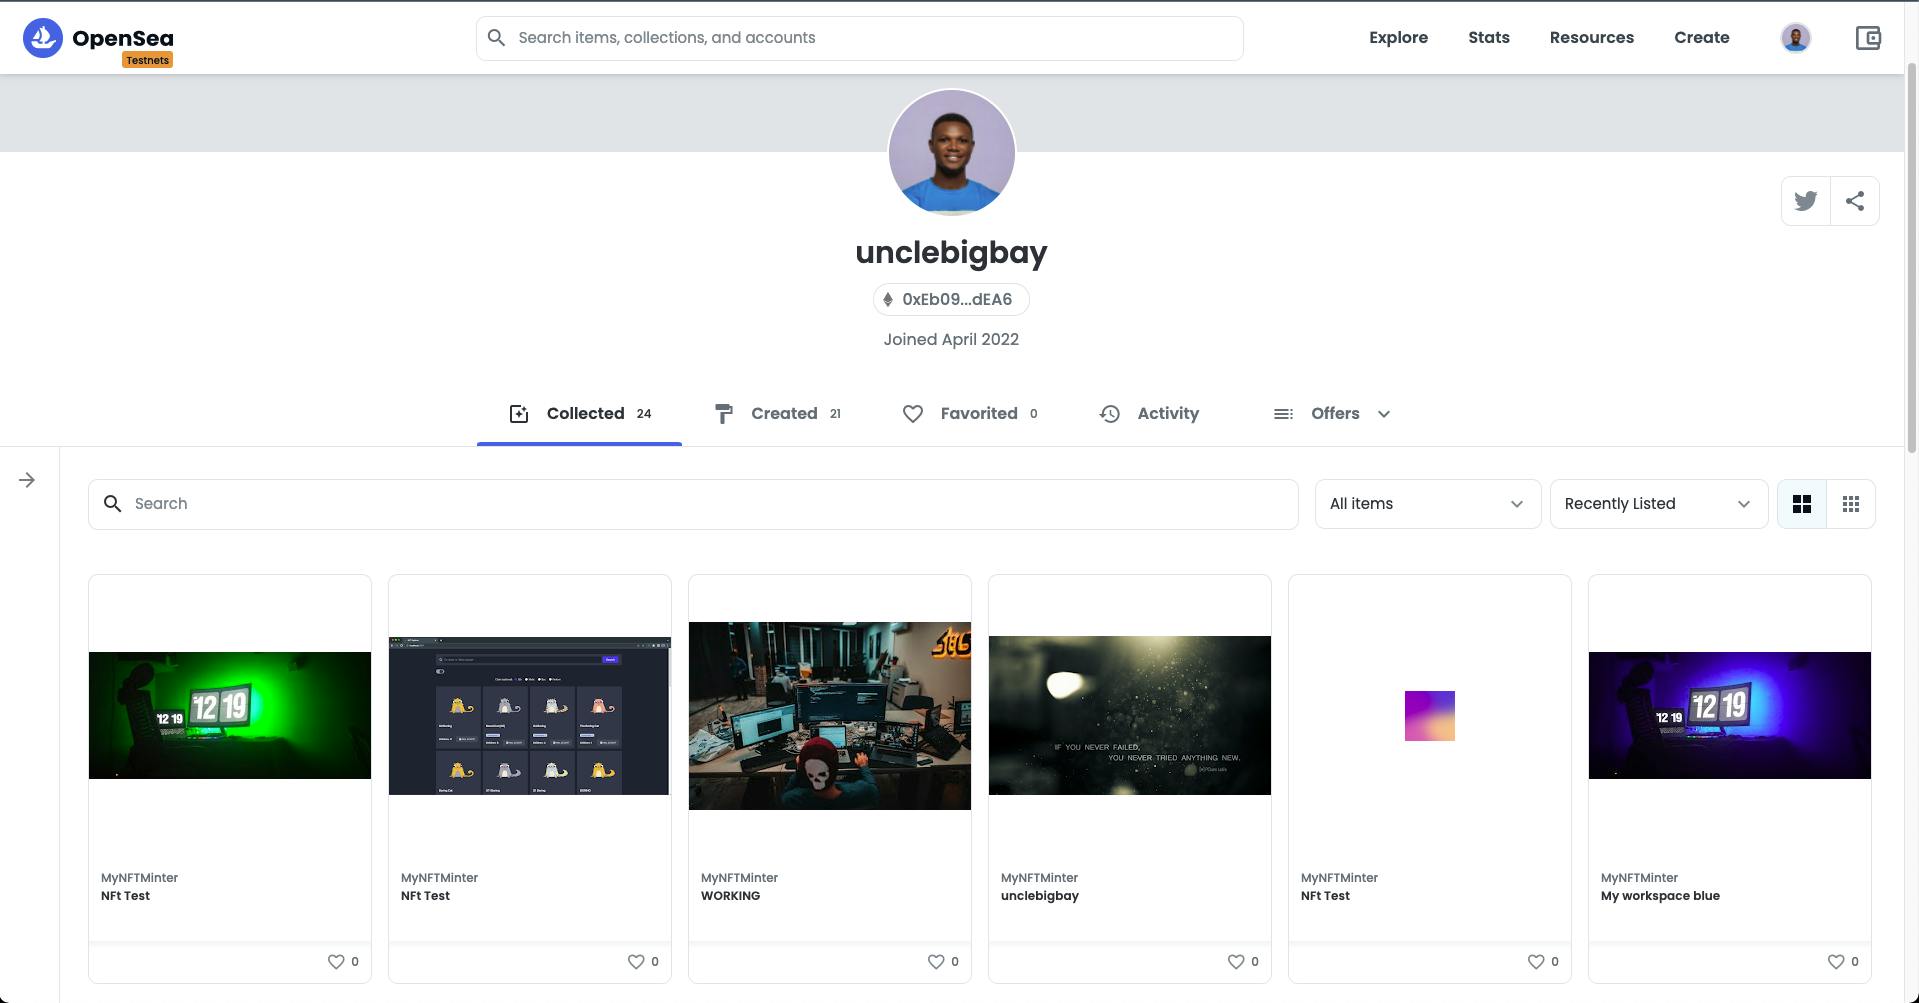
To view all your minted NFTs, visit the OpenSea Testnet website and connect your wallet testnets.opensea.io/account.
You Made It 👏
In this tutorial, we've learned how to write and deploy an NFT minting smart contract with a React frontend.
You can find the complete React source code for our NFT minter tutorial here, and the complete source code for the Solidity smart contract for our NFT minter here.
Where Do You Go Next?
Now that you know how to build an NFT minting smart contract, and how to interact with it from a React application:
Learn How to Build a Web3 Login with Web3.js Library here.
Learn How to Build your Own NFT Explorer with Moralis React SDK here
This article is a part of the Hashnode Web3 blog, where a team of curated writers are bringing out new resources to help you discover the universe of web3. Check us out for more on NFTs, DAOs, blockchains, and the decentralized future.